TRANSFER REMOVAL/INSTALLATION [EV6AX-EL]
TRANSFER REMOVAL/INSTALLATION [EV6AX-EL]
SM2515156
id0316j2800600
Replacement Part
|
Oil seal
Quantity: 1
Location of use: Transfer oil seal (RH) No.1
|
Oil seal
Quantity: 1
Location of use: Transfer oil seal (RH) No.3
|
-
Caution
-
• Performing the following procedures could cause an open circuit in the front ABS wheel speed-sensor wiring harness if it is pulled by mistake. Before servicing, disconnect the front ABS wheel-speed sensor and set it aside so that the wiring harness will not be pulled by mistake.
1.Remove the front under cover No.2. (See FRONT UNDER COVER No.2 REMOVAL/INSTALLATION.)
2.Remove the propeller shaft. (See PROPELLER SHAFT REMOVAL/INSTALLATION [(US)].)
3.Remove the front crossmember component. (See FRONT CROSSMEMBER REMOVAL/INSTALLATION [(US)].)
4.Remove the exhaust manifold (WU-TWC). (See EXHAUST SYSTEM REMOVAL/INSTALLATION [SKYACTIV-G (WITH CYLINDER DEACTIVATION (US))].)
5.Remove the front drive shaft (RH). (See FRONT DRIVE SHAFT REMOVAL/INSTALLATION [(US)].)
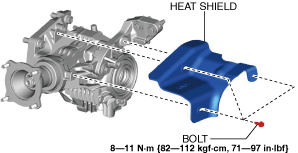
6.Remove the heat shield.
am3zzw00031493
|
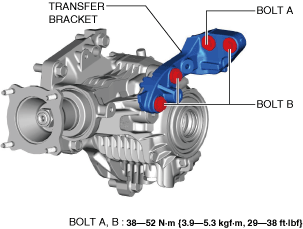
7.Remove the transfer bracket. (See Transfer Bracket Installation Note.)
am3zzw00031494
|
8.Drain the transfer oil. (See TRANSFER OIL REPLACEMENT [EV6AX-EL].)
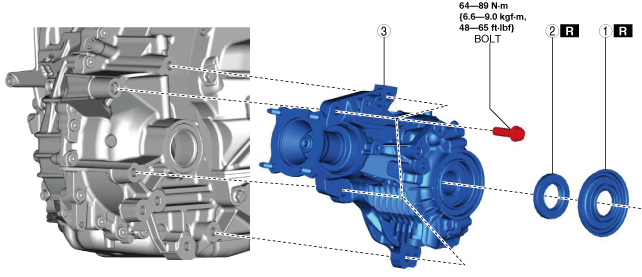
9.Remove in the order shown in the figure.
10.Install in the reverse order of removal.
11.After the engine and transaxle warms up, inspect for oil leakage and transfer operation.
am3zzw00031495
|
|
1
|
Transfer oil seal (RH) No.1
|
|
2
|
Transfer oil seal (RH) No.3
|
|
3
|
Transfer
|
Transfer Bracket Installation Note
1.Install the transfer bracket to the transfer and temporarily tighten bolts A and B.
am3zzw00032844
|
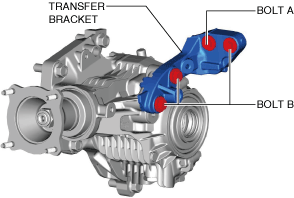
2.Completely tighten the bolts in the order of A and B.