USB PORT REMOVAL/INSTALLATION [(US)]
USB PORT REMOVAL/INSTALLATION [(US)]
SM2336654
id0920008000x1
1.Disconnect the negative battery terminal. (See NEGATIVE BATTERY TERMINAL DISCONNECTION/CONNECTION [(US)].)
2.Remove the following parts:
- (1)Shift lever knob (MTX) (See SHIFT LEVER REMOVAL/INSTALLATION [C66M-R].)
- (2)Selector lever knob (ATX) (See SELECTOR LEVER COMPONENT REMOVAL/INSTALLATION.)
- (3)Console side panel (See CONSOLE SIDE PANEL REMOVAL/INSTALLATION.)
- (4)Shift panel (See SHIFT PANEL REMOVAL/INSTALLATION.)
- (5)Front console box (See FRONT CONSOLE BOX REMOVAL/INSTALLATION.)
- (6)Cup holder (See CUP HOLDER REMOVAL/INSTALLATION.)
- (7)Side wall (See SIDE WALL REMOVAL/INSTALLATION.)
- (8)Rear console (See REAR CONSOLE REMOVAL/INSTALLATION [(US)].)
- (9)Driver-side front scuff plate (See FRONT SCUFF PLATE REMOVAL/INSTALLATION.)
- (10)Driver-side front side trim (See FRONT SIDE TRIM REMOVAL/INSTALLATION.)
- (11)Driver-side decoration panel (See DECORATION PANEL REMOVAL/INSTALLATION.)
- (12)Passenger-side decoration panel (See DECORATION PANEL REMOVAL/INSTALLATION.)
- (13)Hood release lever (See HOOD RELEASE LEVER AND RELEASE CABLE REMOVAL/INSTALLATION [(US)].)
- (14)Driver-side lower panel (See LOWER PANEL REMOVAL/INSTALLATION [(US)].)
- (15)Driver-side knee air bag module (See KNEE AIR BAG MODULE REMOVAL/INSTALLATION [STANDARD DEPLOYMENT CONTROL SYSTEM – MEXICO SPEC.].) (See KNEE AIR BAG MODULE REMOVAL/INSTALLATION [TWO-STEP DEPLOYMENT CONTROL SYSTEM – US/CANADA SPEC.].)
- (16)Center lower panel (See LOWER PANEL REMOVAL/INSTALLATION [(US)].)
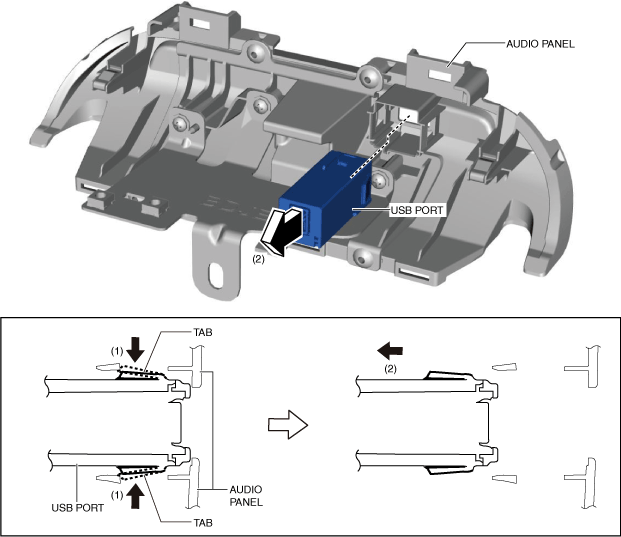
- (17)Audio panel (See AUDIO PANEL REMOVAL/INSTALLATION [(US)].)
3.While pressing the tabs of the USB port in the direction of arrows (1) shown in the figure, move the USB port in the direction of arrow (2) and detach the tabs of the USB port from the audio panel.
With Telematics Communication Unit
am3zzw00024075
|
Without Telematics Communication Unit
am3zzw00029203
|
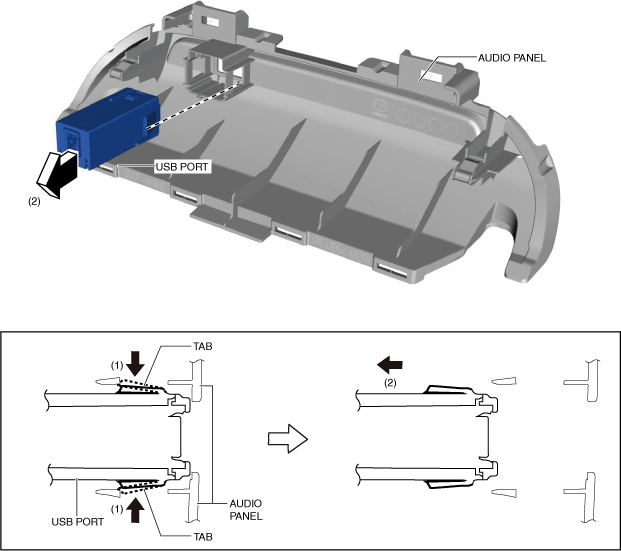
4.Remove the USB port.
5.Install in the reverse order of removal.