HOOD RELEASE LEVER AND RELEASE CABLE REMOVAL/INSTALLATION
2016 – MX-5 – Body and Accessories
HOOD RELEASE LEVER AND RELEASE CABLE REMOVAL/INSTALLATION
Hood Release Lever
1. While pulling the hood release lever, insert a remover tool into the position shown in the figure.
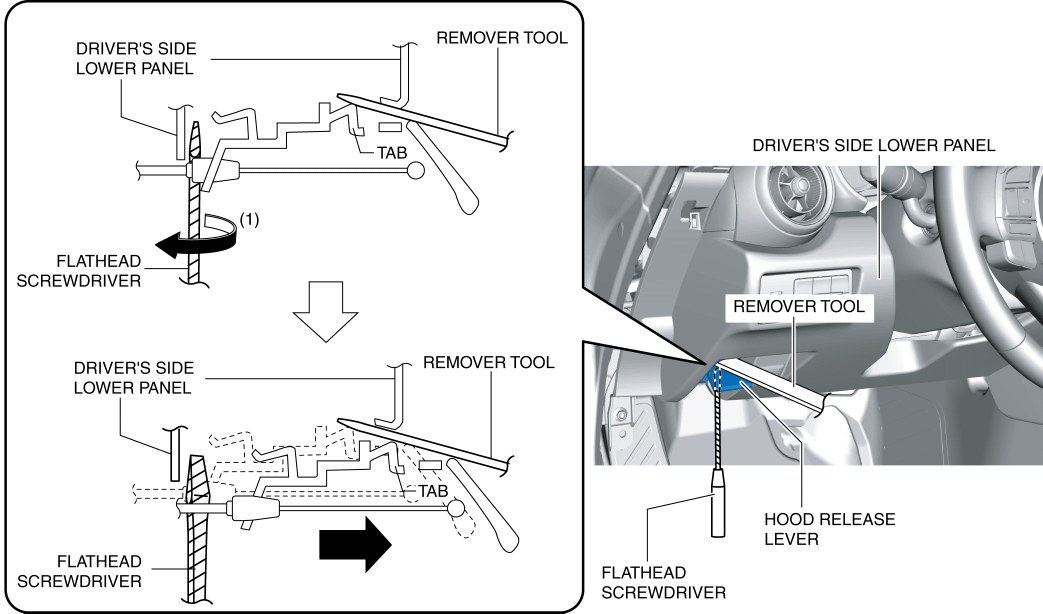
2. Insert a tape-wrapped flathead screwdriver into the position shown in the figure and rotate it in the direction of arrow (1) to detach the hood release lever from the driver’s side lower panel.
CAUTION:
-
Remove the hood release lever while being careful not to damage the hood release cable with the flathead screwdriver.
3. Disconnect the hood release cable from the hood release lever.
4. Install in the reverse order of removal.
Hood Release Cable
1. Disconnect the negative battery cable. (See NEGATIVE BATTERY CABLE DISCONNECTION/CONNECTION.)
2. Remove the following parts:
a. Front bumper (See FRONT BUMPER REMOVAL.)(See FRONT BUMPER INSTALLATION.)
b. Front mudguard (LH) (See FRONT MUDGUARD REMOVAL/INSTALLATION.)
c. Front combination light (LH) (See FRONT COMBINATION LIGHT REMOVAL/INSTALLATION.)
d. Hood release lever (See Hood Release Lever.)
3. Disconnect the hood release cable from the hood latch.
4. Remove the clips.
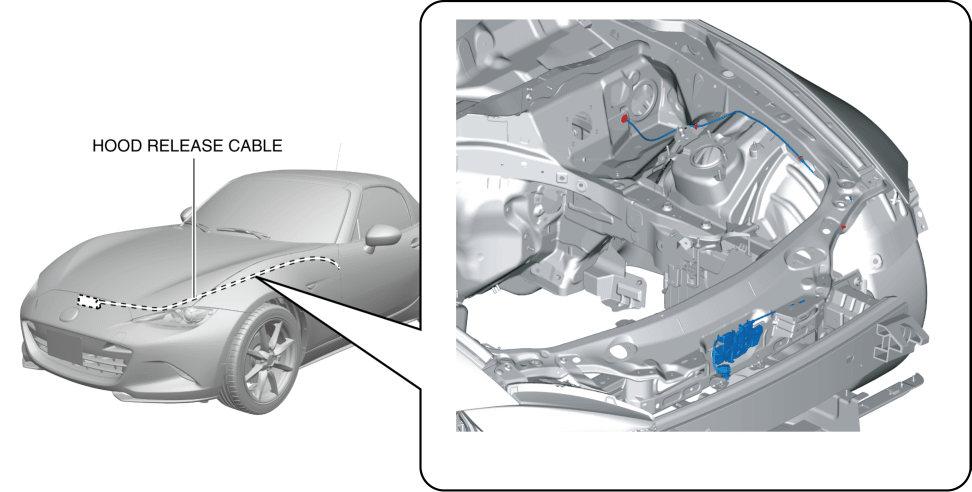
5. Remove the grommet.
6. Remove the hood release cable.
7. Install in the reverse order of removal.