FRONT BUMPER INSTALLATION
2016 – MX-5 – Body and Accessories
FRONT BUMPER INSTALLATION
1. Connect the connectors.
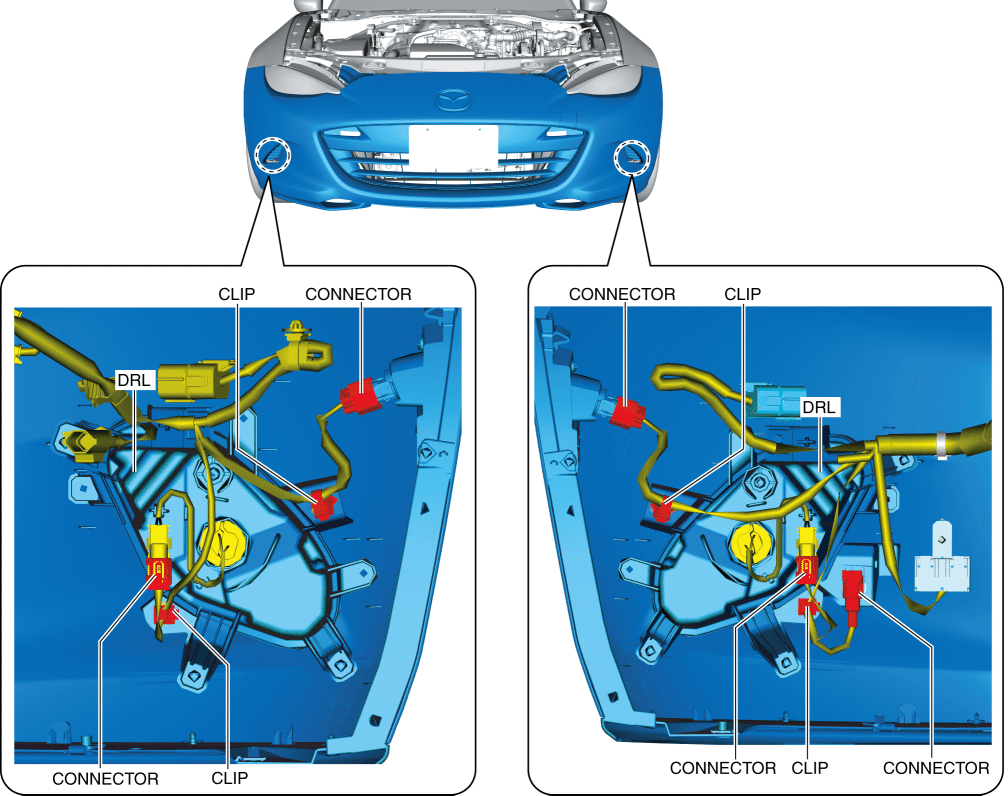
2. Install the wiring harness clips.
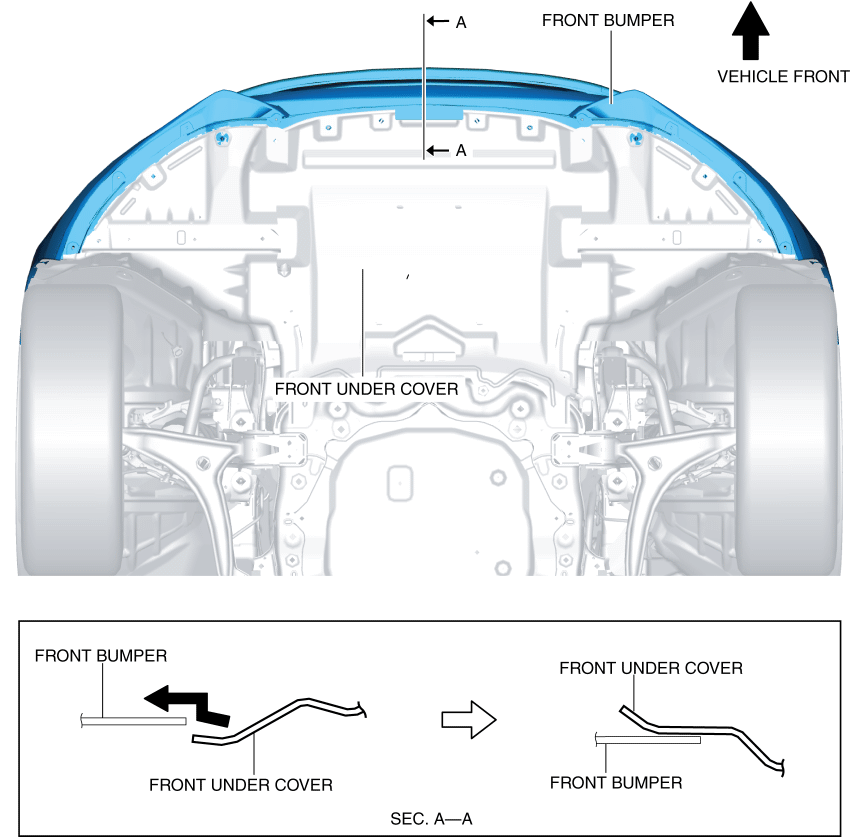
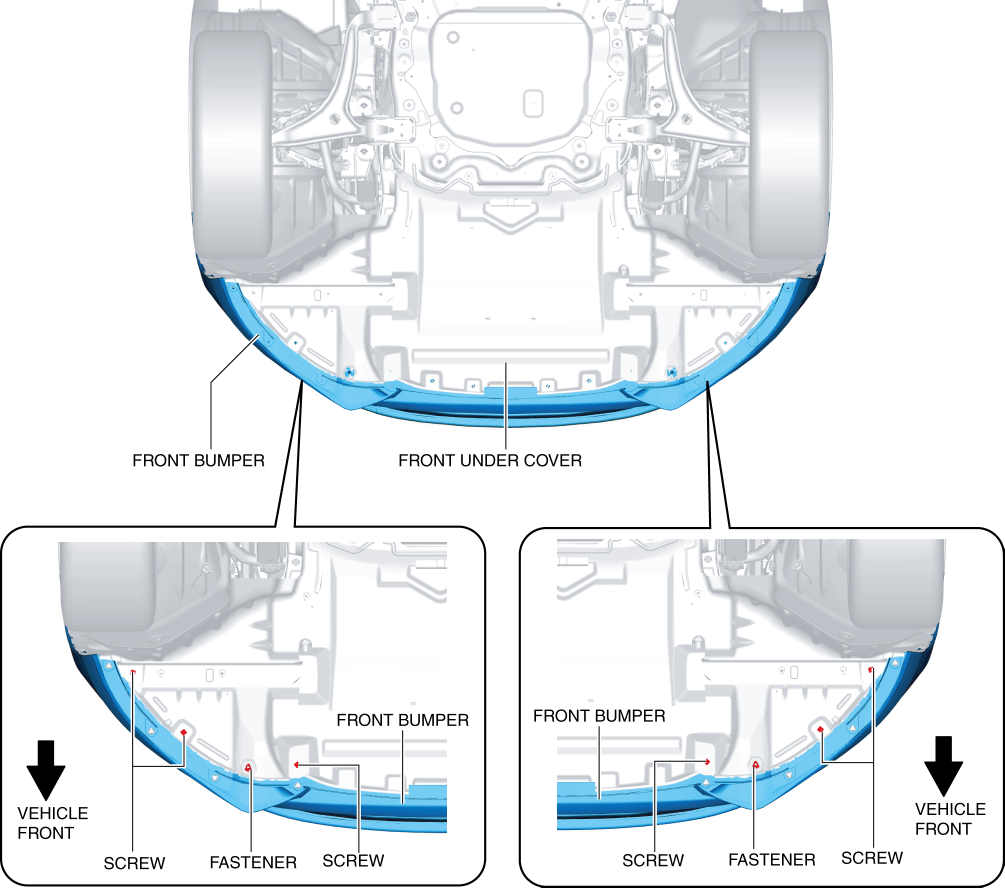
3. Move the front under cover in the direction of the arrow shown in the figure and remove it.
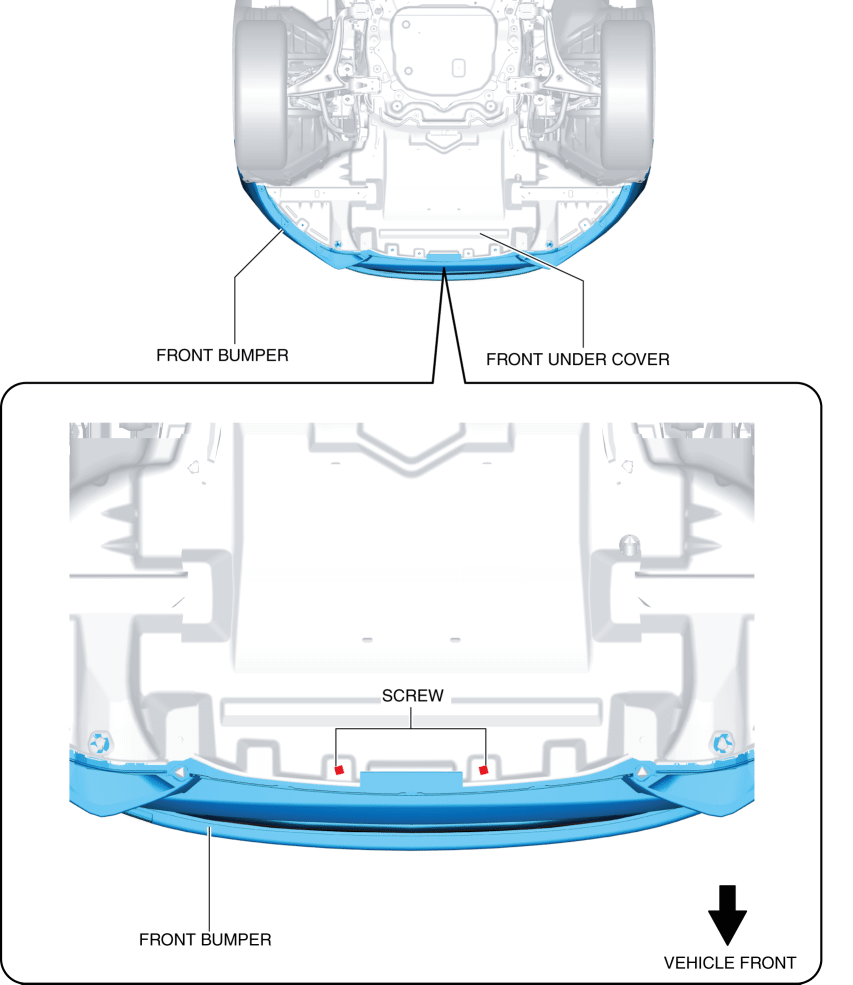
4. Install the screws.
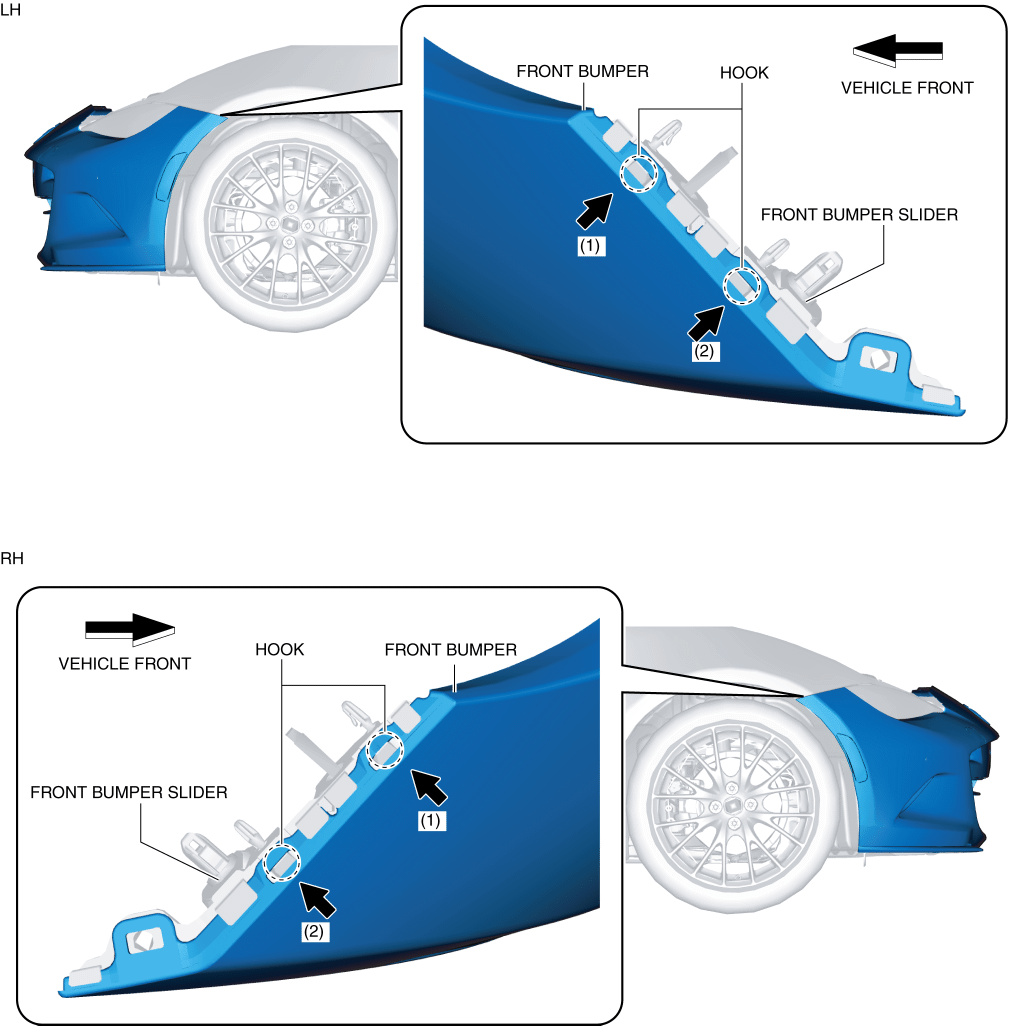
5. Install the front bumper to the front bumper slider in the order of the arrows shown in the figure.
6. Install the screws.

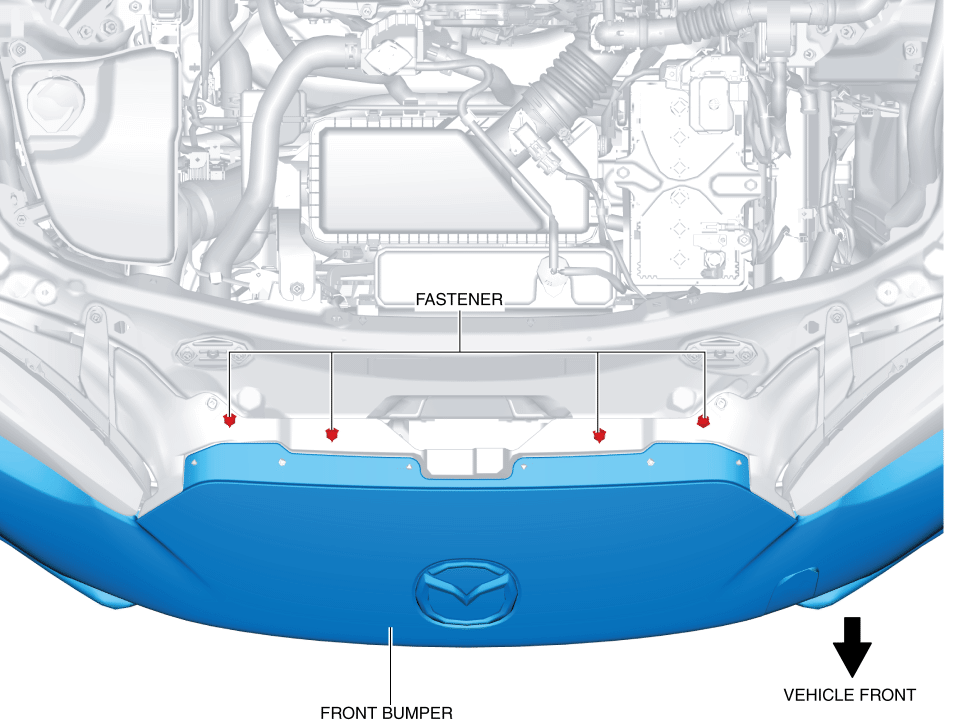
7. Install the fasteners.
8. Temporarily tighten the screws.

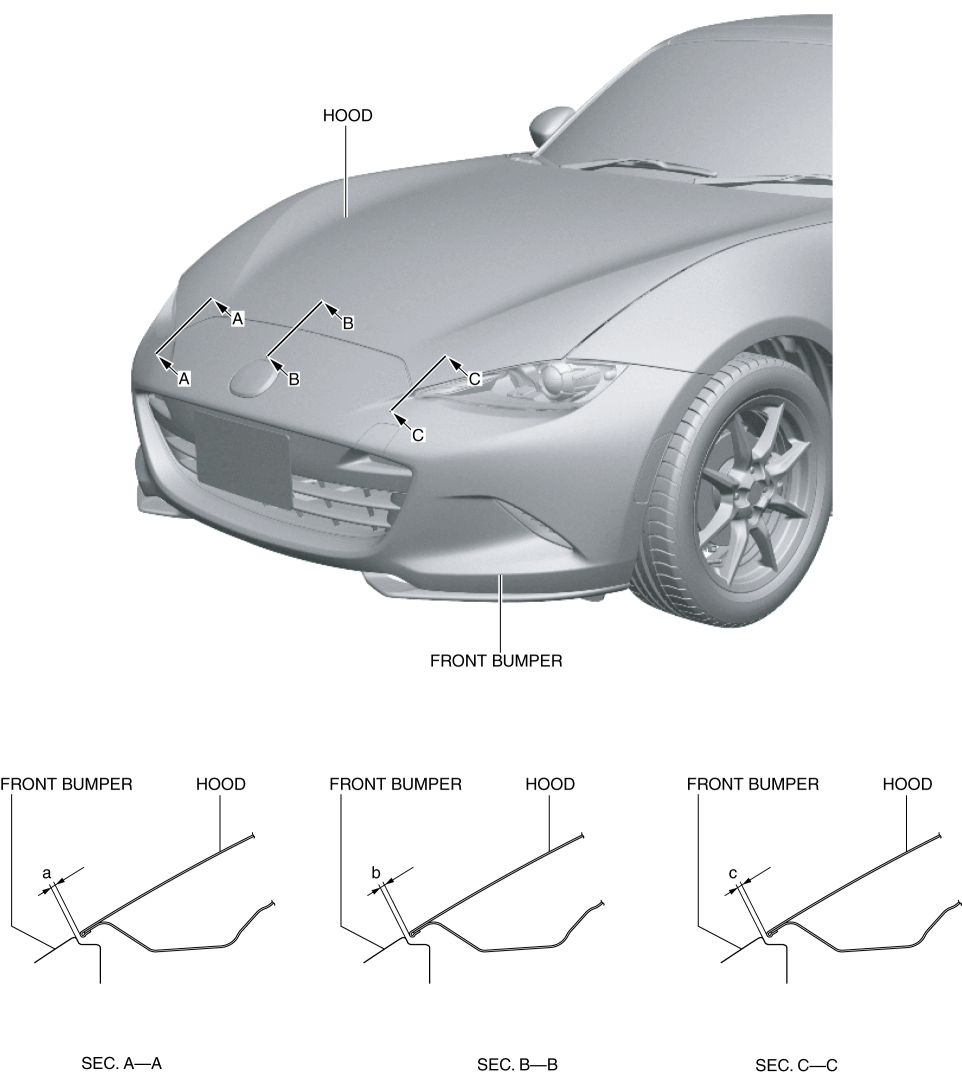
9. Adjust the front bumper position so that the clearance between the front bumper and the hood is within the specification.
-
Standard clearance
-
a: 1.7—5.3 mm {0.07—0.20 in}
-
b: 1.7—5.3 mm {0.07—0.20 in}
-
c: 1.7—5.3 mm {0.07—0.20 in}
10. Completely tighten the screws tightened temporarily in Step 8.
11. Measure the clearance between the front bumper and the hood and verify that it is within the standard clearance.
-
Standard clearance
-
a: 1.7—5.3 mm {0.07—0.20 in}
-
b: 1.7—5.3 mm {0.07—0.20 in}
-
c: 1.7—5.3 mm {0.07—0.20 in}
-
If not within the specification, repeat from Step 8 to Step 11 until the clearance between the front bumper and the hood is within the specification.
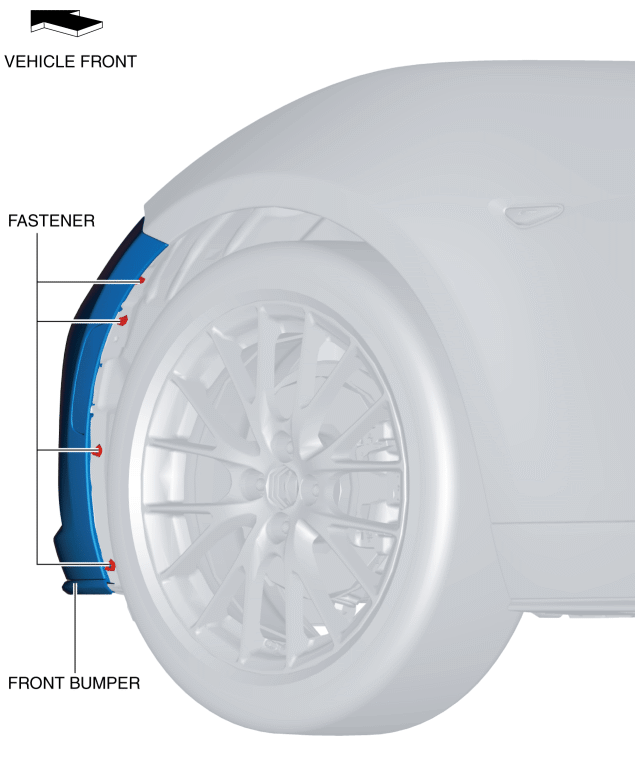
12. Install the screws and fasteners.
13. Install the fasteners.
14. Connect the negative battery cable. (See NEGATIVE BATTERY CABLE DISCONNECTION/CONNECTION.)