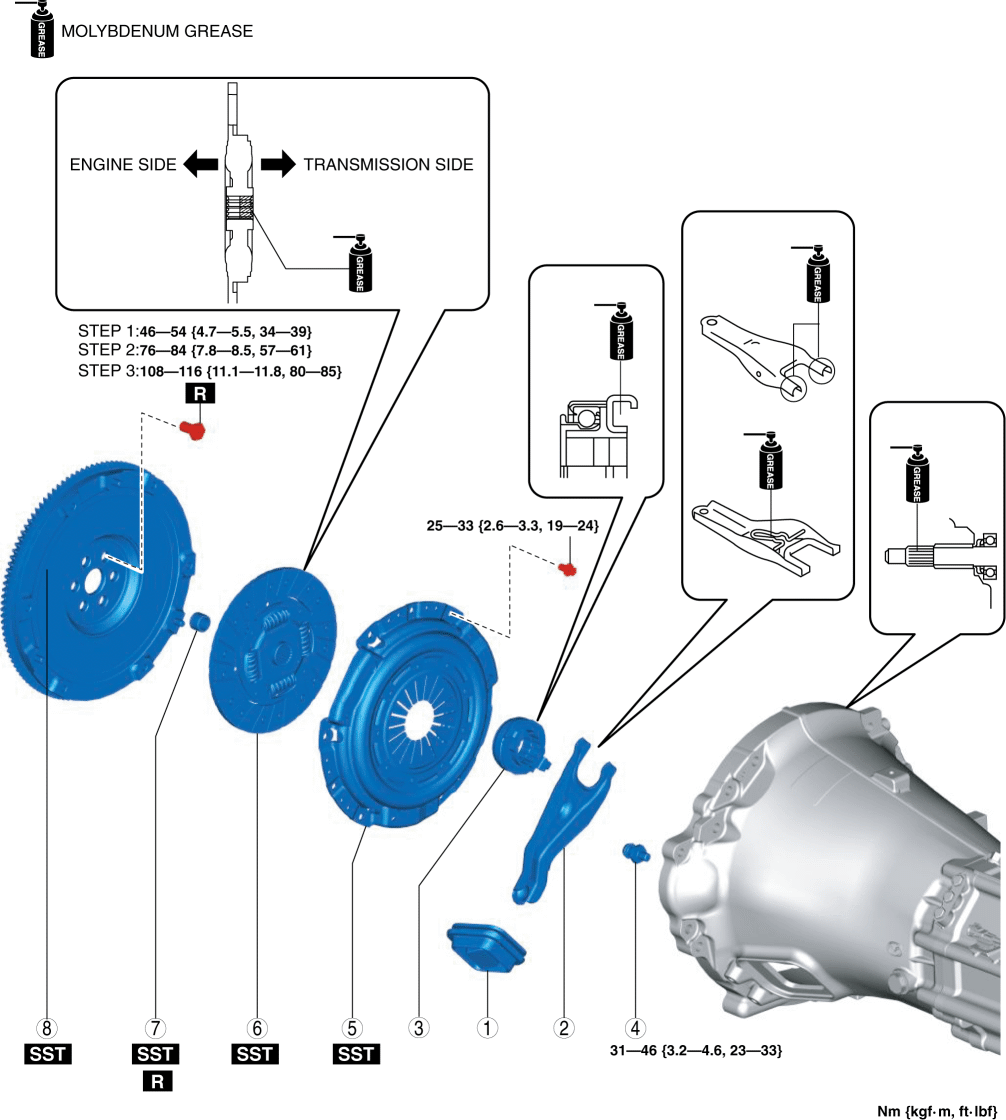
CLUTCH UNIT REMOVAL/INSTALLATION
2016 – MX-5 – Transmission/Transaxle
CLUTCH UNIT REMOVAL/INSTALLATION
1. Disconnect the negative battery cable. (See NEGATIVE BATTERY CABLE DISCONNECTION/CONNECTION.)
2. Remove the transmission. (See TRANSMISSION REMOVAL/INSTALLATION [M66M-D].)
3. Remove in the order indicated in the table.
4. Install in the reverse order of removal.
|
1 |
Boot |
|
2 |
Clutch release fork |
|
3 |
Clutch release collar |
|
4 |
Pivot pin |
|
5 |
Clutch cover |
|
6 |
Clutch disc |
|
7 |
Pilot bearing (See Pilot Bearing Removal Note.) |
|
8 |
Flywheel (See Flywheel Removal Note.) (See Flywheel Installation Note.) |
Clutch Cover and Clutch Disc Removal Note
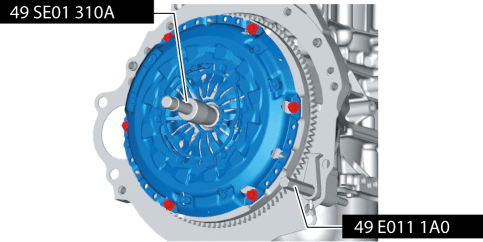
1. Hold the clutch unit using the SSTs (49 SE01 310A, 49 E011 1A0).
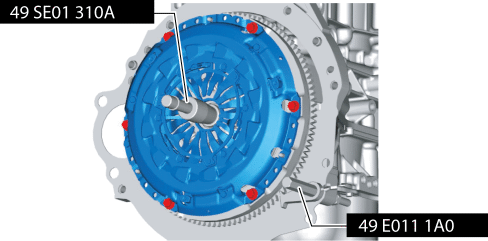
2. Loosen each bolt one turn at a time in a crisscross pattern until spring tension is released.
3. Remove the clutch cover and clutch disc.
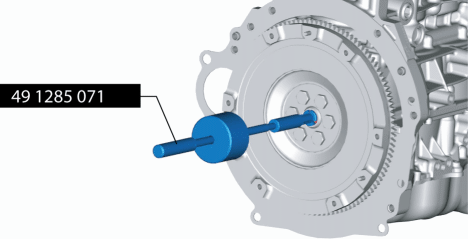
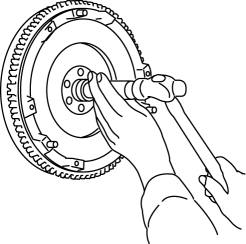
Pilot Bearing Removal Note
NOTE:
-
The pilot bearing does not need to be removed unless you are replacing it.
1. Use the SST (49 1285 071) to remove the pilot bearing.
Flywheel Removal Note
1. Hold the flywheel using the SST (49 E011 1A0).
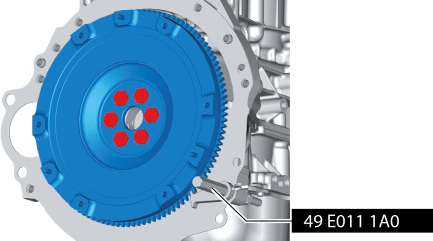
2. Remove the lock bolts, and remove the flywheel.
3. Inspect for oil leakage from the crankshaft rear oil seal.
-
If there is any malfunction, replace the crankshaft rear oil seal. (See REAR OIL SEAL REPLACEMENT [SKYACTIV-G 2.0].)
Flywheel Installation Note
1. Clean the crankshaft thread holes.
2. Install the flywheel to the crankshaft, and temporarily tighten a new lock bolts.
3. Hold the flywheel using the SST (49 E011 1A0).
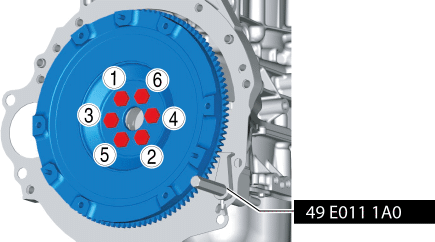
4. Tighten the lock bolts completely in the order shown in the figure in the following 3 steps.
-
Tightening torque
-
Step 1: 46???54 N·m {4.7???5.5 kgf·m, 34???39 ft·lbf}
-
Step 2: 76???84 N·m {7.8???8.5 kgf·m, 57???61 ft·lbf}
-
Step 3: 108???116 N·m {11.1???11.8 kgf·m, 80???85 ft·lbf}
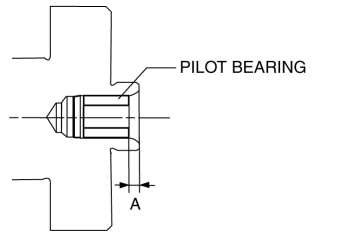
Pilot Bearing Installation Note
1. Install new pilot bearing to the specified position using the following tools.
-
Tool
-
Snap-on brand millimeter size bushing driver set (A160M) adapter A160M7 (20???22 mm)
-
Use the adapter with the 20 mm side of the A160M7 (20???22 mm) facing the pilot bearing side.
-
Substitution tool
-
Outer diameter: 21 mm {0.83 in
-
Inner diameter: 19 mm {0.75 in}
-
Specified position
-
Distance A of pilot bearing from crankshaft end: 1.5???2.5 mm {0.060???0.098 in}
Clutch Disc and Clutch Cover Installation Note
1. Hold the clutch disc position using the SST (49 SE01 310A).
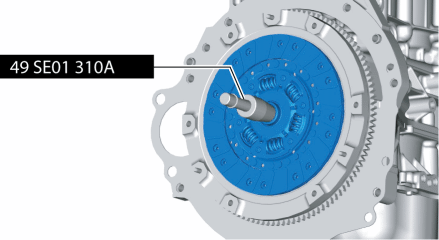
2. Hold the clutch unit using the SST (49 E011 1A0).
3. Using the following procedure, install the clutch disc and clutch cover.
a. Temporarily tighten the bolts in the order shown in the figure.
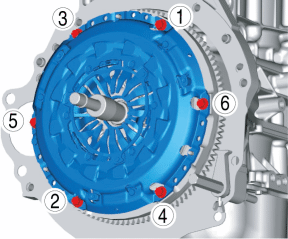
b. Tighten the bolts completely in two or three steps in the order shown in the figure and install the clutch disc and cover.
-
Tightening torque
-
25???33 N·m {2.6???3.3 kgf·m, 19???24 ft·lbf}
4. Remove the SSTs (49 SE01 310A, 49 E011 1A0).