TRANSMISSION REMOVAL/INSTALLATION [M66M-D]
2016 – MX-5 – Transmission/Transaxle
TRANSMISSION REMOVAL/INSTALLATION [M66M-D]
Removal
1. Disconnect the negative battery cable. (See NEGATIVE BATTERY CABLE DISCONNECTION/CONNECTION.)
2. When disassembling/inspecting the transmission, drain the transmission oil. (See TRANSMISSION OIL REPLACEMENT [M66M-D].)
3. Remove the parts on the cabin side.
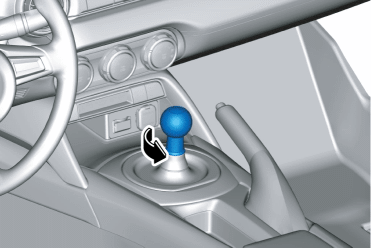
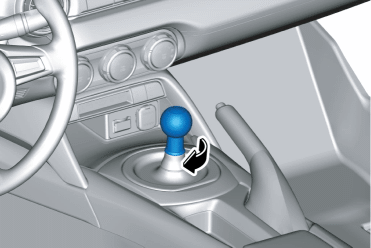
a. Remove the shift lever knob.
b. Remove the shift panel component. (See SHIFT PANEL REMOVAL/INSTALLATION.)
c. Remove the upper panel. (See UPPER PANEL REMOVAL/INSTALLATION.)
d. Remove the parking brake lever boot panel. (See PARKING BRAKE LEVER BOOT PANEL REMOVAL/INSTALLATION.)
e. Remove the rear console. (See REAR CONSOLE REMOVAL/INSTALLATION.)
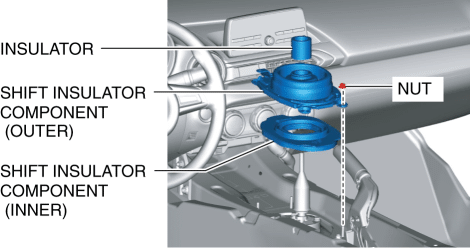
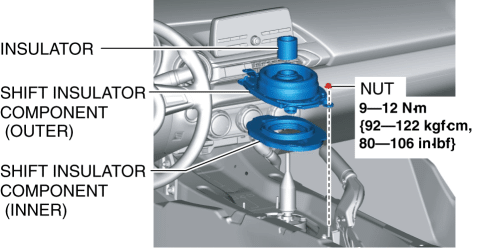
f. Remove the nut, then remove the insulator and change insulator components (outer/inner).
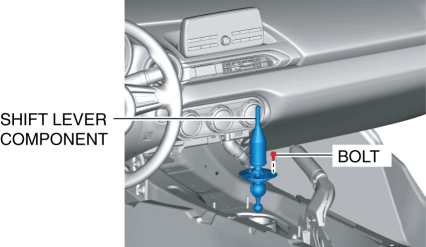
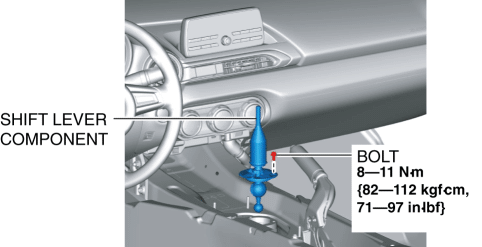
g. Remove the bolt, then remove the shift lever component.
4. Place a clean rag behind the engine so that the engine does not contact the rear housing when it is tilted.

5. Remove the vehicle’s underside parts.
a. Remove the front crossmember under cover. (See FRONT CROSSMEMBER UNDER COVER REMOVAL/INSTALLATION.)
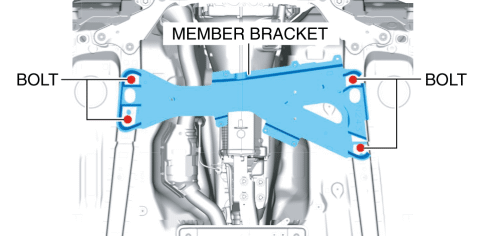
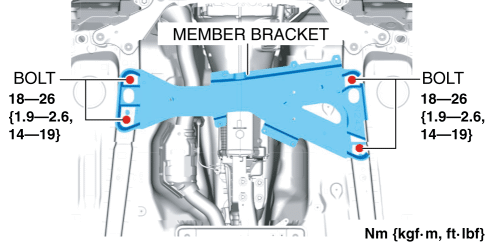
b. Remove the member bracket. (With member bracket)
c. Remove the tunnel member.

d. Remove the starter. (See STARTER REMOVAL/INSTALLATION [SKYACTIV-G 2.0].)
e. Remove the catalytic converter (TWC). (See EXHAUST SYSTEM REMOVAL/INSTALLATION [SKYACTIV-G 2.0].)
f. Remove the exhaust manifold. (See EXHAUST SYSTEM REMOVAL/INSTALLATION [SKYACTIV-G 2.0].)
g. Temporarily install the engine mount. (See EXHAUST SYSTEM REMOVAL/INSTALLATION [SKYACTIV-G 2.0].)
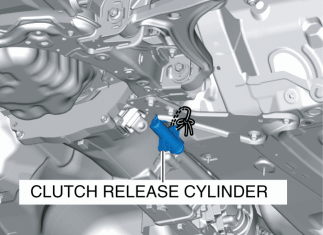
h. Remove the clutch release cylinder with the clutch pipe connected and set the clutch release cylinder aside. (See CLUTCH RELEASE CYLINDER REMOVAL/INSTALLATION.)
i. Remove the propeller shaft. (See PROPELLER SHAFT REMOVAL/INSTALLATION.)
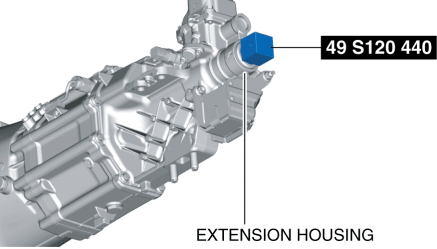
j. Install the SST (49 S120 440) to the main shaft.
k. Remove the power plant frame. (See POWER PLANT FRAME REMOVAL [M66M-D].)
WARNING:
-
Verify that the transmission is securely supported by a transmission jack. If the transmission falls off, it can cause serious injury or death, and damage to the vehicle.
6. Tilt the transmission while being careful not to allow parts on the back of the engine to contact the vehicle body.
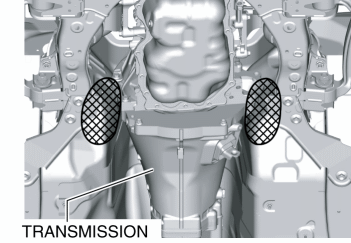
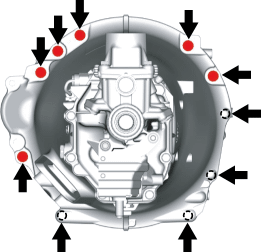
7. Protect the areas shown in the figure using packing tape or equivalent.
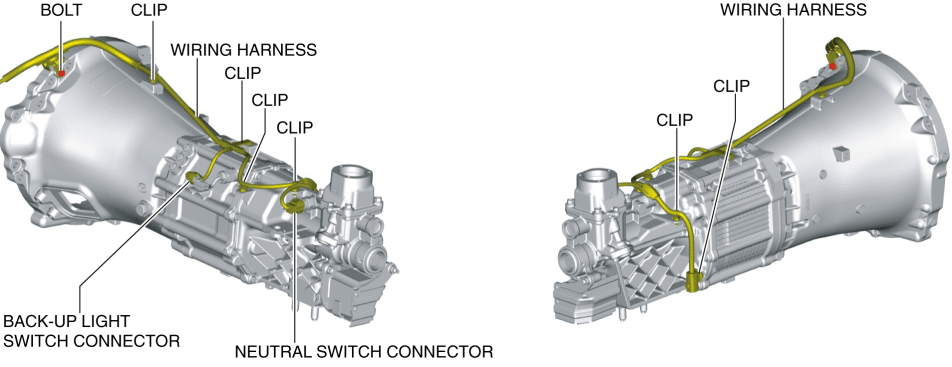
8. Disconnect the back-up light switch connector from manual transaxle. (See BACK-UP LIGHT SWITCH REMOVAL/INSTALLATION [M66M-D].)
9. Disconnect the neutral switch connector from the transmission. (See NEUTRAL SWITCH REMOVAL/INSTALLATION [M66M-D].)
10. Remove the wiring harness from the transmission.
11. Remove the transmission mounting bolts.
12. Pull the transmission toward the vehicle rear to disengage it from the engine, and rotate the transmission to the angle (position where starter installation area does not interfere with vehicle body) shown in the figure.

Installation
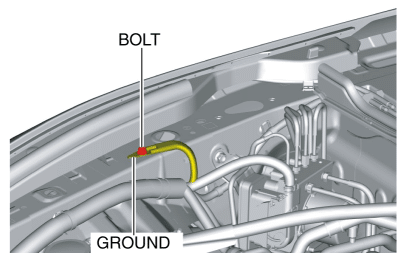
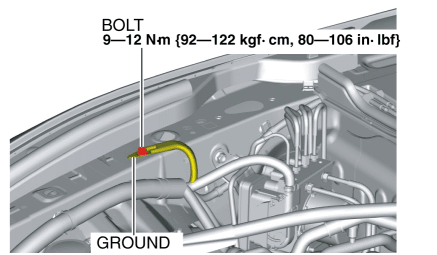
1. Remove the ground.
2. Set the SST (49 E017 5A0) as shown in the figure.
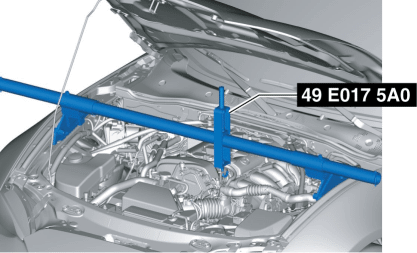
3. Using the SST (49 E017 5A0), lower the rear side of the engine while being careful not to allow parts on the back of the engine to contact the vehicle body.
WARNING:
-
Verify that the transmission is securely supported by a transmission jack. If the transmission falls off, it can cause serious injury or death, and damage to the vehicle.
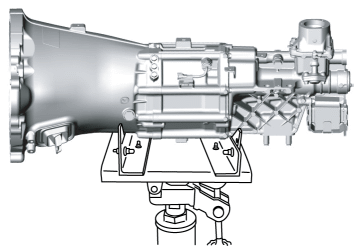
4. Set the transmission on a jack and lift into place.
5. Install the transmission to the engine, and tighten the transmission mounting bolts.
-
Tightening torque
-
38???52 N·m {3.9???5.3 kgf·m, 29???38 ft·lbf}
6. Install the wiring harness to the transmission.
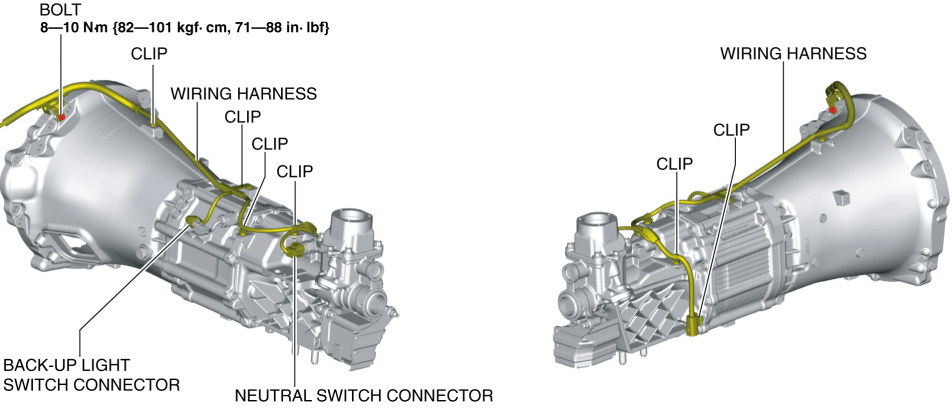
7. Connect the neutral switch connector. (See NEUTRAL SWITCH REMOVAL/INSTALLATION [M66M-D].)
8. Connect the back-up light switch connector. (See BACK-UP LIGHT SWITCH REMOVAL/INSTALLATION [M66M-D].)
9. Install the vehicle’s underside parts.
a. Install the power plant frame. (See POWER PLANT FRAME INSTALLATION [M66M-D].)
b. Remove the tunnel member temporarily.
c. Install the propeller shaft. (See PROPELLER SHAFT REMOVAL/INSTALLATION.)
d. Install the clutch release cylinder to the transmission. (See CLUTCH RELEASE CYLINDER REMOVAL/INSTALLATION.)
e. Install the exhaust manifold. (See EXHAUST SYSTEM REMOVAL/INSTALLATION [SKYACTIV-G 2.0].)
f. Install the catalytic converter (TWC). (See EXHAUST SYSTEM REMOVAL/INSTALLATION [SKYACTIV-G 2.0].)
g. Install the starter. (See STARTER REMOVAL/INSTALLATION [SKYACTIV-G 2.0].)
h. Install the tunnel member.
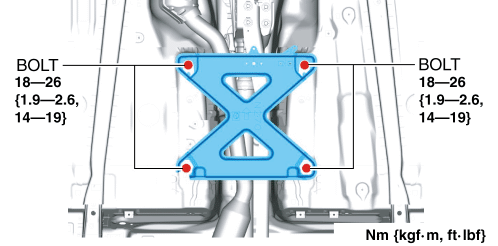
i. Install the member bracket. (With member bracket)
j. Install the front crossmember under cover. (See FRONT CROSSMEMBER UNDER COVER REMOVAL/INSTALLATION.)
10. Remove the SST (49 E017 5A0).
11. Install the ground.
12. Install the parts on the cabin side.
NOTE:
-
If the transmission is disassembled/inspected, always add the specified oil.
a. Add the specified oil to the shift control case.
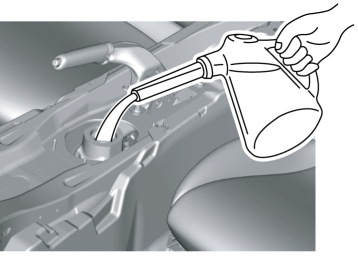
|
Specified shift control case oil |
Shift control case oil amount (reference) |
|
Mazda Original Long Life Gear Oil IS*1 |
270???310 ml {270???310 cc, 16.5???18.9 in3} |
- *1
- Mazda Original Long Life Gear Oil IS is superior oil for optimum shift-feel. Using Mazda Original Long Life Gear Oil IS is recommended. If Mazda Original Long Life Gear Oil IS cannot be obtained, use standard oil (API Service GL-4 (SAE 75W-90)). However, shifting in very low temperatures may become difficult.
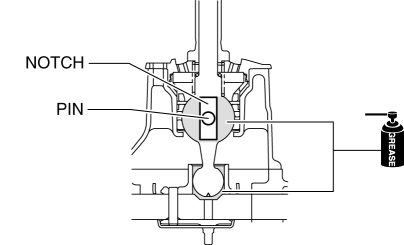
b. Apply grease to the positions of the shift lever component shown in the figure.
c. Install the shift lever component.
d. Install the insulator, change insulator components (outer/inner).
e. Install the rear console.(See REAR CONSOLE REMOVAL/INSTALLATION.)
f. Install the parking brake lever boot panel. (See PARKING BRAKE LEVER BOOT PANEL REMOVAL/INSTALLATION.)
g. Install the upper panel. (See UPPER PANEL REMOVAL/INSTALLATION.)
h. Install the shift panel component. (See SHIFT PANEL REMOVAL/INSTALLATION.)
i. Install the shift lever knob.
13. If the transmission is disassembled/inspected, add transmission oil. (See TRANSMISSION OIL REPLACEMENT [M66M-D].)
14. Connect the negative battery cable. (See NEGATIVE BATTERY CABLE DISCONNECTION/CONNECTION.)
15. If the manual transaxle is overhauled, perform the ???INSPECTION AFTER TRANSMISSION INSTALLATION???. (See INSPECTION AFTER TRANSMISSION INSTALLATION [M66M-D].)