TRUNK LID LIGHT REMOVAL/INSTALLATION
TRUNK LID LIGHT REMOVAL/INSTALLATION
SM2336615
id091800900000
-
Note
-
• Fogging or dew condensation may occur on the inside of the trunk lid light because of a natural phenomenon occurring as a result of a temperature difference between the interior and exterior of the trunk lid light. However, it has no effect on the light performance because the phenomenon is resolved when temperature inside the trunk lid light rises after the back-up light turns on or a period of time has elapsed.
1.Disconnect the negative battery terminal. (See NEGATIVE BATTERY TERMINAL DISCONNECTION/CONNECTION [(US)].)
2.Remove the trunk lid handle. (See TRUNK LID HANDLE REMOVAL/INSTALLATION.)
3.Remove the trunk lid trim. (See TRUNK LID TRIM REMOVAL/INSTALLATION.)
4.Disconnect the connectors.
am3zzw00033202
|
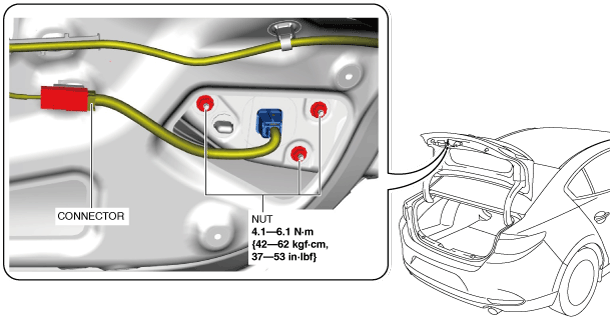
5.Remove the nuts.
-
Caution
-
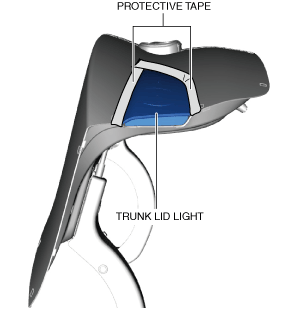
• When removing the trunk lid light from the trunk lid, the trunk lid light could contact the trunk lid and damage it. Apply protective tape to the trunk lid before removing the trunk lid light from the trunk lid.
6.To prevent scratches, apply protective tape to the position shown in the figure.
am3zzw00027127
|
-
Caution
-
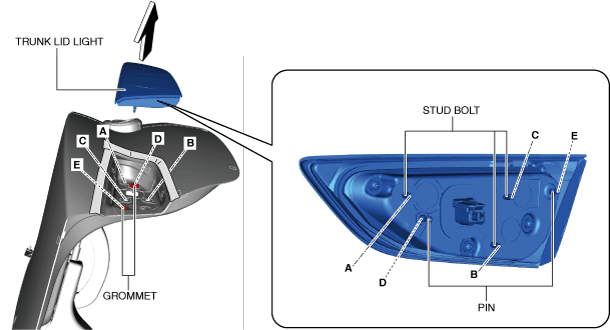
• When removing the trunk lid light from the trunk lid, the trunk lid light could fall off and be damaged. When removing the trunk lid light from the trunk lid, hold the trunk lid light on the lens side with a hand.
7.Remove the trunk lid light in the direction of the arrow shown in the figure.
am3zzw00027128
|
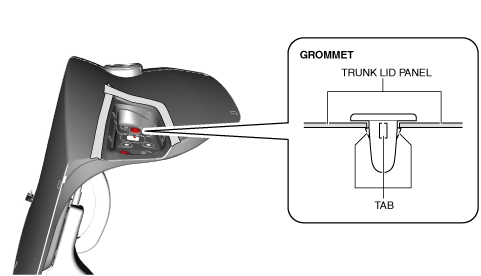
8.Remove the grommet.
am3zzw00027129
|
9.Install in the reverse order of removal.