FRONT DOOR GARNISH REMOVAL/INSTALLATION
FRONT DOOR GARNISH REMOVAL/INSTALLATION
SM2336484
id091600446300
Replacement part
|
Front door garnish
Quantity: 1
Location of use: Front door garnish
|
-
Warning
-
• Using a utility knife with bare hands can cause injury. Always wear gloves when using a utility knife.
1.Remove the front beltline molding. (See FRONT BELTLINE MOLDING REMOVAL/INSTALLATION.)
2.Using a remover tool, remove the clips in the direction of arrows (1), (2) shown in the figure.
am3zzw00023876
|
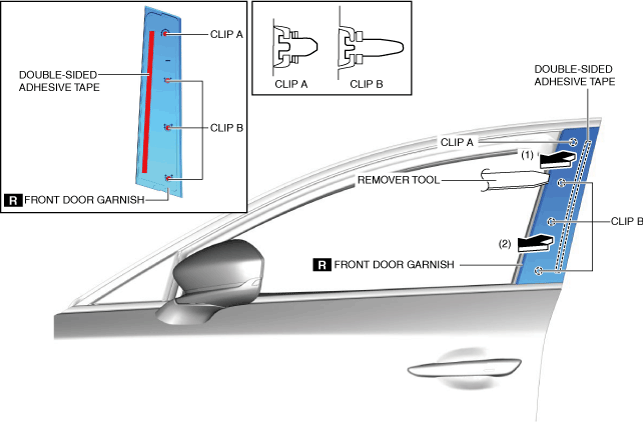
3.Remove the double-sided adhesive tape in the position shown in the figure using a utility knife, remove the front door garnish from the body.
4.Install in the reverse order of removal. (See Front Door Garnish Installation Note.)
Front Door Garnish Installation Note
1.When installing a new front door garnish, perform the following procedure:
- (1)Remove the double-sided adhesive tape on the front door sash.
- (2)Remove any grease or dirt from the affixing surface of the front door sash.