REAR DOOR GARNISH REMOVAL/INSTALLATION
REAR DOOR GARNISH REMOVAL/INSTALLATION
SM2336483
id091600445700
Replacement part
|
Rear door garnish
Quantity: 1
Location of use: Rear door garnish
|
-
Warning
-
• Using a utility knife with bare hands can cause injury. Always wear gloves when using a utility knife.
1.Remove the rear beltline molding. (See REAR BELTLINE MOLDING REMOVAL/INSTALLATION.)
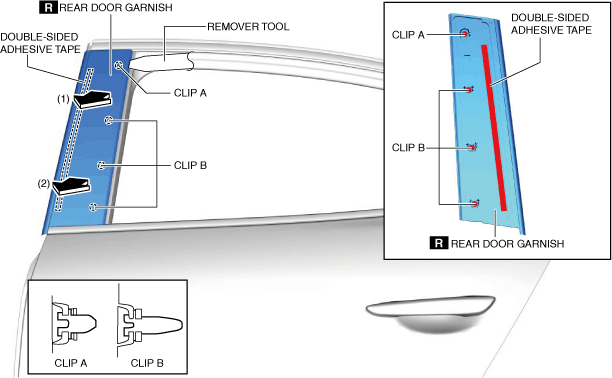
2.Using a remover tool, remove the clips in the direction of arrows (1), (2) shown in the figure.
am3zzw00023875
|
3.Remove the double-sided adhesive tape in the position shown in the figure using a utility knife, remove the rear door garnish from the rear door sash.
4.Install in the reverse order of removal. (See Rear Door Garnish Installation Note.)
Rear Door Garnish Installation Note
1.When installing a new rear door garnish, perform the following procedure:
- (1)Remove the double-sided adhesive tape on the rear door sash.
- (2)Remove any grease or dirt from the affixing surface of the rear door sash.
