DOOR LOCK SWITCH REMOVAL/INSTALLATION [(US)]
DOOR LOCK SWITCH REMOVAL/INSTALLATION [(US)]
SM2336464
id0914005186x1
Driver’s Side/Passenger’s Side
1.Disconnect the negative battery terminal. (See NEGATIVE BATTERY TERMINAL DISCONNECTION/CONNECTION [(US)].)
2.Remove the following parts:
- (1)Front door speaker grille (See SPEAKER GRILLE REMOVAL/INSTALLATION.)
- (2)Inner garnish (See INNER GARNISH REMOVAL/INSTALLATION.)
- (3)Power window main switch (to remove from driver’s side) (See POWER WINDOW MAIN SWITCH REMOVAL/INSTALLATION.)
- (4)Power window subswitch (to remove from passenger’s side) (See POWER WINDOW SUBSWITCH REMOVAL/INSTALLATION.)
- (5)Front door trim (See FRONT DOOR TRIM REMOVAL/INSTALLATION [(US)].)
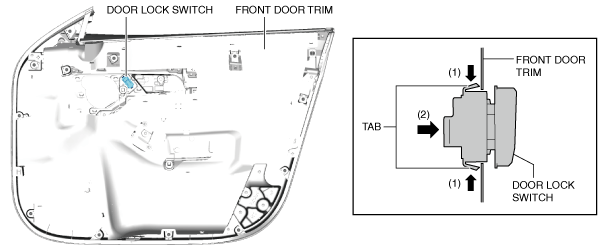
3.While pressing the tabs of the door lock switch in the direction of arrows (1) shown in the figure, move the door lock switch in the direction of arrow (2) and detach the tabs of the door lock switch from the front door trim.
am3zzw00028073
|
4.Remove the door lock switch.
5.Install in the reverse order of removal.
Liftgate
1.Disconnect the negative battery terminal. (See NEGATIVE BATTERY TERMINAL DISCONNECTION/CONNECTION [(US)].)
2.Remove the liftgate recess. (See LIFTGATE RECESS REMOVAL/INSTALLATION.)
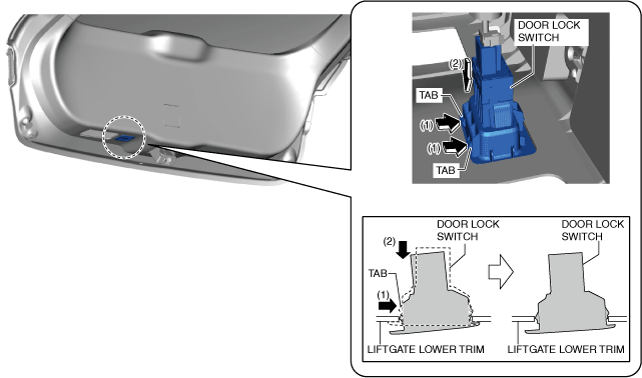
3.While pressing the tabs of the door lock switch in the direction of arrows (1) shown in the figure, move the door lock switch in the direction of arrow (2) and detach the tabs of the door lock switch from the liftgate lower trim.
am3zzw00028074
|
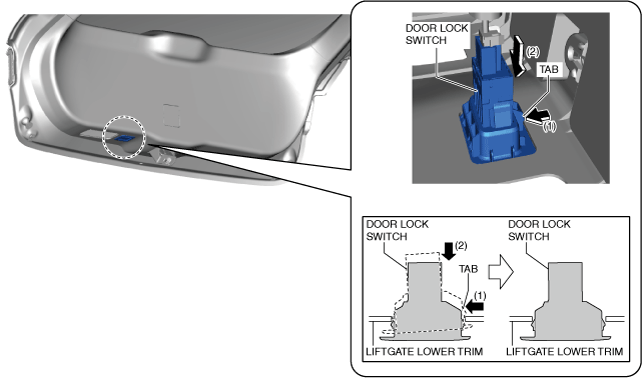
4.While pressing the tab of the door lock switch in the direction of arrows (1) shown in the figure, move the door lock switch in the direction of arrow (2) and detach the tab of the door lock switch from the liftgate lower trim.
am3zzw00028075
|
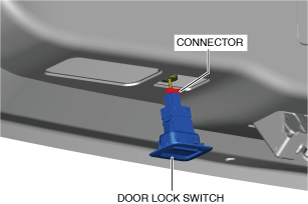
5.Disconnect the connector.
am3zzw00022183
|
6.Remove the door lock switch.
7.Install in the reverse order of removal.