FRONT DOOR KEY CYLINDER REMOVAL/INSTALLATION
FRONT DOOR KEY CYLINDER REMOVAL/INSTALLATION
SM2336439
id091400510900
1.Fully close the front door glass.
2.Disconnect the negative battery terminal. (See NEGATIVE BATTERY TERMINAL DISCONNECTION/CONNECTION [(US)].)
3.Remove the following parts:
- (1)Driver-side front door speaker grille (See SPEAKER GRILLE REMOVAL/INSTALLATION.)
- (2)Driver-side inner garnish (See INNER GARNISH REMOVAL/INSTALLATION.)
- (3)Power window main switch (See POWER WINDOW MAIN SWITCH REMOVAL/INSTALLATION.)
- (4)Driver-side front door trim (See FRONT DOOR TRIM REMOVAL/INSTALLATION [(US)].)
- (5)Front inner handle (See INNER HANDLE REMOVAL/INSTALLATION.)
4.Remove the front outer handle bracket and front door key cylinder as a single unit. (See FRONT OUTER HANDLE REMOVAL/INSTALLATION.)
5.Insert a tape-wrapped flathead screwdriver into the position shown in the figure.
am3zzw00029697
|
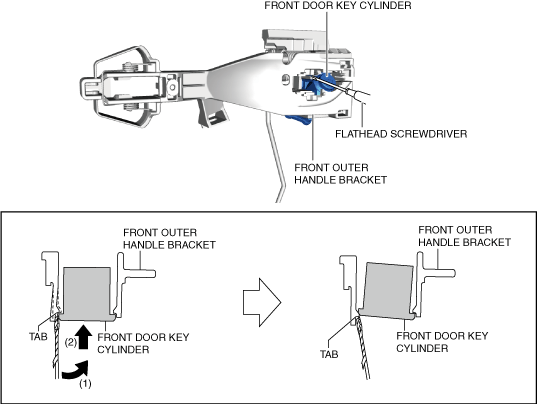
6.Move the tape-wrapped flathead screwdriver in the direction of arrow (1) shown in the figure, press the front door key cylinder in the direction of arrow (2), and then detach the front outer handle bracket tab from the front door key cylinder.
7.Insert the tape-wrapped flathead screwdriver into the position shown in the figure.
am3zzw00029698
|
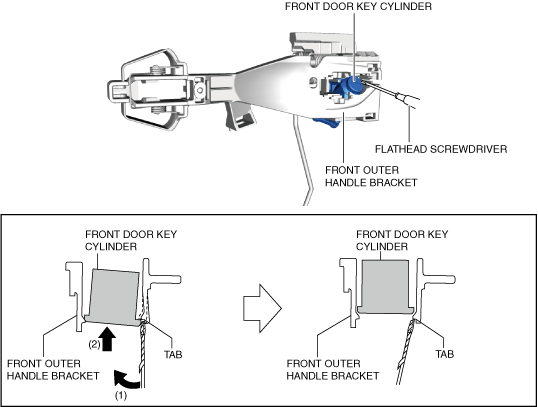
8.Move the tape-wrapped flathead screwdriver in the direction of arrow (1) shown in the figure, press the front door key cylinder in the direction of arrow (2), and then detach the front outer handle bracket tab from the front door key cylinder.
9.Remove the front door key cylinder.
am3zzw00022104
|

10.Install in the reverse order of removal.