LIFTGATE REMOVAL/INSTALLATION
LIFTGATE REMOVAL/INSTALLATION
SM2336353
id091100521200
Replacement part
|
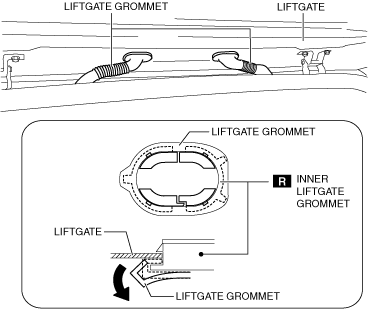
Inner liftgate grommet
Quantity: 2
Location of use: Liftgate
|
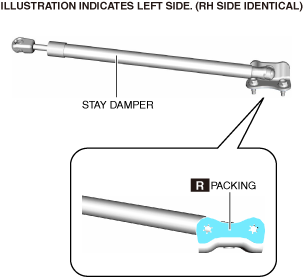
Packing
Quantity: 1
Location of use: Stay damper
|
-
Warning
-
• Removing the stay damper, liftgate hinge securing bolt, or liftgate without supporting the liftgate may cause the liftgate to fall off and injure you. When removing the stay damper, liftgate hinge securing bolt, or liftgate, always use two persons to perform the work.
Liftgate Removal/Installation
1.Disconnect the negative battery terminal. (See NEGATIVE BATTERY TERMINAL DISCONNECTION/CONNECTION [(US)].)
2.Remove the liftgate upper trim. (See LIFTGATE UPPER TRIM REMOVAL/INSTALLATION.)
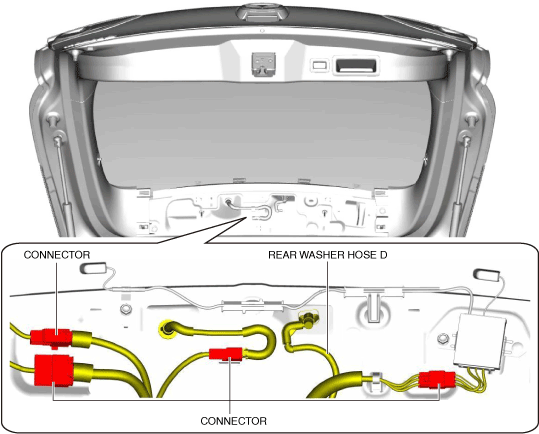
3.Disconnect the connectors and rear washer hose D shown in the figure.
am3zzw00029634
|
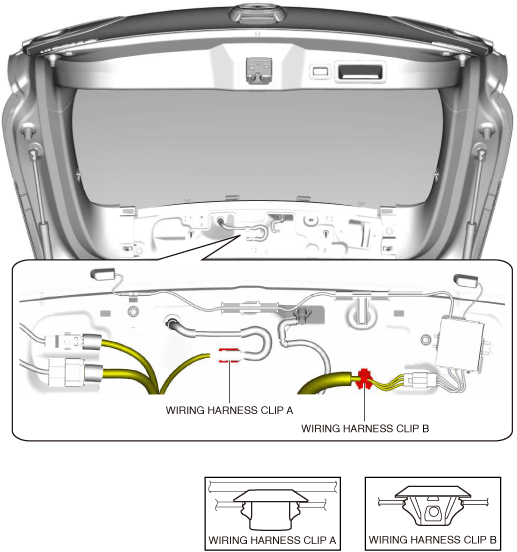
4.Remove the wiring harness clips shown in the figure.
am3zzw00031783
|
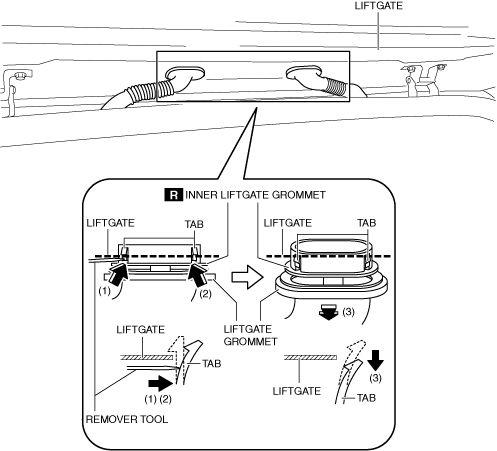
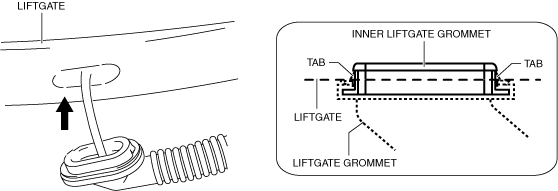
5.Partially peel the liftgate grommets in the direction of the arrow shown in the figure, and remove the liftgate grommets from the inner liftgate grommets.
am3zzw00029636
|
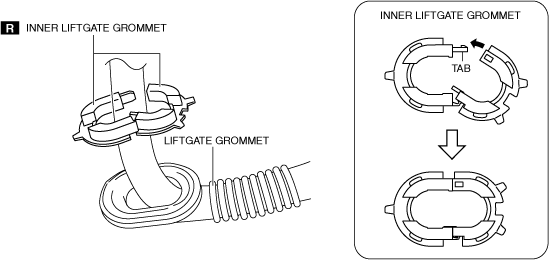
6.Using a remover tool, press the inner liftgate grommet tabs in the direction of arrows (1) and (2) shown in the figure and remove the inner liftgate grommet from the liftgate in the direction of arrow (3).
am3zzw00029637
|
7.Remove the rear washer hose D and wiring harness from the liftgate and set them aside.
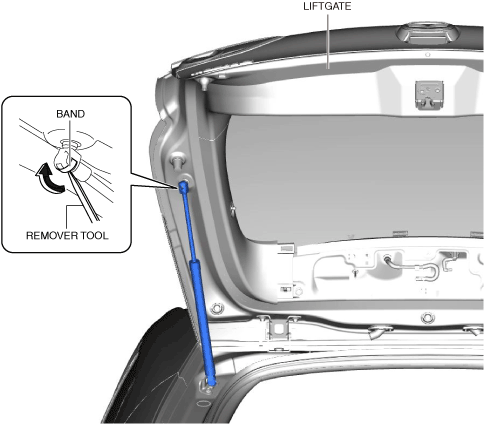
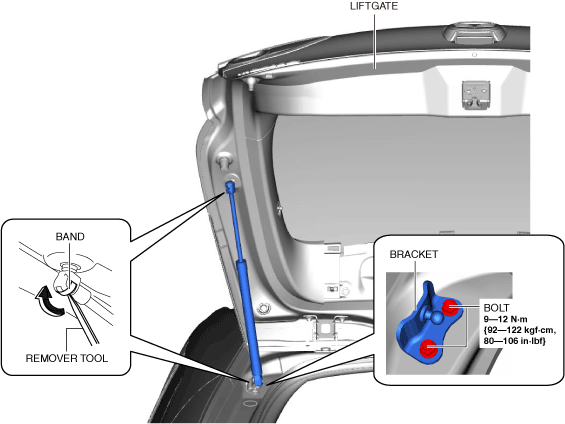
8.Using a remover tool, remove the stay damper securing band in the direction of the arrow shown in the figure.
am3zzw00031784
|
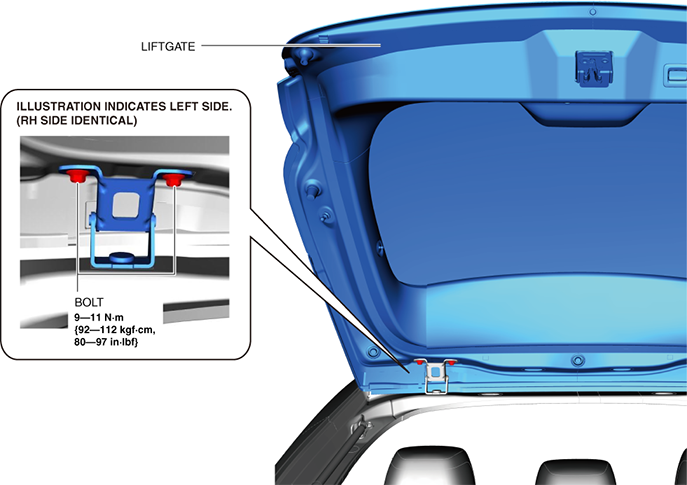
9.Remove the bolts shown in the figure and remove the liftgate.
am3zzw00029639
|
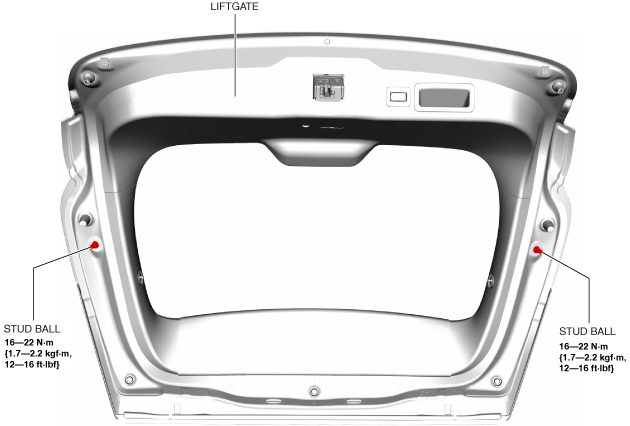
10.Remove the stud balls. (When removing the stud balls.)
am3zzw00029640
|
11.Install in the reverse order of removal. (See Liftgate Grommet Installation Note.)
12.Adjust the liftgate. (See LIFTGATE ADJUSTMENT.)
Liftgate Grommet Installation Note
-
Caution
-
• Always replace a new inner liftgate grommet when installing the liftgate grommet. If the inner liftgate grommet is removed, the tab connection may weaken and it may cause water leakage.
1.Install the liftgate grommet using the following procedure:
- (1)Engage a new inner liftgate grommet.
-
 am3zzw00029643
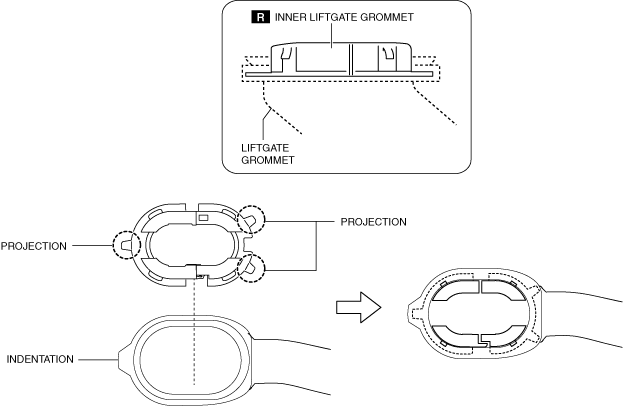
- (2)Align the inner liftgate grommet projection with the indentation on the liftgate grommet, and install it.
-
am3zzw00029644
-
Caution
-
• Install the inner liftgate grommet so that there is no gap between the liftgate grommet and the inner liftgate grommet. Otherwise, it may cause water leakage.
-
- (3)Press the inner liftgate grommet into the liftgate side as shown in the figure and engage the tabs of the inner liftgate grommet with the liftgate side.
-
am3zzw00029645
-
Caution
-
• After installing the liftgate, shake the inner liftgate grommet to verify that the tabs are securely engaged. If there is gap between the liftgate grommet and the liftgate, it may cause water leakage.
-
Stay Damper Removal/Installation
1.When removing the stay damper, perform the following procedure:
- (1)Using a remover tool, remove the stay damper securing band in the direction of the arrow shown in the figure.
-
am3zzw00029638
- (2)Remove the stay damper from the bracket.
- (3)Remove the bolts. (When removing the bracket.)
- (4)Remove the bracket. (When removing the bracket.)
- (5)Install in the reverse order of removal. (See Stay Damper Installation Note.)
Stay Damper Installation Note
1.If the stay damper is to be reused, perform the following procedure:
- (1)Remove the packing remaining on the stay damper.
- (2)Adhere new packing to the position shown in the figure.
-
ac5uuw00009731