REAR DOOR CHECKER REMOVAL/INSTALLATION
REAR DOOR CHECKER REMOVAL/INSTALLATION
SM2336349
id091100520700
Replacement part
|
Grommet
Quantity: 3
Location of use: Rear door speaker hole cover
|
Rear door speaker hole cover
Quantity: 1
Location of use: Rear door panel
|
1.Fully close the rear door glass.
2.Disconnect the negative battery terminal. (See NEGATIVE BATTERY TERMINAL DISCONNECTION/CONNECTION [(US)].)
3.Remove the power window subswitch (rear). (See POWER WINDOW SUBSWITCH REMOVAL/INSTALLATION.)
4.Remove the rear door trim. (See REAR DOOR TRIM REMOVAL/INSTALLATION.)
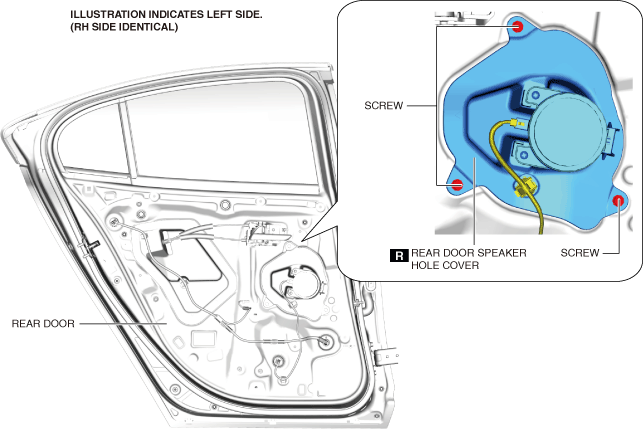
5.Remove the screws shown in the figure.
am3zzw00029626
|
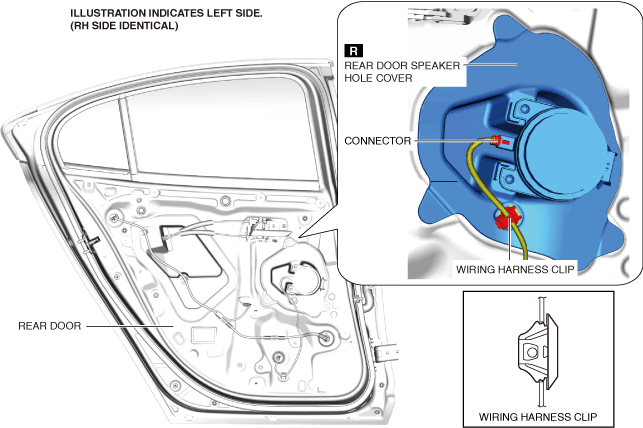
6.Remove the wiring harness clip and disconnect the connector shown in the figure.
am3zzw00029627
|
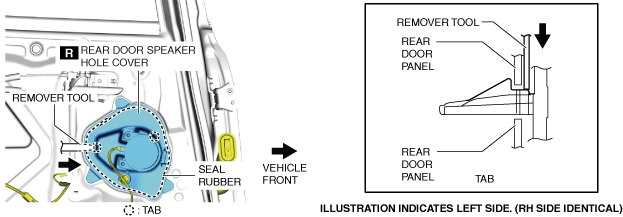
7.Insert a remover tool into the position shown in the figure, move it in the direction of the arrow, and detach the tabs from the rear door panel.
am3zzw00031186
|
8.Remove the rear door speaker hole cover with the rear door speaker.
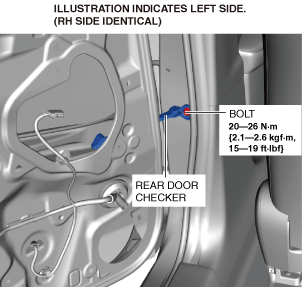
9.Remove the bolt shown in the figure.
am3zzw00029628
|
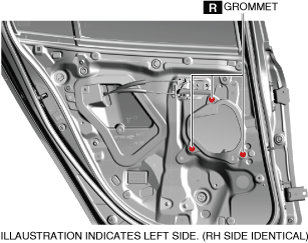
10.Remove the grommet.
am3zzw00036644
|
11.Remove the nuts shown in the figure.
am3uuw00000426
|
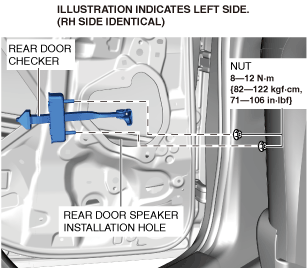
12.Pull out the rear door checker from the rear door speaker installation hole.
13.Install in the reverse order of removal.