TELEMATICS COMMUNICATION UNIT REMOVAL/INSTALLATION
TELEMATICS COMMUNICATION UNIT REMOVAL/INSTALLATION
SM2566437
id092200668000
-
Caution
-
• When replacing the telematics communication unit, perform the configuration to assure that the system operates correctly. (See CONFIGURATION.)
1.Disconnect the negative battery terminal. (See NEGATIVE BATTERY TERMINAL DISCONNECTION/CONNECTION [(US)].)
2.Remove the following parts:
- (1)Shift panel (See SHIFT PANEL REMOVAL/INSTALLATION.)
- (2)Front console box (See FRONT CONSOLE BOX REMOVAL/INSTALLATION.)
- (3)Passenger-side front scuff plate (See FRONT SCUFF PLATE REMOVAL/INSTALLATION.)
- (4)Passenger-side front side trim (See FRONT SIDE TRIM REMOVAL/INSTALLATION.)
- (5)Passenger-side decoration panel (See DECORATION PANEL REMOVAL/INSTALLATION.)
- (6)Glove compartment (without passenger-side knee air bag module) (See GLOVE COMPARTMENT REMOVAL/INSTALLATION.)
- (7)Dashboard under cover (See DASHBOARD UNDER COVER REMOVAL/INSTALLATION.)
- (8)Passenger side lower panel (See LOWER PANEL REMOVAL/INSTALLATION [(US)].)
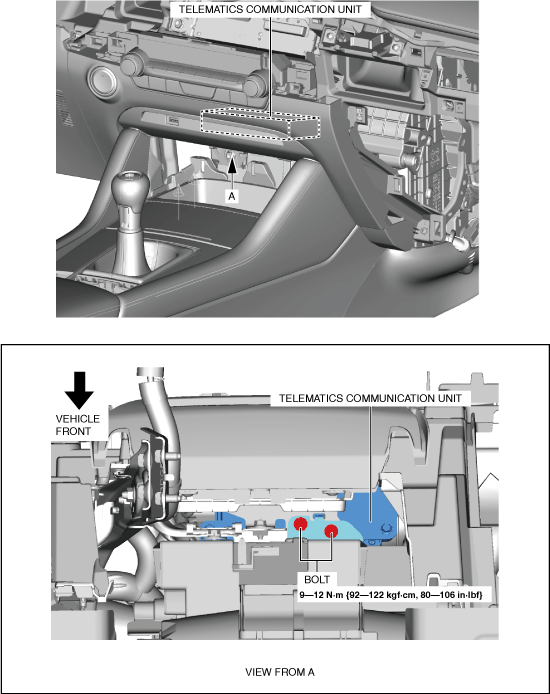
3.Remove the bolts.
am3zzw00029817
|
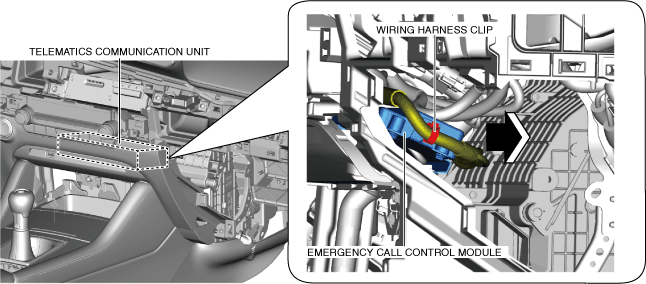
4.Remove the wiring harness clip.
am3zzw00029818
|
5.Move the telematics communication unit in the direction of the arrow shown in the figure.
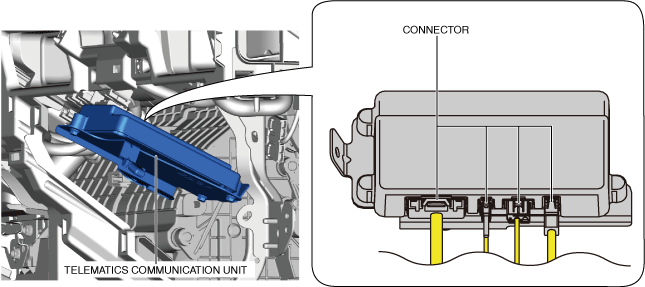
6.Disconnect the connectors.
am3zzw00029819
|
7.Remove the telematics communication unit.
8.Install in the reverse order of removal.
9.If the telematics communication unit is replaced, perform the following procedure.
- (1)Switch the ignition ON (engine off or on) to complete the telematics communication unit automatic configuration.
- (2)Perform the telematics communication unit initial setting. (See TELEMATICS COMMUNICATION UNIT INITIAL SETTING.)