INSTRUMENT CLUSTER REMOVAL/INSTALLATION
INSTRUMENT CLUSTER REMOVAL/INSTALLATION
SM2336695
id092200010300
-
Caution
-
• When replacing the instrument cluster, perform the configuration to assure that the system operates correctly. (See CONFIGURATION.)
1.Disconnect the negative battery terminal. (See NEGATIVE BATTERY TERMINAL DISCONNECTION/CONNECTION [(US)].)
2.Remove the following parts:
- (1)Driver-side front scuff plate (See FRONT SCUFF PLATE REMOVAL/INSTALLATION.)
- (2)Driver-side front side trim (See FRONT SIDE TRIM REMOVAL/INSTALLATION.)
- (3)Driver-side decoration panel (See DECORATION PANEL REMOVAL/INSTALLATION.)
- (4)Passenger-side decoration panel (See DECORATION PANEL REMOVAL/INSTALLATION.)
- (5)Hood release lever (See HOOD RELEASE LEVER AND RELEASE CABLE REMOVAL/INSTALLATION [(US)].)
- (6)Driver-side lower panel (See LOWER PANEL REMOVAL/INSTALLATION [(US)].)
- (7)Upper column cover (See COLUMN COVER REMOVAL/INSTALLATION.)
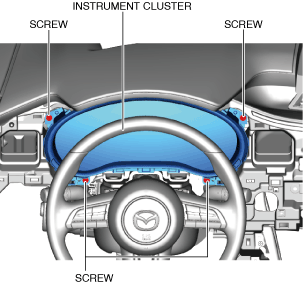
3.Remove the screws.
am3zzw00025130
|
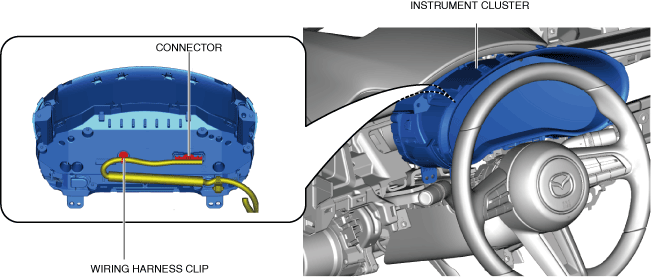
4.Disconnect the connector.
am3zzw00025131
|
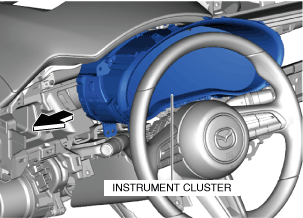
5.Remove the instrument cluster by sliding it between the dashboard and the steering wheel.
am3zzw00025132
|
6.Install in the reverse order of removal.
-
Caution
-
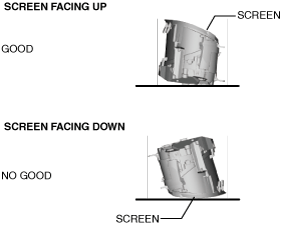
• If the instrument cluster is left for a long time with its screen facing down, grease applied to the needles may spill and the needles may not operate smoothly. When storing the instrument cluster, store it with its screen facing upward.
 am3zzw00025133
7.If the instrument cluster is replaced, perform the following procedure.
- (1)Perform manual configuration using the following procedure.
-
- 1)Connect the M-MDS to the DLC-2.
- 2)Switch the ignition ON (engine off or on).
- 3)Perform vehicle identification.
- 4)Select [Configuration] using the M-MDS.
- 5)Select [IC].
- 6)Perform manual configuration following the instructions on the screen.
- (2)Switch the ignition OFF.
- (3)Switch the ignition ON (engine off or on) to complete the instrument cluster automatic configuration.
- (4)Clear the DTC. (See CLEARING DTC.)


