REAR CONSOLE REMOVAL/INSTALLATION [(US)]
REAR CONSOLE REMOVAL/INSTALLATION [(US)]
SM2336564
id0917008985x1
1.Disconnect the negative battery terminal. (See NEGATIVE BATTERY TERMINAL DISCONNECTION/CONNECTION [(US)].)
2.Remove the following parts:
- (1)Shift lever knob (MTX) (See SHIFT LEVER REMOVAL/INSTALLATION [C66M-R].)
- (2)Selector lever knob (ATX) (See SELECTOR LEVER COMPONENT REMOVAL/INSTALLATION.)
- (3)Shift panel (See SHIFT PANEL REMOVAL/INSTALLATION.)
- (4)Front console box (See FRONT CONSOLE BOX REMOVAL/INSTALLATION.)
- (5)Cup holder (See CUP HOLDER REMOVAL/INSTALLATION.)
- (6)Side wall (See SIDE WALL REMOVAL/INSTALLATION.)
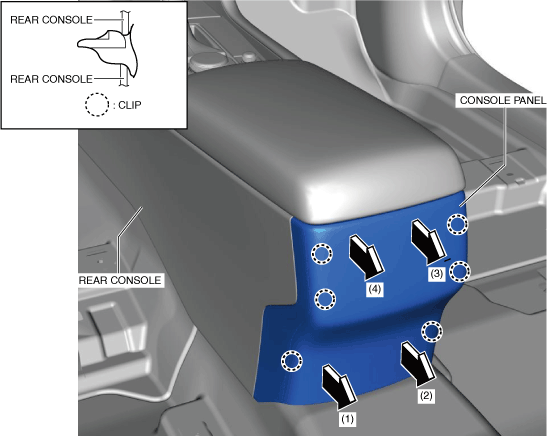
3.Move the console panel in the order of arrows (1), (2), (3), and (4) shown in the figure, and detach the clips.
am3zzw00021905
|
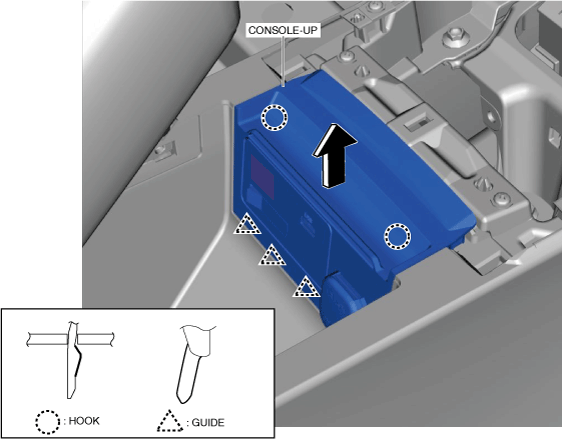
4.Move the console-up in the direction of the arrow shown in the figure and remove it while detaching the hooks and guides.
am3zzw00029299
|
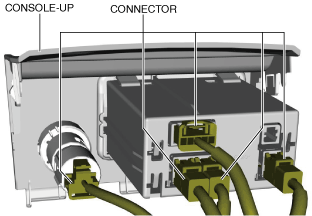
5.Disconnect the connectors.
am3zzw00024072
|
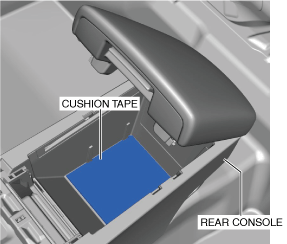
6.Remove the cushion tape.
am3zzw00021906
|
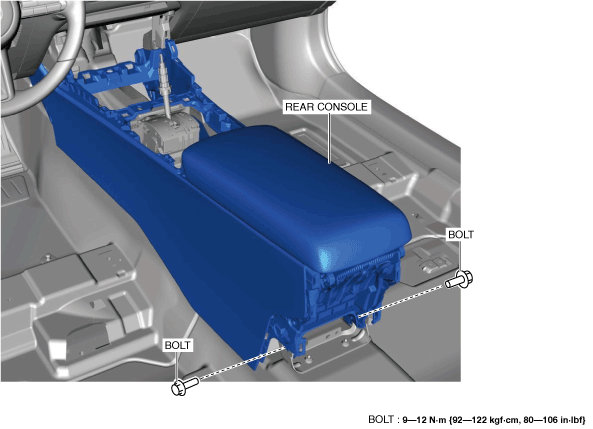
7.Remove the bolts.
am3zzw00021907
|
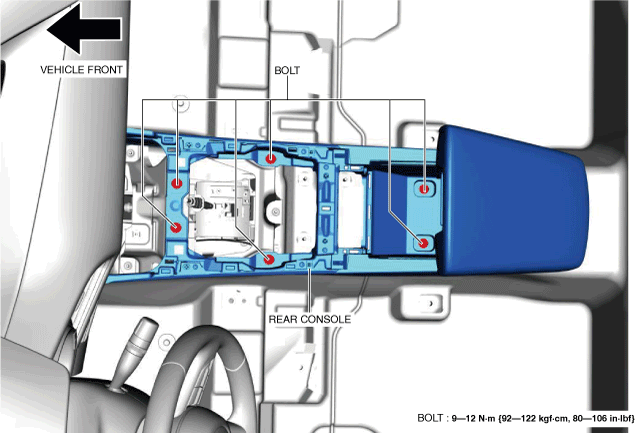
8.Remove the bolts.
am3zzw00021908
|
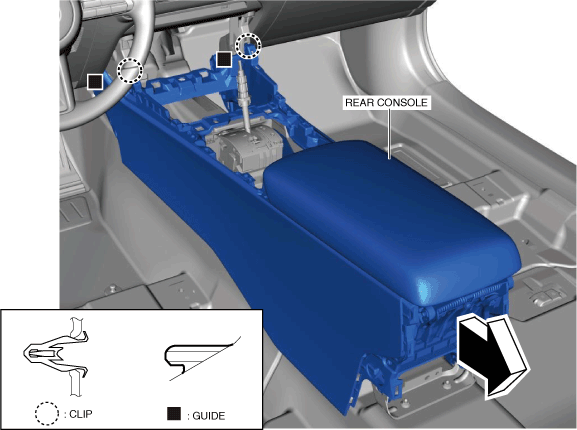
9.Move the rear console in the direction of the arrow shown in the figure, detach the clips and guides from the center lower panel, and remove the rear console.
am3zzw00021909
|
10.When removing the rear console bracket No.1, perform the following procedure:
- (1)Remove the wiring harness clips.
-
 am3zzw00027686
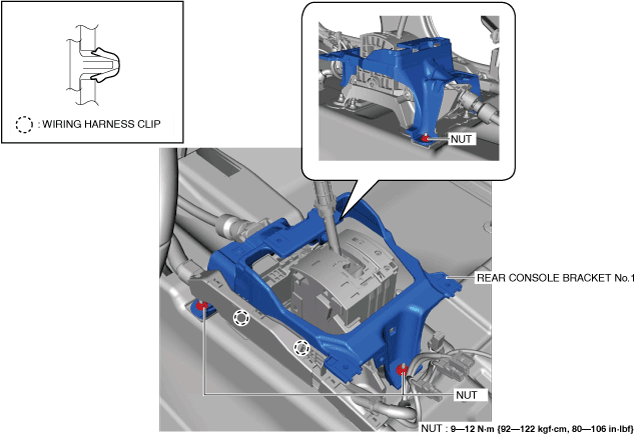
- (2)Remove the nuts.
- (3)Remove the rear console bracket No.1.
11.Install in the reverse order of removal.