REAR POWER WINDOW REGULATOR REMOVAL/INSTALLATION
REAR POWER WINDOW REGULATOR REMOVAL/INSTALLATION
SM2336364
id091200001200
-
Note
-
• The rear power window motor is integrated with the rear power window regulator.
1.Fully lower the rear door glass.
2.Disconnect the negative battery terminal. (See NEGATIVE BATTERY TERMINAL DISCONNECTION/CONNECTION [(US)].)
3.Remove the following parts:
- (1)Power window subswitch (rear) (See POWER WINDOW SUBSWITCH REMOVAL/INSTALLATION.)
- (2)Rear door trim (See REAR DOOR TRIM REMOVAL/INSTALLATION.)
- (3)Rear inner handle (See INNER HANDLE REMOVAL/INSTALLATION.)
- (4)Rear door quarter glass (See REAR DOOR QUARTER GLASS REMOVAL/INSTALLATION.)
4.Connect the negative battery terminal. (See NEGATIVE BATTERY TERMINAL DISCONNECTION/CONNECTION [(US)].)
5.Connect the power window subswitch connector.
6.Perform the rear door glass preparation. (See REAR DOOR GLASS REMOVAL/INSTALLATION.)
7.Remove the rear door glass. (See REAR DOOR GLASS REMOVAL/INSTALLATION.)
8.Disconnect the negative battery terminal. (See NEGATIVE BATTERY TERMINAL DISCONNECTION/CONNECTION [(US)].)
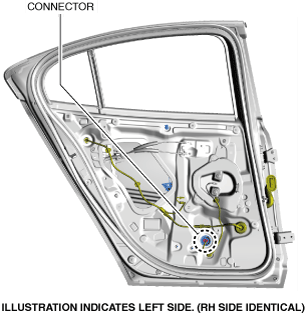
9.Disconnect the power window subswitch connector.
10.Disconnect the connector.
am3uuw00015501
|
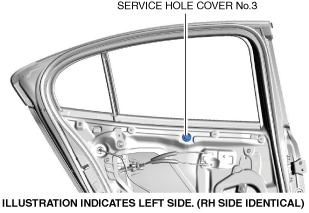
11.Remove service hole cover No.3.
am3zzw00024488
|
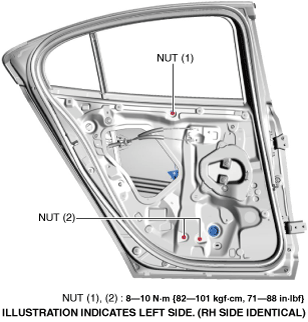
12.Remove the nuts shown in the figure in the order of (1) and (2).
am3zzw00024489
|
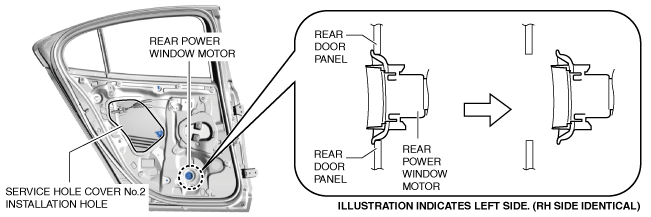
13.Insert a hand from the service hole cover No.2 installation hole and remove the rear power window motor from the rear door panel.
am3zzw00024490
|
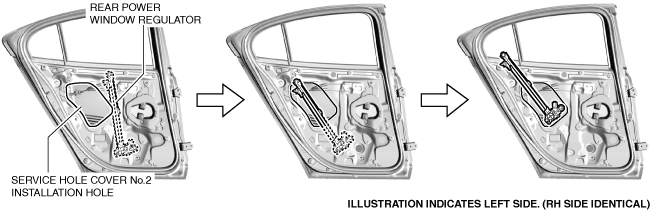
14.Remove the rear power window regulator through the service hole cover No.2 installation hole.
-
Caution
-
• When removing the rear power window regulator, the rear power window regulator may contact the service hole cover No.2 installation hole, and the coating film of the rear door inner panel and the rear power window regulator could be damaged. Remove the rear power window regulator while verifying that the rear power window regulator and the service hole cover No.2 installation hole do not contact each other.
am3zzw00024491
|
15.Install in the reverse order of removal. (See Rear Power Window Regulator Installation Note.)
16.Perform the power window system initialization procedure. (with auto open/auto close function) (See POWER WINDOW SYSTEM INITIALIZATION PROCEDURE.)
Rear Power Window Regulator Installation Note
1.The rear power window regulator installation work can be facilitated by performing the following procedure:
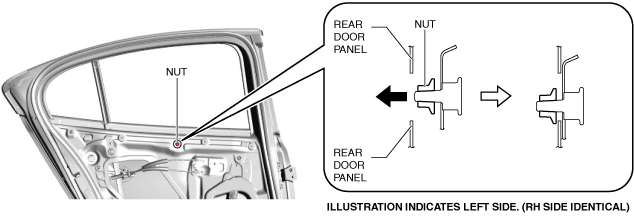
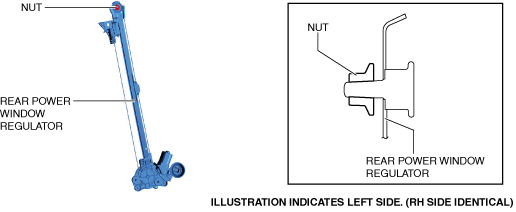
- (1)Temporarily tighten the nut shown in the figure.
-
 am3uuw00015601
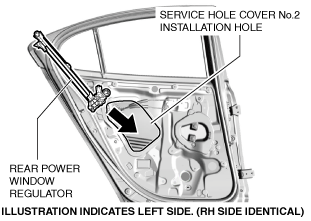
- (2)Insert the rear power window regulator from the service hole cover No.2 installation hole.
-
am3uuw00015602
- (3)Hook the temporarily tightened nuts to the rear door panel.
-
am3uuw00015603