FRONT FENDER PANEL REMOVAL/INSTALLATION
FRONT FENDER PANEL REMOVAL/INSTALLATION
SM2336325
id091000801000
1.Disconnect the negative battery terminal. (See NEGATIVE BATTERY TERMINAL DISCONNECTION/CONNECTION [(US)].)
2.Remove the following parts:
- (1)Upper face (See UPPER FACE REMOVAL/INSTALLATION [(US)].)
- (2)Front bumper (See FRONT BUMPER REMOVAL/INSTALLATION [(US)].)
- (3)Front combination light (See FRONT COMBINATION LIGHT REMOVAL/INSTALLATION.)
- (4)Front door (See FRONT DOOR REMOVAL/INSTALLATION.)
- (5)Rear deflector (See DEFLECTOR REMOVAL/INSTALLATION.)
- (6)Side step molding (See SIDE STEP MOLDING REMOVAL.) (See SIDE STEP MOLDING INSTALLATION.)
- (7)Front fender molding (See FRONT FENDER MOLDING REMOVAL/INSTALLATION.)
3.Remove the fasteners.
am3zzw00028824
|
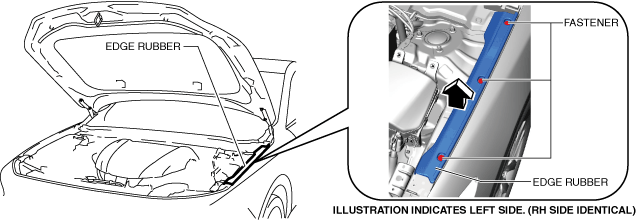
4.Remove the edge rubber in the direction of the arrow shown in the figure.
5.Remove the A-pillar garnish.
am3zzw00023208
|

6.Remove the fastener.
am3zzw00023209
|
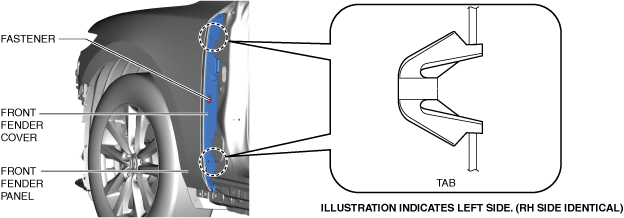
7.Remove the front fender cover while detaching the tabs.
8.Remove the fasteners.
am3zzw00023210
|
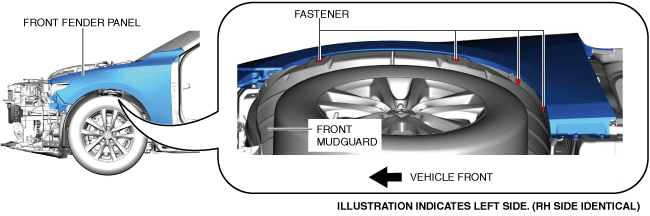
9.Partially peel back the front mudguard.
10.Remove bolts A, B and C shown in the figure.
am3zzw00023211
|
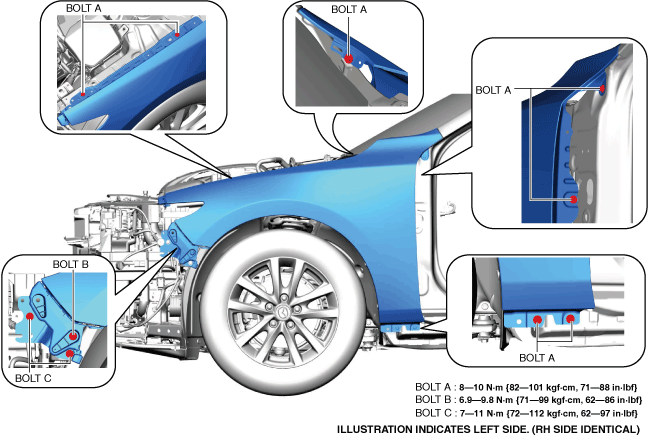
11.Remove the front fender panel.
12.Install in the reverse order of removal.
13.Adjust the headlight aiming. (See HEADLIGHT AIMING [(US)].)
14.Perform the front door adjustment. (See DOOR ADJUSTMENT.)
15.Perform the 360° view monitor system aiming. (with 360° view monitor system) (See 360°VIEW MONITOR SYSTEM AIMING.)
16.Perform the front radar sensor aiming adjustment. (with front radar sensor) (See FRONT RADAR SENSOR AIMING.)
17.Perform the front side radar sensor aiming adjustment. (with front side radar sensor) (See FRONT SIDE/REAR SIDE RADAR SENSOR AIMING.)