REAR END PANEL INSTALLATION [PANEL REPLACEMENT]
REAR END PANEL INSTALLATION [PANEL REPLACEMENT]
SM2333642
id098008744600
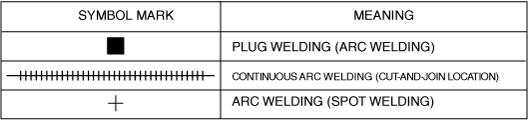
Symbol Mark
am3zzb00000545
|
Installation Procedure
4SD
1.When installing new parts, measure and adjust the body as necessary to conform with standard dimensions.
2.Drill holes for the plug welding before installing the new parts.
3.After temporarily installing new parts, make sure the related parts fit properly.
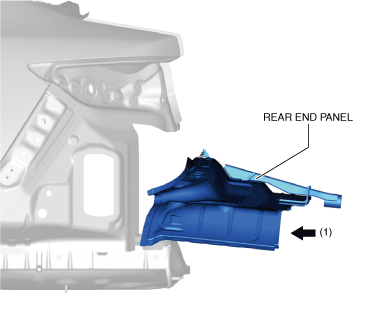
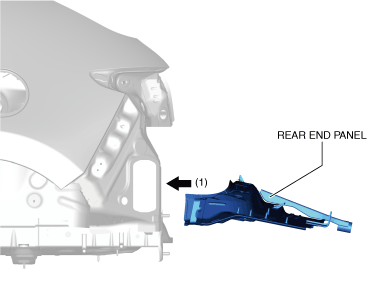
4.Insert the rear end panel in the direction of arrow (1) to show in the figure.
am3zzb00000530
|
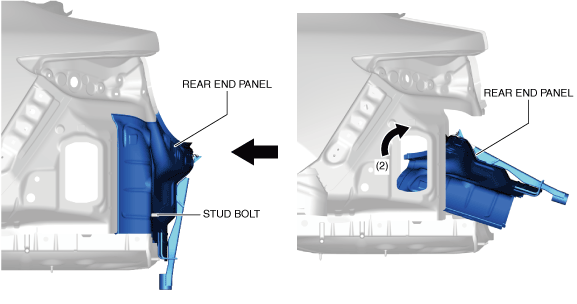
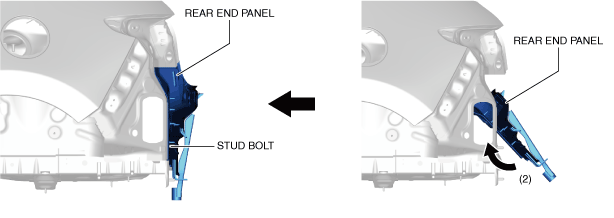
5.Push the core end of the rear end panel and install it in the direction of arrow (2) to show in the figure in spite of being insertion in stud bolts.
am3zzb00000531
|
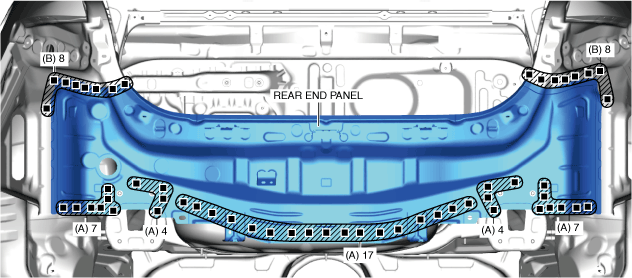
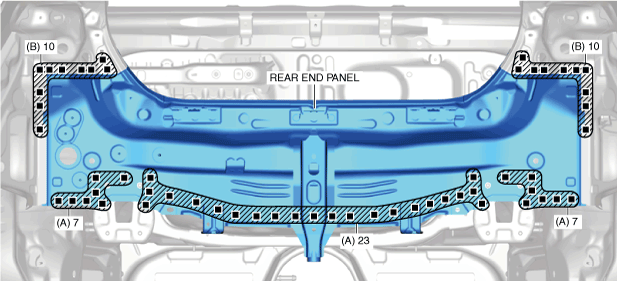
6.Plug welds in the 39 locations in area A shown in the figure.
7.Plug welds in the 16 locations in area B shown in the figure.
Without rear end panel center reinforcement
am3zzb00000766
|
With rear end panel center reinforcement
am3zzb00000778
|
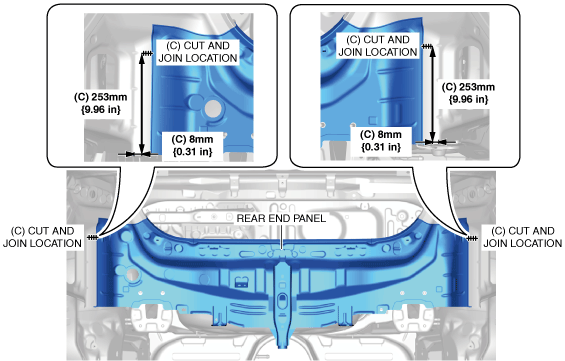
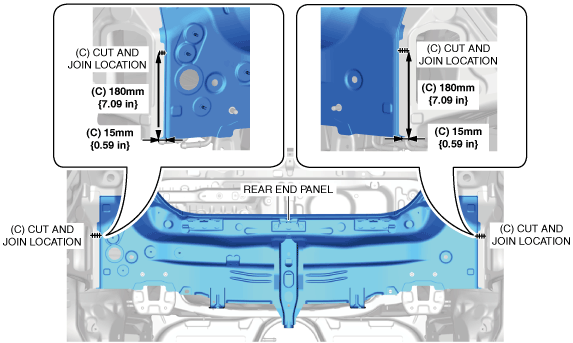
8.After repairing the ends of the rear fender panel (lower), cut and join the 2 locations in area C shown in the figure.
-
Caution
-
• If there is a gap between the rear end panel and the end of the repaired rear fender panel (lower), abnormal noise may occur due to vibration and welding defects caused by burn-through during plug welding. When performing plug welding after repairing the end of the rear fender panel (lower), secure them using a vise to prevent a gap from forming between the rear end panel.
am6zzb00000763
|
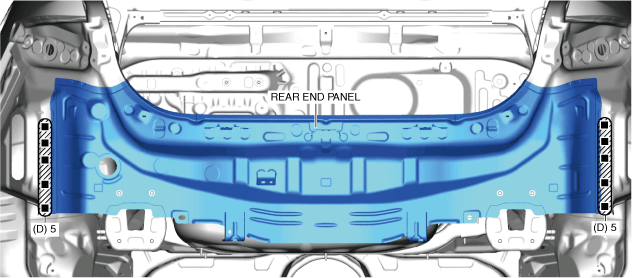
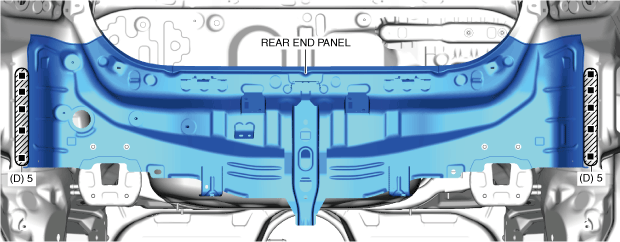
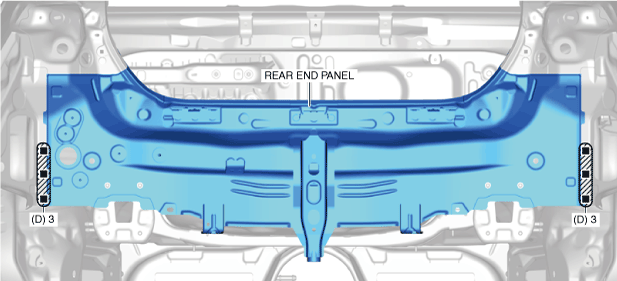
9.Plug welds in the 10 locations in area D shown in the figure and install the rear end panel.
Without rear end panel center reinforcement
am3zzb00000767
|
With rear end panel center reinforcement
am3zzb00000779
|
5HB
1.When installing new parts, measure and adjust the body as necessary to conform with standard dimensions.
2.Drill holes for the plug welding before installing the new parts.
3.After temporarily installing new parts, make sure the related parts fit properly.
4.Insert the rear end panel in the direction of arrow (1) to show in the figure.
am3zzb00000594
|
5.Push the core end of the rear end panel and install it in the direction of arrow (2) to show in the figure in spite of being insertion in stud bolts.
am3zzb00000595
|
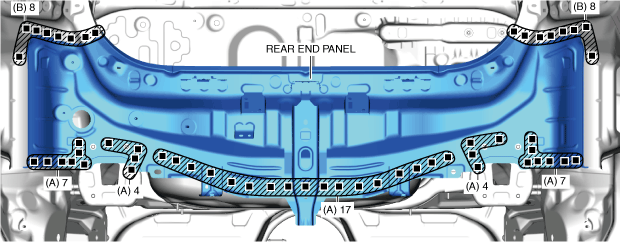
6.Plug welds in the 37 locations in area A shown in the figure.
7.Plug welds in the 20 locations in area B shown in the figure.
am3zzb00000596
|
8.After repairing the ends of the rear fender panel (lower), cut and join the 2 locations in area C shown in the figure.
-
Caution
-
• If there is a gap between the rear end panel and the end of the repaired rear fender panel (lower), abnormal noise may occur due to vibration and welding defects caused by burn-through during plug welding. When performing plug welding after repairing the end of the rear fender panel (lower), secure them using a vise to prevent a gap from forming between the rear end panel.
am3zzb00000597
|
9.Plug welds in the 6 locations in area D shown in the figure.
am3zzb00000598
|
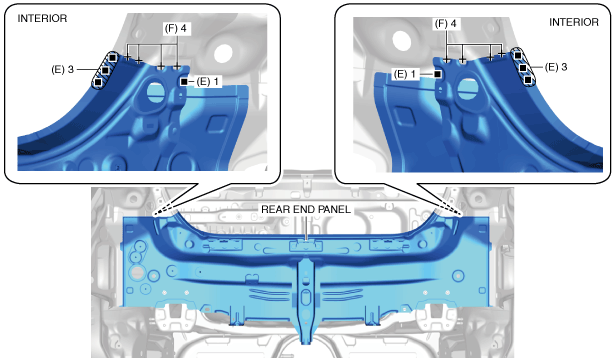
10.Plug welds in the 8 locations in area E shown in the figure from the interior.
11.Arc spot welds in the 8 locations in area F shown in the figure from the interior and install the rear end panel.
am3zzb00000599
|