UPPER PANEL REMOVAL/INSTALLATION
2016 – MX-5 – Body and Accessories
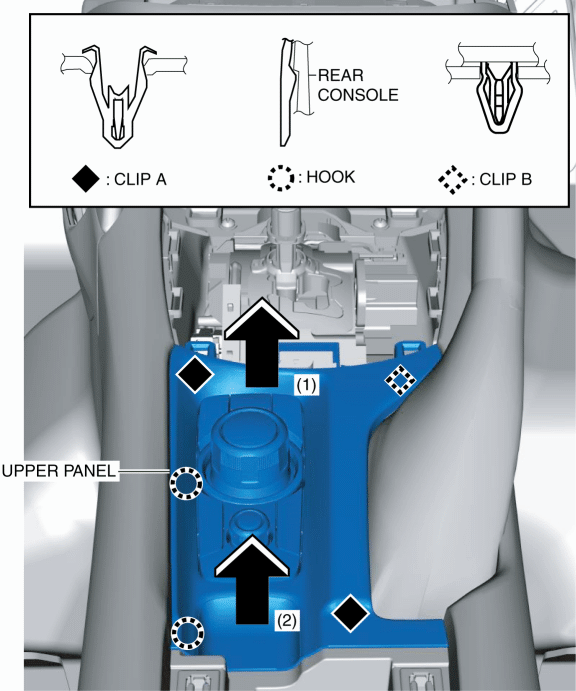
UPPER PANEL REMOVAL/INSTALLATION
1. Disconnect the negative battery cable. (See NEGATIVE BATTERY CABLE DISCONNECTION/CONNECTION.)
2. Remove the following parts:
a. Selector lever knob (AT) (See AUTOMATIC TRANSMISSION SHIFT MECHANISM REMOVAL/INSTALLATION.)
b. Shift lever knob (MT)
c. Shift panel component (See SHIFT PANEL REMOVAL/INSTALLATION.)
3. Move the upper panel in the order of arrows (1) and (2) shown in the figure and detach clips A and B, and the hooks from the rear console.
4. Remove the drive selection switch when replacing the upper panel. (AT) (See DRIVE SELECTION SWITCH REMOVAL/INSTALLATION [SKYACTIV-G 2.0].)
5. Remove the commander switch when replacing the upper panel. (See COMMANDER SWITCH REMOVAL/INSTALLATION.)
6. Install in the reverse order of removal.