COMMANDER SWITCH REMOVAL/INSTALLATION
2016 – MX-5 – Body and Accessories
COMMANDER SWITCH REMOVAL/INSTALLATION
CAUTION:
-
The connectivity master unit (CMU) determines the presence/non-presence of a commander switch and records it based on the communication status when the ignition is switched ON (engine off or on) or to the ACC position for the first time after the negative battery cable is connected.
-
If the negative battery cable is connected while the connectivity master unit (CMU) has recorded the non-presence of the commander switch and thereafter a commander switch is installed, the installed commander switch will not operate.
-
When installing or removing the commander switch, always disconnect the negative battery cable, and after the servicing is completed, switch the ignition to ACC or ON (engine off or on) to allow the connectivity master unit (CMU) to record the presence/non-presence of the commander switch.
1. Disconnect the negative battery cable. (See NEGATIVE BATTERY CABLE DISCONNECTION/CONNECTION.)
2. Remove the following parts:
a. Selector lever knob (AT) (See AUTOMATIC TRANSMISSION SHIFT MECHANISM REMOVAL/INSTALLATION.)
b. Shift lever knob (MT)
c. Shift panel compartment (See SHIFT PANEL REMOVAL/INSTALLATION.)
d. Upper panel (See UPPER PANEL REMOVAL/INSTALLATION.)
3. Remove the screws.
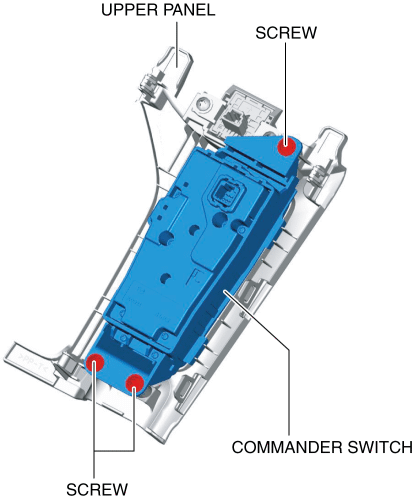
4. Remove the commander switch.
5. Install in the reverse order of removal.