CONVERTIBLE TOP ADJUSTMENT
2016 – MX-5 – Body and Accessories
CONVERTIBLE TOP ADJUSTMENT
Top Lock Ajustment
1. Remove the top lock cover.(See TOP LOCK REMOVAL/INSTALLATION.)
2. Loosen the top lock installation screws and adjust the top lock position.
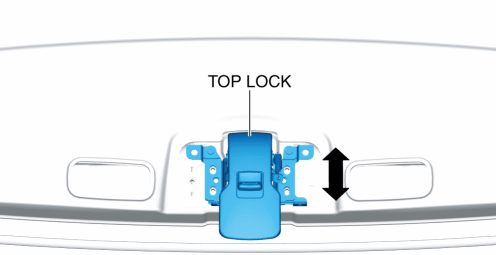
3. Tighten the top lock installation screws.(See TOP LOCK REMOVAL/INSTALLATION.)
4. Close the convertible top and secure the top lock.
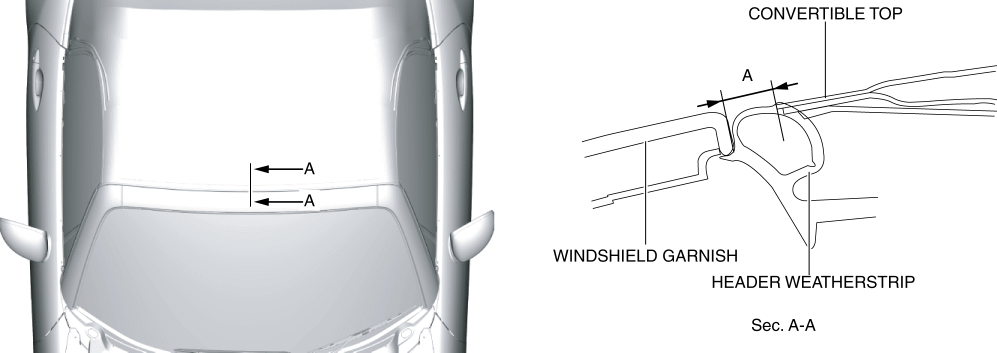
5. Verify that the gap between the windshield garnish and the convertible top is within the specification.
-
Standard clearance
-
A: 5—9 mm {0.2—0.3 in}
-
If not within the specification, repeat from Step 2 to Step 5 until the clearance between the windshield garnish and the convertible top is within the specification.
6. Verify that the top lock can be secured/released smoothly.
7. Install the top lock cover.(See TOP LOCK REMOVAL/INSTALLATION.)
Female Wedge Ajustment
NOTE:
-
The female wedge can be adjusted on the left side only.
1. Loosen the female wedge installation screws and adjust the female wedge position.(See FEMALE WEDGE REMOVAL/INSTALLATION.)
2. Tighten the female wedge installation screws.(See FEMALE WEDGE REMOVAL/INSTALLATION.)
3. Verify that the top lock can be secured/released smoothly.
Link Weatherstrip Ajustment
Link weatherstrip No.1 ajustment
1. Partially peel back the link weatherstrip No.1.
2. Loosen the retainer No.1 installation screws and adjust the retainer No.1 position.
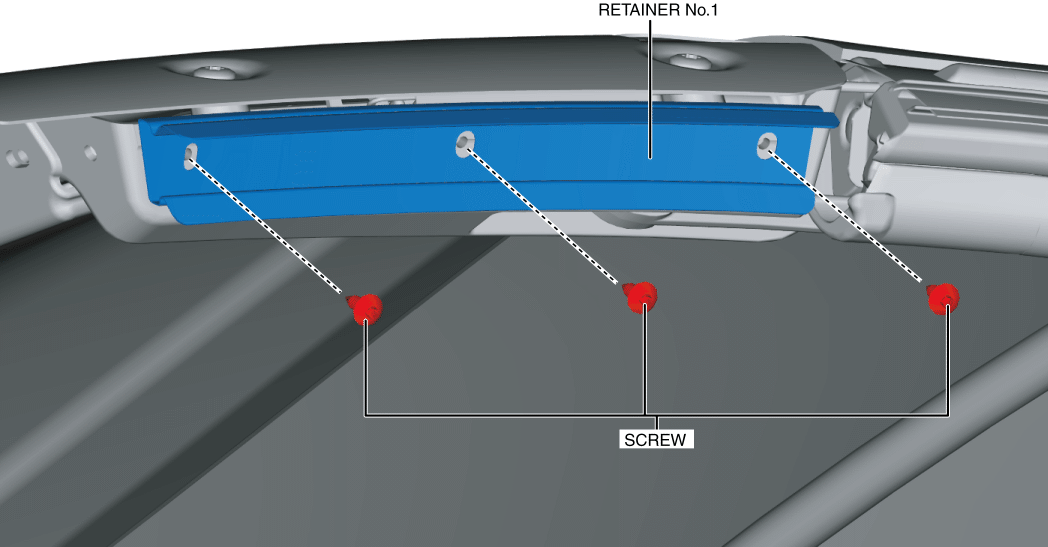
3. Tighten the retainer No.1 installation screws.
4. Install the link weatherstrip No.1.
5. Verify that the convertible top opens/closes smoothly.
6. Verify that the top lock can be secured/released smoothly.
7. Verify that the door glass can be opened/closed smoothly.
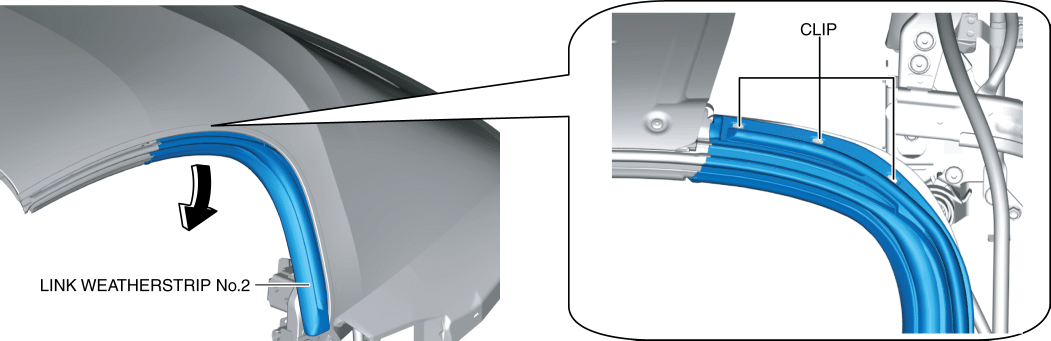
Link weatherstrip No.2 ajustment
1. Adjust the convertible top opening/closing position to the area where the fastener is visible as shown in the figure.
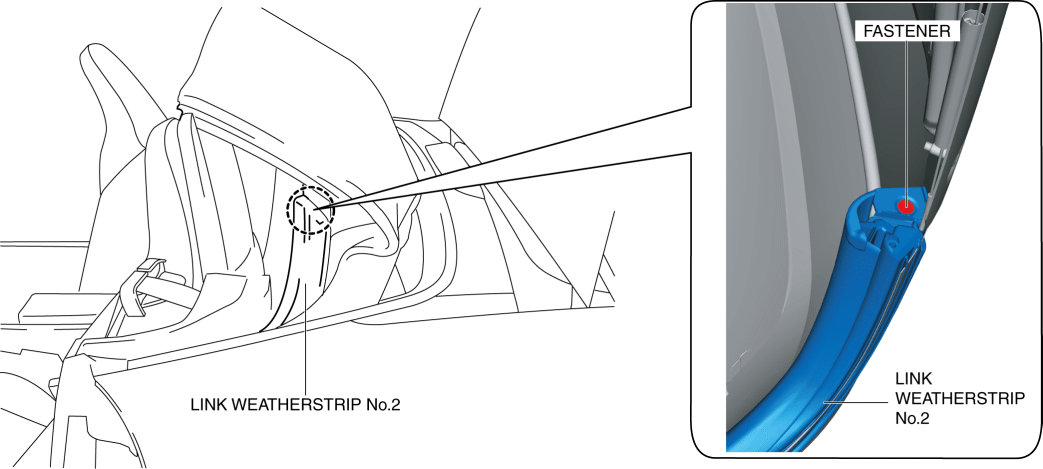
2. Remove the fastener.
3. Partially peel back link weatherstrip No.2 by pulling it in the direction of the arrow shown in the figure.
4. Loosen the retainer No.2 and retainer No.3 installation screws and adjust the retainer No.2 and retainer No.3 position.
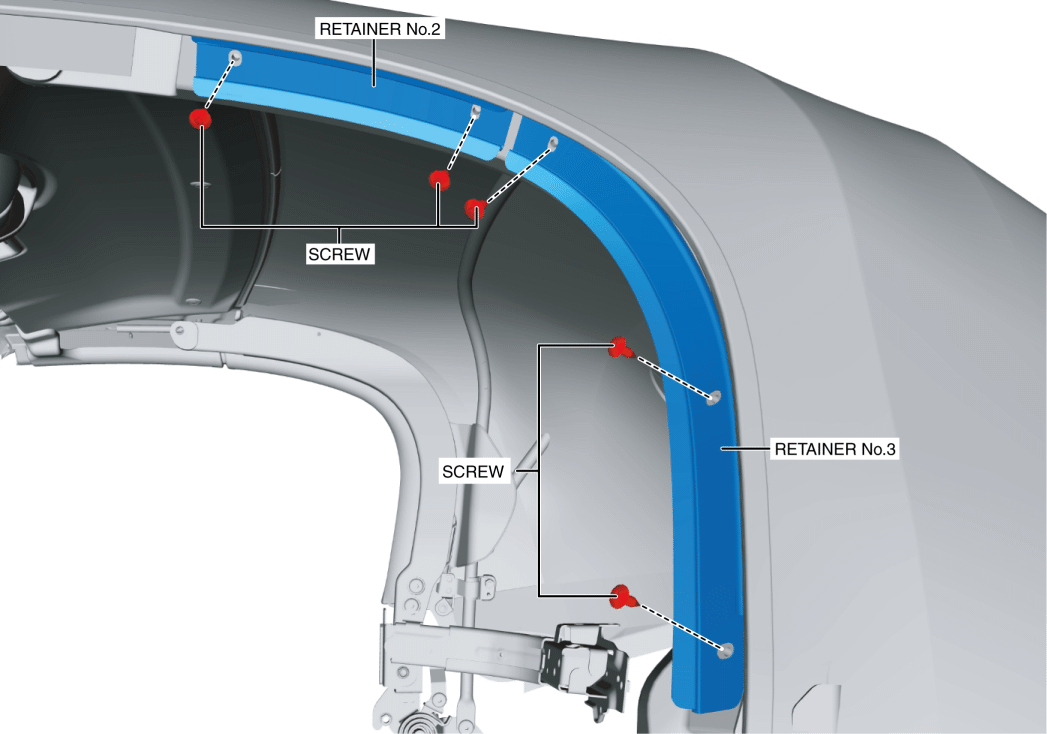
5. Tighten the retainer No.2 and retainer No.3 installation screws.
6. Install the link weatherstrip No.2.
7. Verify that the convertible top opens/closes smoothly.
8. Verify that the top lock can be secured/released smoothly.
9. Verify that the door glass can be opened/closed smoothly.