CONVERTIBLE TOP REMOVAL/INSTALLATION
2016 – MX-5 – Body and Accessories
CONVERTIBLE TOP REMOVAL/INSTALLATION
1. Disconnect the negative battery cable. (See NEGATIVE BATTERY CABLE DISCONNECTION/CONNECTION.)
2. Open the convertible top.
3. Remove the following parts:
a. Selector lever knob (AT) (See AUTOMATIC TRANSMISSION SHIFT MECHANISM REMOVAL/INSTALLATION.)
b. Shift lever knob (MT)
c. Shift panel assembly (See SHIFT PANEL REMOVAL/INSTALLATION.)
d. Upper panel (See UPPER PANEL REMOVAL/INSTALLATION.)
e. Parking brake lever boot panel(See PARKING BRAKE LEVER BOOT PANEL REMOVAL/INSTALLATION.)
f. Rear console (See REAR CONSOLE REMOVAL/INSTALLATION.)
g. Scuff plate (See SCUFF PLATE REMOVAL/INSTALLATION.)
h. Tire house trim (See TIRE HOUSE TRIM REMOVAL/INSTALLATION.)
i. Wind blocker (See WIND BLOCKER REMOVAL/INSTALLATION.)
j. Front seat back bar garnish (See SEAT BACK BAR GARNISH REMOVAL/INSTALLATION.)
k. Quarter trim (See QUARTER TRIM REMOVAL/INSTALLATION.)
l. Rear side trim (See REAR SIDE TRIM REMOVAL/INSTALLATION.)
m. Roof hook lever (See ROOF HOOK REMOVAL/INSTALLATION.)
n. Back trim (See BACK TRIM REMOVAL/INSTALLATION.)
4. Remove the seat belt retractor installation bolts and set aside the seat belt retractor. (See SEAT BELT REMOVAL/INSTALLATION.)
5. Remove the lock bracket. (See LOCK BRACKET REMOVAL/INSTALLATION.)
6. Remove the seat back crossmember assembly. (See SEAT BACK CROSSMEMBER ASSEMBLY REMOVAL/INSTALLATION.)
7. Partially peel back the cab-side weatherstrip in the direction of the arrow shown in the figure..

8. Close the convertible top and secure the top lock.
9. Remove the side shelf.(See SIDE SHELF REMOVAL/INSTALLATION.)
10. Remove the fasteners.
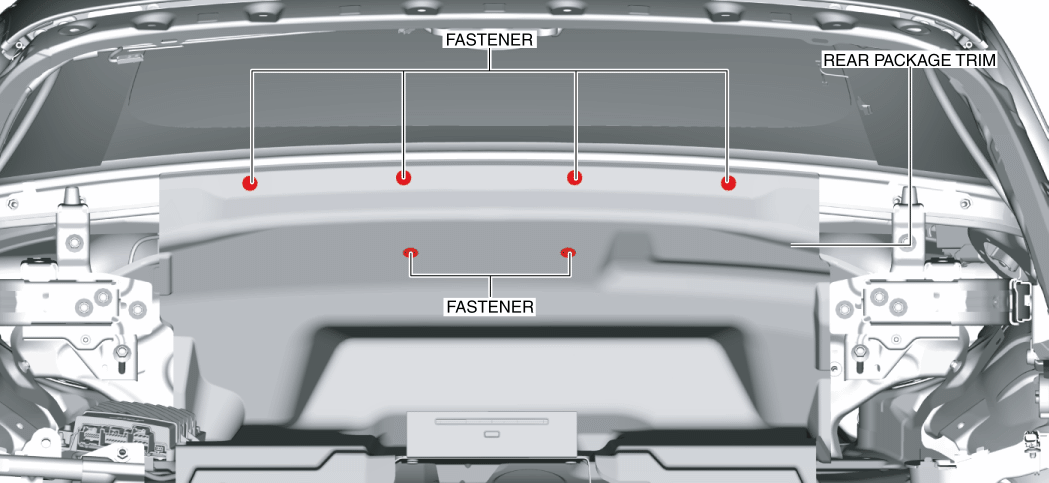
11. Partially peel back the rear package trim.
12. Disconnect the rear window defroster connector.
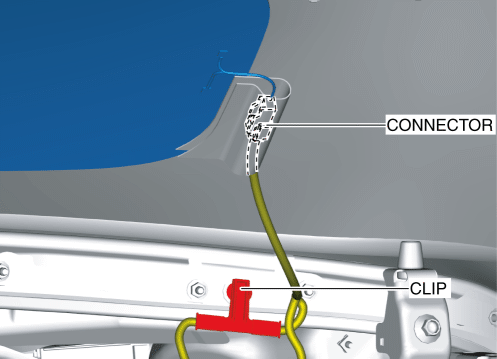
13. Remove the clip.
14. Remove the fasteners.
CAUTION:
-
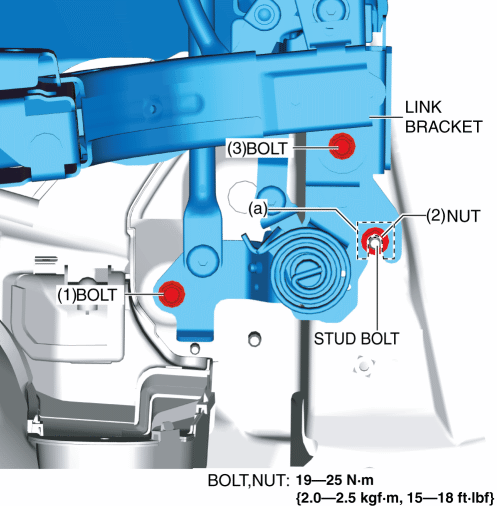
Cover the link bracket using a cloth before removing the top fabric installation nuts to prevent the rear window glass from contacting the link bracket and causing damage.

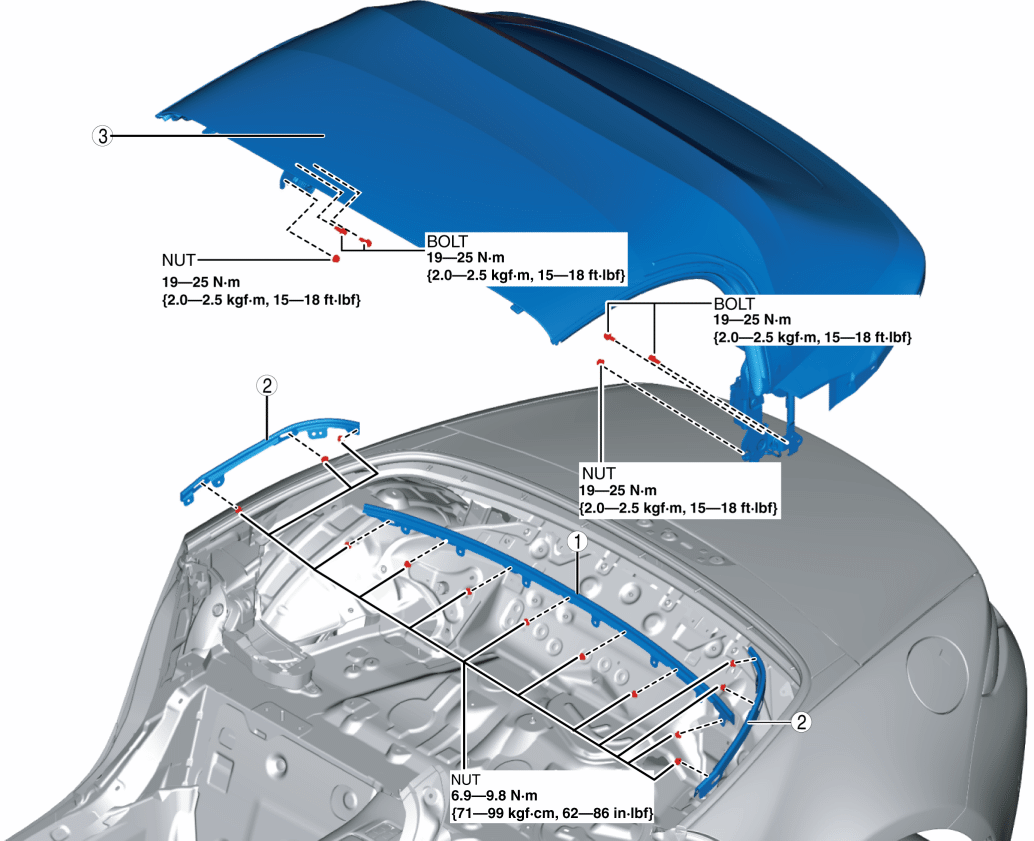
15. Remove in the order indicated in the table.
|
1 |
Center set plate |
|
2 |
Side set plate |
|
3 |
Convertible top |
16. Install in the reverse order of removal.(See Convertible Top Installation Note.)
Convertible Top Installation Note
-
Install the link bracket to the stud bolts with no gaps on the mating surfaces (a), then tighten the bolts and nut in the order shown in the figure.
-
When installing the top fabric and set plate, perform the following procedure.
-
Close the convertible top and secure the top lock.
-
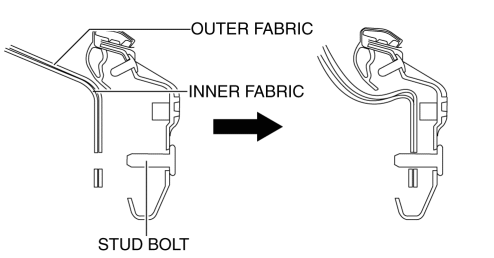
Align the hole of the top fabric with the stud bolt and press the top fabric in.(without inner fabric)

-
Align the hole of the top fabric and inner fabric with the stud bolt and press the top fabric in.(with inner cloth)
-
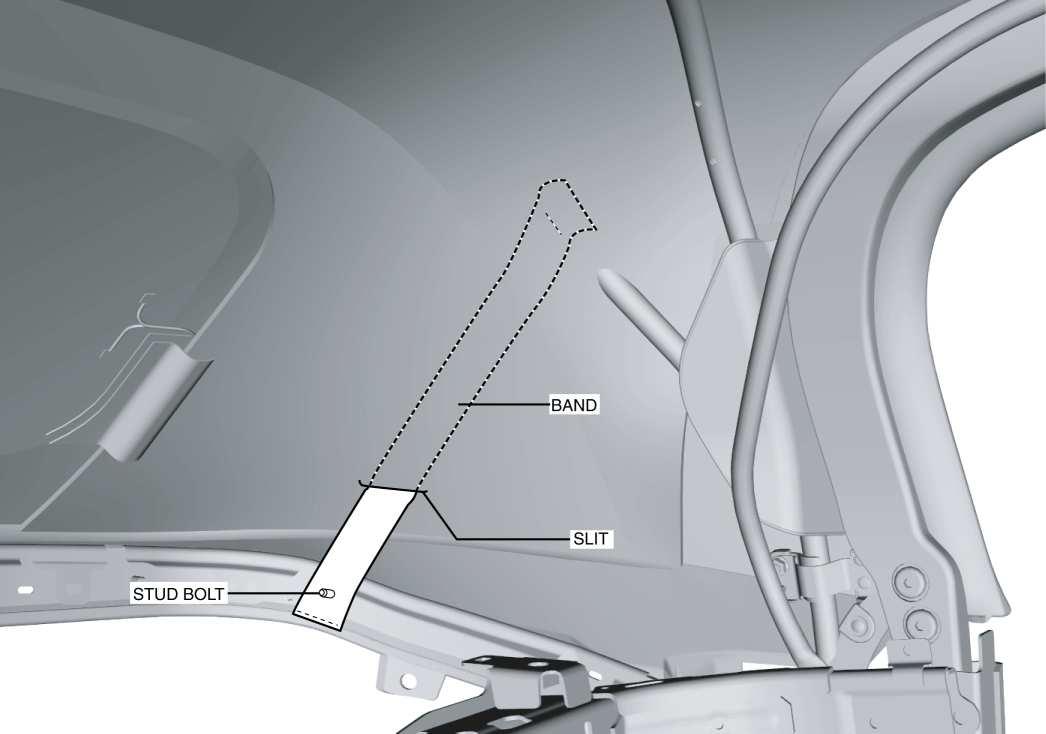
Pass the band through the slit of the inner fabric to the cabin side. (with inner fabric)
-
Align the hole of the band with the stud bolt and press the band in.
-
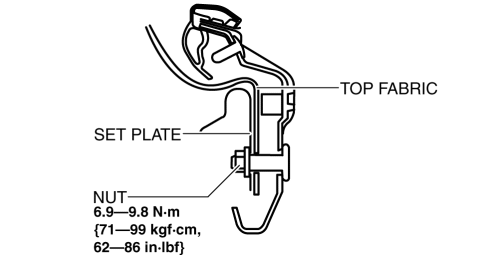
Install the set plate.
-
Install the nuts.
-
When installing the cab-side weatherstrip perform the following procedure:
-
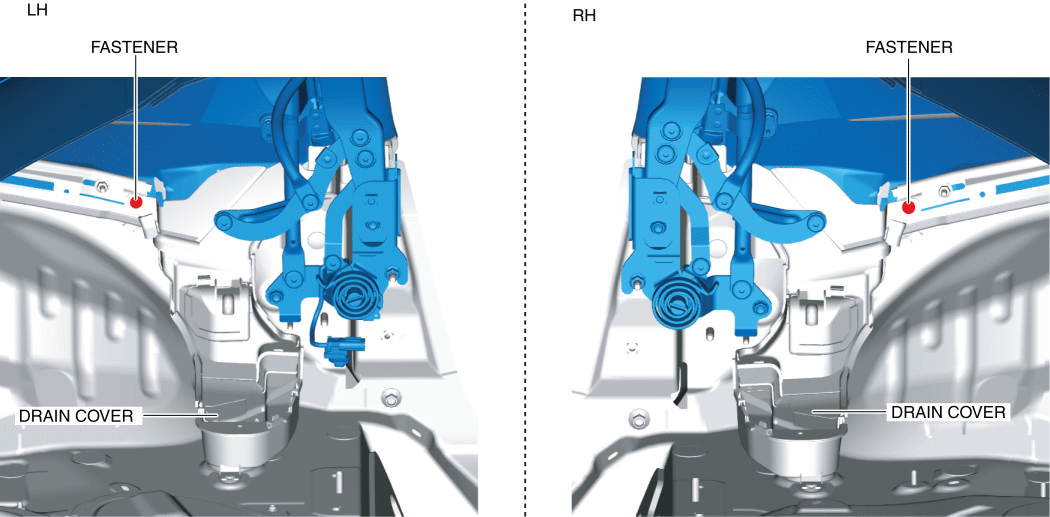
Insert the tab into the hole of the body.
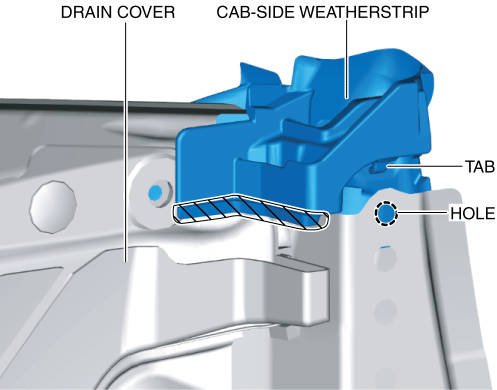
-
Insert the shaded area shown in the figure inside the drain cover.