SEAT BACK BAR GARNISH REMOVAL/INSTALLATION
< Previous Next >
2016 – MX-5 – Body and Accessories
SEAT BACK BAR GARNISH REMOVAL/INSTALLATION
Front
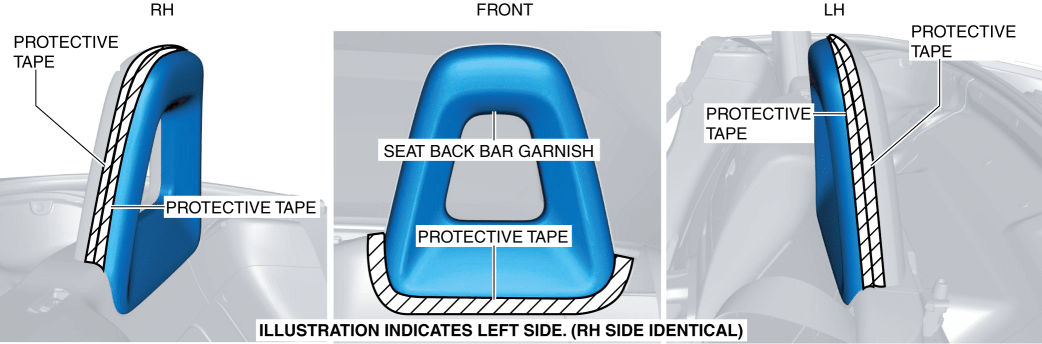
1. Affix protective tape to the shaded position shown in the figure.
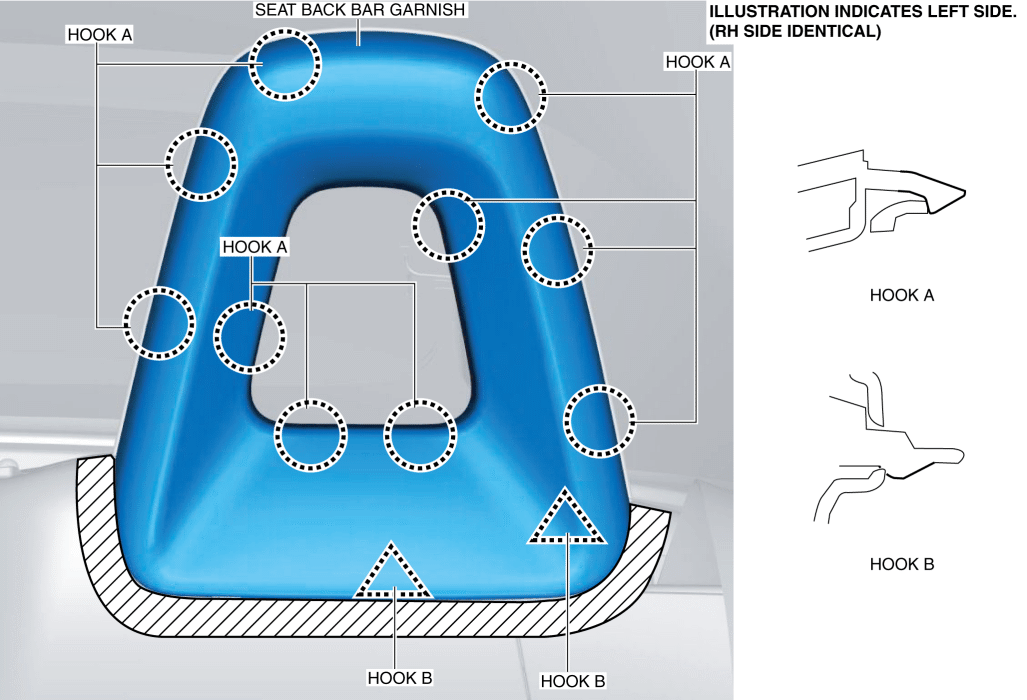
2. Insert the remover tool into the notch at the position shown in the figure.

3. Move the remover tool in the direction of the arrow shown in the figure and detach hooks A and B from the back trim.
4. Detach hooks A, B and C using the remover tool and remove the seat back bar garnish.
5. Install in the reverse order of removal.
Rear
1. Remove the front seat back bar garnish. (See Front.)
2. Remove the screw.
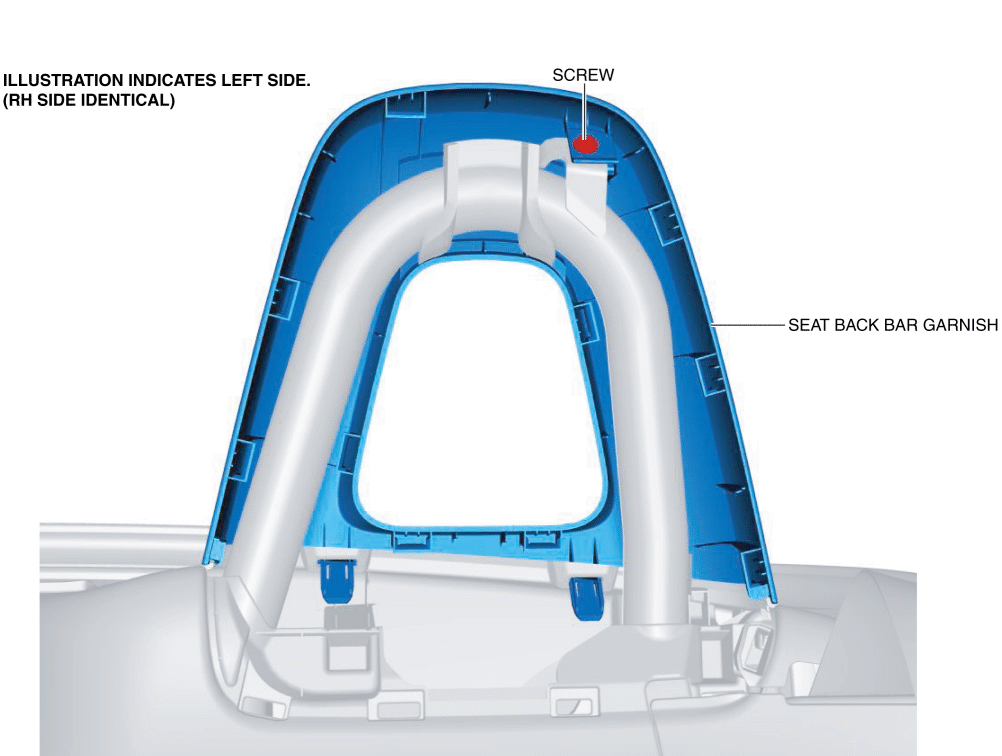
3. Move the seat back bar garnish in the direction of the arrow and remove it while detaching the hooks.

4. Install in the reverse order of removal.
© 2014 Mazda North American Operations, U.S.A.