IMMOBILIZER SYSTEM-RELATED PARTS PROGRAMMING
2016 – MX-5 – Body and Accessories
IMMOBILIZER SYSTEM-RELATED PARTS PROGRAMMING
Foreword
-
When replacing immobilizer system-related parts or programming an additional remote transmitter, or clearing a remote transmitter, program the immobilizer system-related parts so that the system operates normally. For immobilizer system-related parts programming, select the programming procedures according to the service. (See Selection of Procedure for Immobilizer System-Related Parts Programming.)
CAUTION:
-
The engine cannot be started if any step or procedure for each service operation is skipped. Perform all procedures in the order of the steps.
-
If any metallic or magnetic object is near the remote transmitter, communication between the remote transmitter and the vehicle may be obstructed, resulting in a failure to program the immobilizer system-related parts. Remove any metallic or magnetic objects, such as key holders, from the remote transmitter when programming immobilizer system-related parts.
-
If any of the following devices are inside the vehicle, programming of immobilizer system-related parts may fail. Do not bring any of the following devices or similar products inside the vehicle when programming immobilizer system-related parts.
-
M-MDS
-
Personal computer
-
Devices that can send/receive radio waves
-
If the engine is started during immobilizer system-related parts programming, the programming mode cancels. Therefore, do not start the engine unless indicated in the procedure. Repeat the procedure from the beginning if the engine is started during the immobilizer system-related parts programming.
-
If a remote transmitter is near the vehicle during immobilizer system-related parts programming, it may be programmed mistakenly. Keep the remote transmitter 1 m away from the vehicle unless indicated in the procedure.
-
The SSU in the procedure indicates the start stop unit. In addition, the advanced key indicates the remote transmitter.
NOTE:
-
Two or more remote transmitters must be programmed for the engine to start.
-
A maximum of six remote transmitters can be programmed to one vehicle.
-
The number of programmed key ID numbers can be verified using the M-MDS.
-
Do not select any screen menu other than the ones indicated in the procedure during M-MDS operation.
-
When programming the immobilizer system-related parts, the incode must be searched.
Selection of Procedure for Immobilizer System-Related Parts Programming
1. Verify that the ROOM fuse, AT fuse, and SRS2/ESCL fuse are installed.
2. Select the applicable programming procedure from the service content of the immobilizer system-related parts.
Immobilizer System-Related Parts Service and Programming Procedure Table
|
No. |
Service |
Programming procedure |
|
|
1 |
Additional remote transmitter programming |
Have remote transmitter that can start engine |
(See No.1 Additional Remote Transmitter Programming Procedure (Using the M-MDS).) |
|
2 |
Programming due to PCM replacement |
||
|
3 |
Start stop unit replacement and programming due to simultaneous replacement of start stop unit/PCM |
||
|
4 |
Remote transmitter replacement or clearing |
(See No.4 Remote transmitter replacement or remote transmitter clearing.) |
|
|
5 |
Additional remote transmitter programming |
There is no remote transmitter available that can start engine |
|
M-MDS Connecting Procedure
NOTE:
-
Do not place the M-MDS in the vehicle while programming the immobilizer system.
1. Fully lower the door glass.
2. Connect the M-MDS to the DLC-2.
3. Place the M-MDS outside the vehicle.
CAUTION:
-
Cover the vehicle body with a rag so as not to damage the vehicle body with the cable.
Procedure for communication between coil antenna and remote transmitter
-
While the push button start indicator light (green) is flashing, press the top part of the remote transmitter against the center of the push button start.
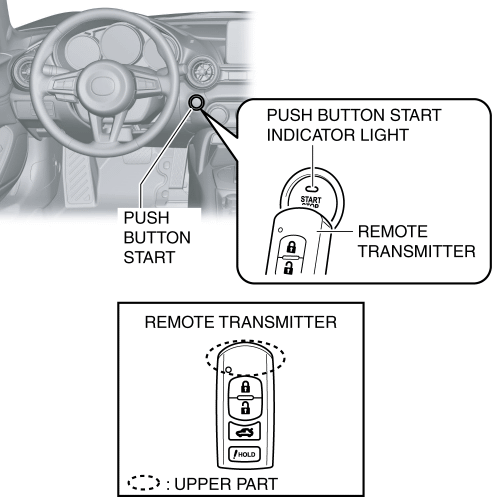
NOTE:
-
The coil antenna is integrated with the push button start.
-
No.1 Additional Remote Transmitter Programming Procedure (Using the M-MDS)
CAUTION:
-
The engine cannot be started if any step or procedure is skipped. Perform all procedures in the order of the steps.
-
Vehicle condition
-
There is a remote transmitter that can start the engine.
NOTE:
-
If a remote transmitter cannot be programmed, verify the number of programmed remote transmitter using the M-MDS.
-
Perform the DTC inspection for the start stop unit using the M-MDS.
Procedure
|
Step |
Procedure |
Action after procedure |
|
|
1 |
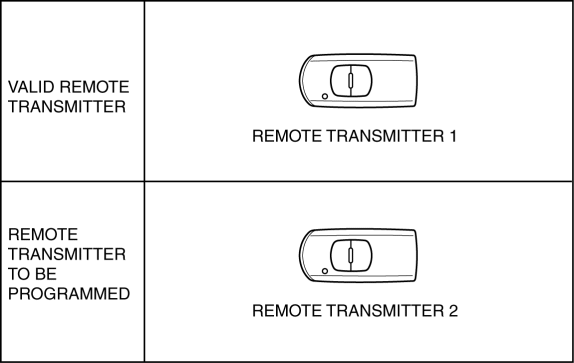
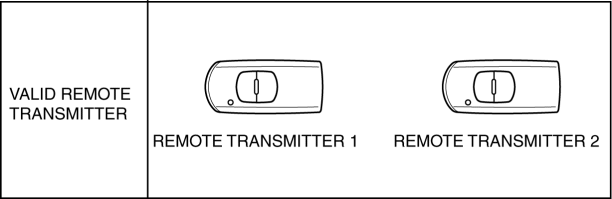
VERIFY THAT REMOTE TRANSMITTER WHICH CAN START ENGINE IS REMOTE TRANSMITTER 1
|
Go to the next step. |
|
|
2 |
PERFORM ADDITIONAL PROGRAMMING OF REMOTE TRANSMITTER 2
|
Yes |
Change the remote transmitter and repeat Step 2. |
|
No |
Switch the ignition off, then go to the next step. |
||
|
3 |
PERFORM IMMOBILIZER SYSTEM FUNCTION VERIFICATION
NOTE:
|
Yes |
Change the key and repeat Step 3. |
|
No |
Go to the next step. |
||
|
4 |
VERIFY THAT REMOTE TRANSMITTER IS PROGRAMMED
Place only the programmed remote transmitter on the passenger seat and verify that the engine can be started with the programmed key. |
Go to the next step. |
|
|
5 |
M-MDS COMPLETION
|
Procedure is completed. |
|
No.2 Programming Procedure After PCM Replacement
CAUTION:
-
The engine cannot be started if any step or procedure is skipped. Perform all procedures in the order of the steps.
-
Vehicle condition
-
There is a remote transmitter that can start the engine.
Procedure
|
Step |
Procedure |
Action after procedure |
|
|
1 |
REPLACE PCM
Refer to PCM REMOVAL/INSTALLATION to perform PCM replacement. |
Go to the next step. |
|
|
2 |
PERFORM PARAMETER RESET
|
Go to the next step. |
|
|
3 |
M-MDS COMPLETION
|
Go to the next step. |
|
|
4 |
PERFORM IMMOBILIZER SYSTEM FUNCTION VERIFICATION
|
Yes |
Change the key and repeat Step 4. |
|
No |
Go to the next step. |
||
|
5 |
VERIFY PARAMETER RESET IS COMPLETED
NOTE:
|
Yes |
Procedure is completed. |
|
No |
Perform the related DTC inspection to repair the malfunctioning part. |
||
No.3 Start stop unit replacement and programming procedure due to simultaneous replacement of start stop unit/PCM
CAUTION:
-
The engine cannot be started if any step or procedure is skipped. Perform all procedures in the order of the steps.
-
Because it is necessary to program two or more remote transmitters to the immobilizer system-related parts to start the engine, perform the remote transmitter programming after clearing the remote transmitter.
NOTE:
-
Before beginning the procedure, verify that the customer has provided all of the remote transmitters for the vehicle.
-
The engine cannot be started unless two or more remote transmitters are programmed after the replacement.
-
Vehicle condition
-
Have two or more remote transmitters to be programmed after the replacement.
Procedure
|
Step |
Procedure |
Action after procedure |
|
|
1 |
REPLACE START STOP UNIT AND REPLACE START STOP UNIT/PCM SIMULTANEOUSLY
Refer to START STOP UNIT REMOVAL/INSTALLATION to perform start stop unit replacement. (See START STOP UNIT REMOVAL/INSTALLATION.) Refer to PCM REMOVAL/INSTALLATION to perform PCM replacement. |
Go to the next step. |
|
|
2 |
PERFORM PARAMETER RESET
|
Go to the next step. |
|
|
3 |
PERFORM KEY ID NUMBER CLEARING
|
Go to the next step. |
|
|
4 |
PERFORM REMOTE TRANSMITTER 1 PROGRAMMING
|
Switch the ignition off, then go to the next step. |
|
|
5 |
PERFORM REMOTE TRANSMITTER 2 PROGRAMMING
|
Yes |
If other remote transmitters are programmed, repeat Step 5. |
|
No |
Go to the next step. |
||
|
6 |
M-MDS COMPLETION
|
Go to the next step. |
|
|
7 |
PERFORM IMMOBILIZER SYSTEM FUNCTION VERIFICATION (REMOTE TRANSMITTER 1)
NOTE:
|
Switch the ignition off, then go to the next step. |
|
|
8 |
PERFORM IMMOBILIZER SYSTEM FUNCTION VERIFICATION (REMOTE TRANSMITTER 2)
NOTE:
|
Yes |
If there are other remote transmitters to be programmed, repeat Step 7. |
|
No |
Go to the next step. |
||
|
9 |
VERIFY THAT REMOTE TRANSMITTER IS PROGRAMMED
NOTE:
|
Yes |
Procedure is completed. |
|
No |
Perform the related DTC inspection to repair the malfunctioning part. |
||
No.4 Remote transmitter replacement or remote transmitter clearing
CAUTION:
-
The engine cannot be started if any step or procedure is skipped. Perform all procedures in the order of the steps.
-
Because it is necessary to program two or more remote transmitters to the immobilizer system-related parts to start the engine, perform the remote transmitter programming after clearing the remote transmitter.
-
Vehicle condition
-
Have two remote transmitters to be programmed.
Procedure
|
Step |
Procedure |
Action after procedure |
|
|
1 |
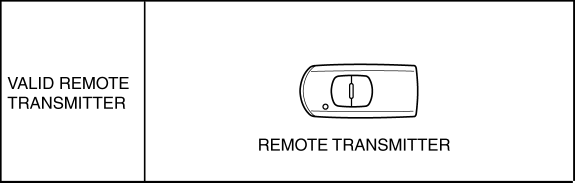
PERFORM KEY ID NUMBER CLEARING
|
Switch the ignition off, then go to the next step. |
|
|
2 |
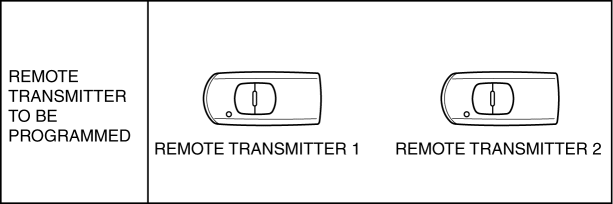
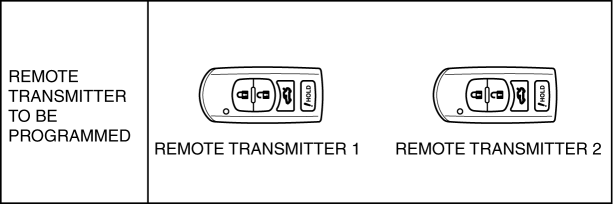
PERFORM REMOTE TRANSMITTER 1 PROGRAMMING
|
Switch the ignition off, then go to the next step. |
|
|
3 |
PERFORM REMOTE TRANSMITTER 2 PROGRAMMING
|
Yes |
Change the key and repeat Step 3. |
|
No |
Go to the next step. |
||
|
4 |
M-MDS COMPLETION
|
Go to the next step. |
|
|
5 |
PERFORM IMMOBILIZER SYSTEM FUNCTION VERIFICATION (REMOTE TRANSMITTER 1)
NOTE:
|
Switch the ignition off, then go to the next step. |
|
|
6 |
PERFORM IMMOBILIZER SYSTEM FUNCTION VERIFICATION (REMOTE TRANSMITTER 2)
NOTE:
|
Yes |
If there are other remote transmitters to be programmed, repeat Step 5. |
|
No |
Go to the next step. |
||
|
7 |
VERIFY THAT REMOTE TRANSMITTER IS PROGRAMMED
NOTE:
|
Yes |
Procedure is completed. |
|
No |
Perform the related DTC inspection to repair the malfunctioning part. |
||
No.5 Additional Remote Transmitter Programming Procedure (If there is no remote transmitter available that can start engine) (Using M-MDS)
CAUTION:
-
The engine cannot be started if any step or procedure is skipped. Perform all procedures in the order of the steps.
-
Because it is necessary to program two or more remote transmitters to the immobilizer system-related parts to start the engine, perform the programming of two or more remote transmitters.
NOTE:
-
Perform the DTC inspection for the start stop unit using the M-MDS.
-
Vehicle condition
-
Have two remote transmitters to be programmed.
Procedure
|
Step |
Procedure |
Action after procedure |
|
|
1 |
PERFORM KEY ID NUMBER CLEARING
|
Switch the ignition off, then go to the next step. |
|
|
2 |
PERFORM REMOTE TRANSMITTER 1 PROGRAMMING
CAUTION:
|
Switch the ignition off, then go to the next step. |
|
|
3 |
PERFORM REMOTE TRANSMITTER 2 PROGRAMMING
CAUTION:
|
Yes |
Change the key and repeat Step 3. |
|
No |
Go to the next step. |
||
|
4 |
M-MDS COMPLETION
|
Go to the next step. |
|
|
5 |
PERFORM IMMOBILIZER SYSTEM FUNCTION VERIFICATION (REMOTE TRANSMITTER 1)
NOTE:
|
Switch the ignition off, then go to the next step. |
|
|
6 |
PERFORM IMMOBILIZER SYSTEM FUNCTION VERIFICATION (REMOTE TRANSMITTER 2)
NOTE:
|
Yes |
If there are other remote transmitters to be programmed, repeat Step 5. |
|
No |
Go to the next step. |
||
|
7 |
VERIFY THAT REMOTE TRANSMITTER IS PROGRAMMED
NOTE:
|
Yes |
Procedure is completed. |
|
No |
Perform the related DTC inspection to repair the malfunctioning part. |
||