DTC U3004:16 [START STOP UNIT]
2016 – MX-5 – Body and Accessories
DTC U3004:16 [START STOP UNIT]
|
Description |
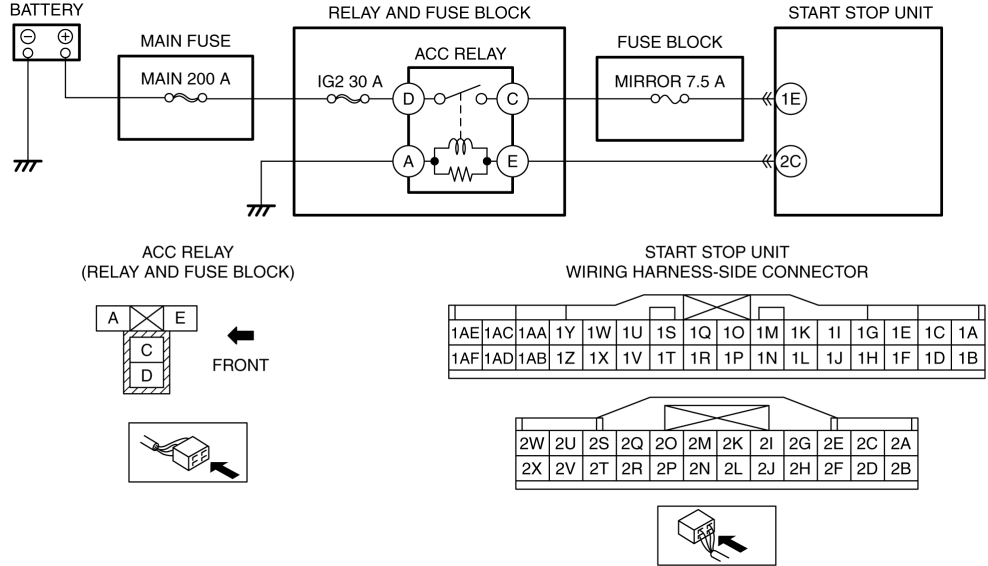
ACC relay circuit malfunction |
|
Detection condition |
|
|
Fail-safe |
Not applicable |
|
Possible cause |
|
|
|
|
Diagnostic Procedure
|
Step |
Inspection |
Action |
|
|
1 |
INSPECT ACC RELAY
|
Yes |
Go to the next step. |
|
No |
Replace the ACC relay, then go to Step 6. (See RELAY LOCATION.) |
||
|
2 |
INSPECT ACC RELAY CIRCUIT FOR OPEN CIRCUIT OR SHORT TO GROUND
|
Yes |
Go to the next step. |
|
No |
Inspect the IG2 30 A and MAIN 200 A fuse.
Go to Step 6. |
||
|
3 |
INSPECT START STOP UNIT CONNECTOR CONDITION
|
Yes |
Go to the next step. |
|
No |
Repair or replace the connector, then go to Step 6. |
||
|
4 |
INSPECT ACC RELAY CIRCUIT FOR SHORT TO GROUND
|
Yes |
Inspect the MIRROR 7.5 A fuse.
Go to Step 6. |
|
No |
Go to the next step. |
||
|
5 |
INSPECT ACC RELAY CIRCUIT FOR OPEN CIRCUIT
|
Yes |
Go to the next step. |
|
No |
Inspect the MIRROR 7.5 A fuse.
Go to the next step. |
||
|
6 |
VERIFY THAT REPAIRS HAVE BEEN COMPLETED
|
Yes |
Repeat the inspection from Step 1.
Go to the next step. |
|
No |
Go to the next step. |
||
|
7 |
VERIFY IF OTHER DTCs DISPLAYED
|
Yes |
Repair or replace the malfunctioning part according to the applicable DTC troubleshooting. (See DTC TABLE [START STOP UNIT].) |
|
No |
DTC troubleshooting completed. |
||