REAR BUMPER REMOVAL
2016 – MX-5 – Body and Accessories
REAR BUMPER REMOVAL
1. Disconnect the negative battery cable. (See NEGATIVE BATTERY CABLE DISCONNECTION/CONNECTION.)
2. Remove the trunk end trim. (See TRUNK END TRIM REMOVAL/INSTALLATION.)
3. Partially peel back the trunk side trim. (See TRUNK SIDE TRIM REMOVAL/INSTALLATION.)
4. Remove the following parts:
a. Rear combination light (See REAR COMBINATION LIGHT REMOVAL/INSTALLATION.)
b. Rear splash shield (See REAR SPLASH SHIELD REMOVAL/INSTALLATION.)
c. Rear bumper stay (See REAR BUMPER STAY REMOVAL/INSTALLATION.)
d. Rear bumper retainer No.1 (See REAR BUMPER RETAINER No.1 REMOVAL/INSTALLATION.)
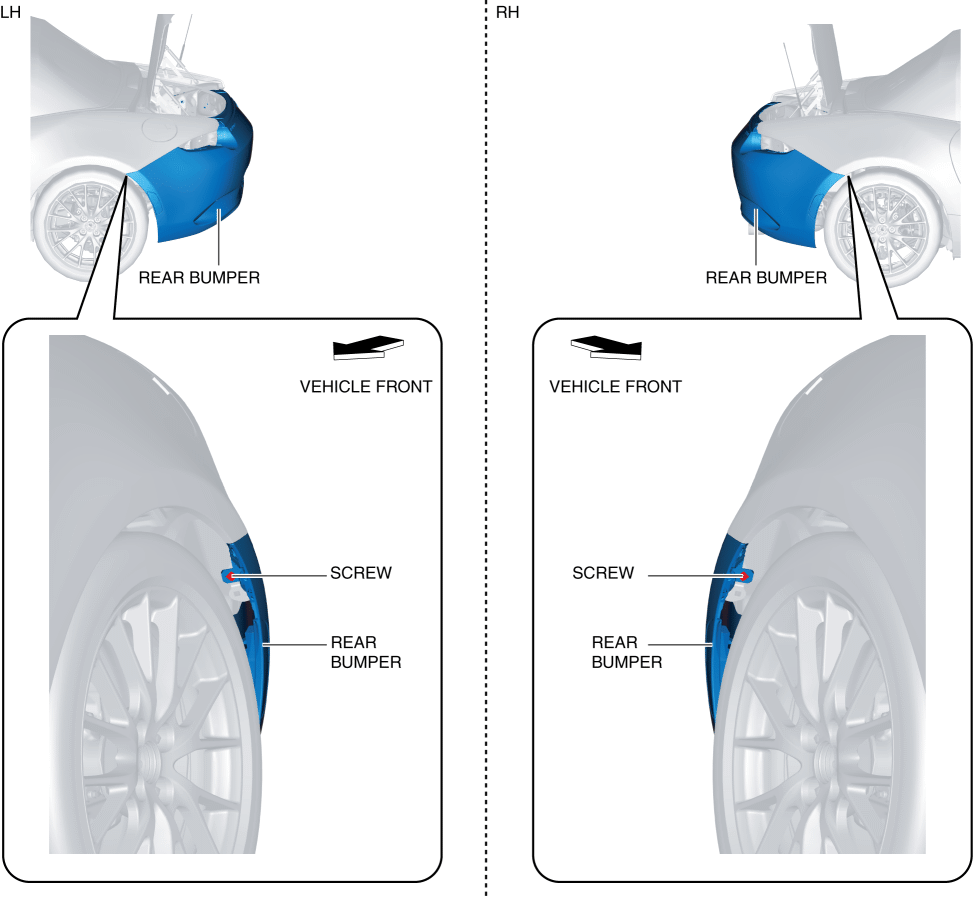
5. Remove the screws.
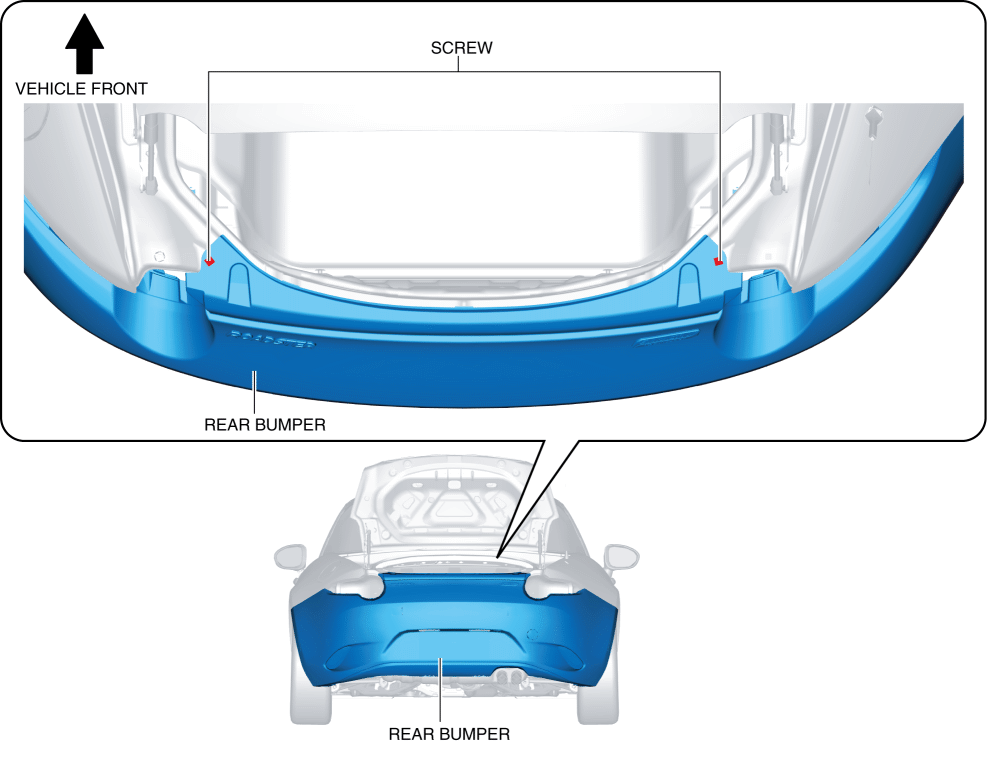
6. Remove the screws.
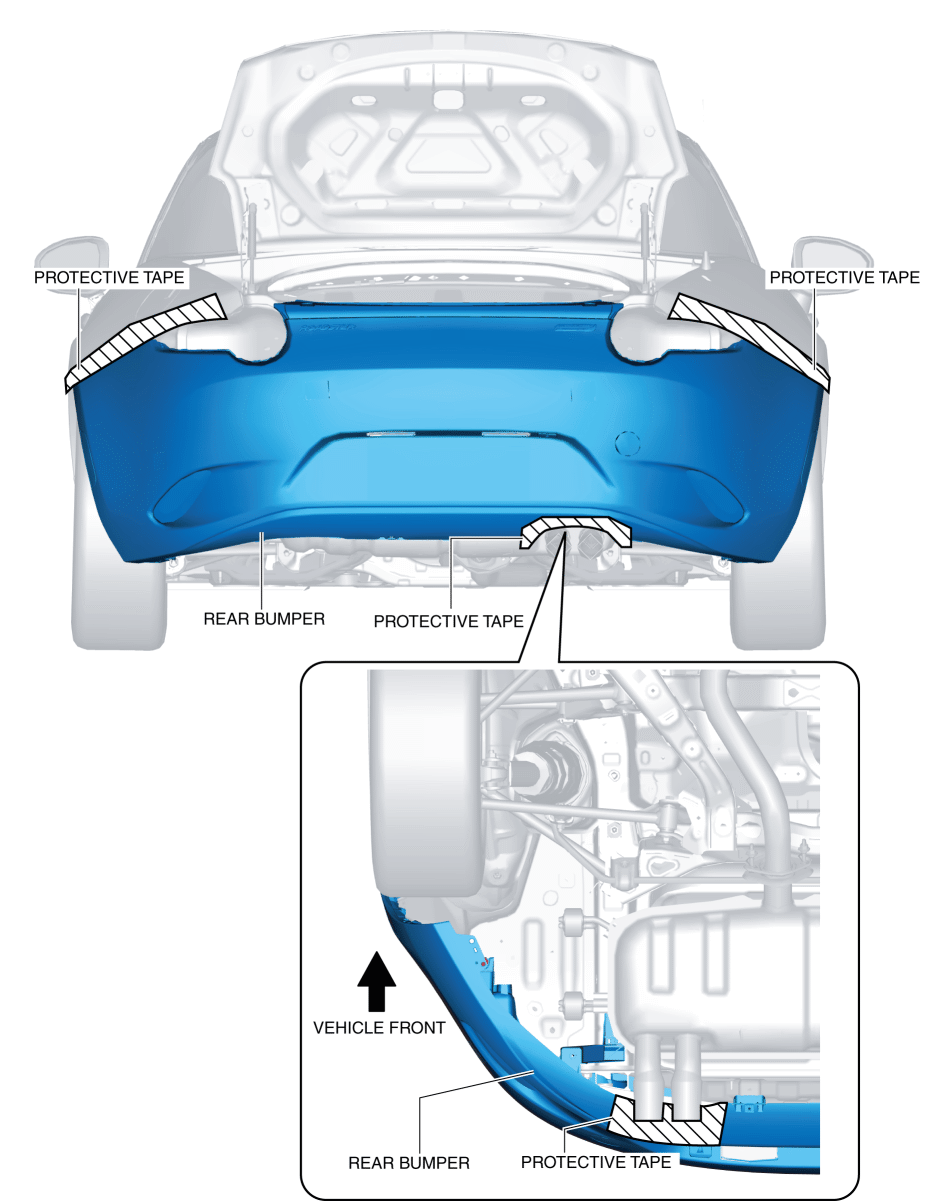
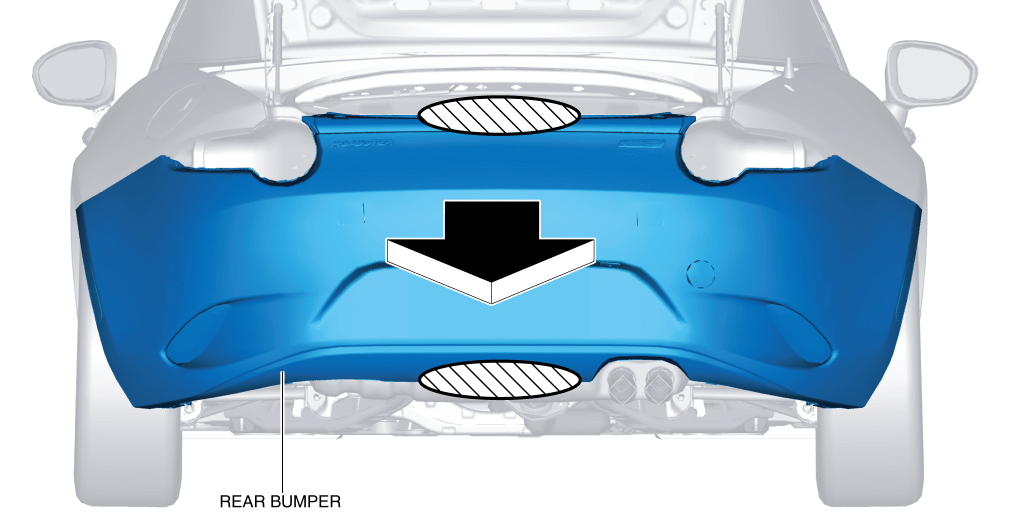
7. To prevent scratches or damage, apply protective tape to the positions shown in the figure.
CAUTION:
-
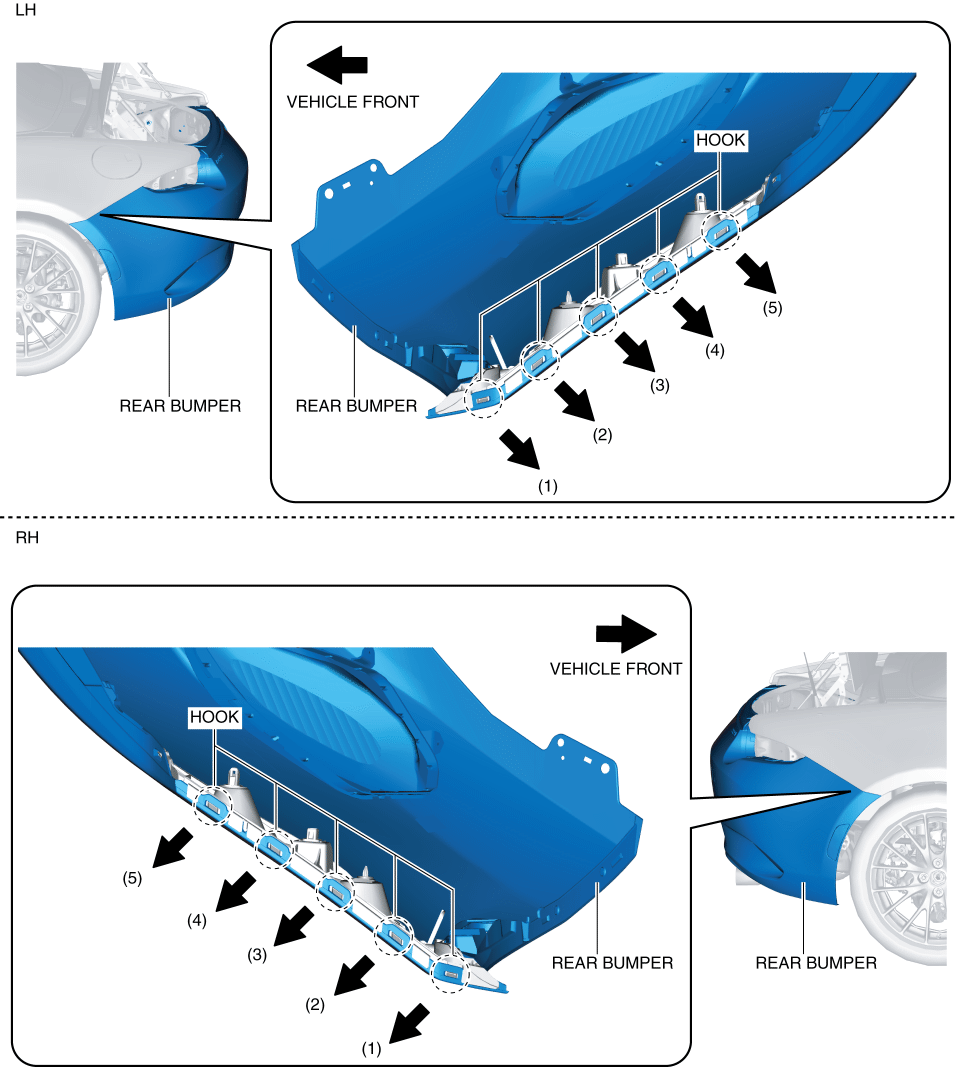
If the rear bumper hooks are detached from the rear bumper slider without supporting the rear bumper, it may fall off and be damaged. Detach the rear bumper hooks from the rear bumper slider using two people, one person supports the rear bumper.
-
Carefully remove the rear bumper from the rear bumper slider. If the rear bumper hooks are detached from the rear bumper slider with excessive force, the rear bumper hook may be damaged because the rear bumper hooks and the rear bumper slider are engaged firmly.
8. Pull the rear bumper in the direction of the arrows shown in the figure, and detach the rear bumper hooks from the rear bumper slider.
9. Hold the shaded areas shown in the figure, pull the rear bumper in the direction of the arrow, and detach the rear bumper from the body and the rear bumper bracket.
10. Disconnect the connectors.
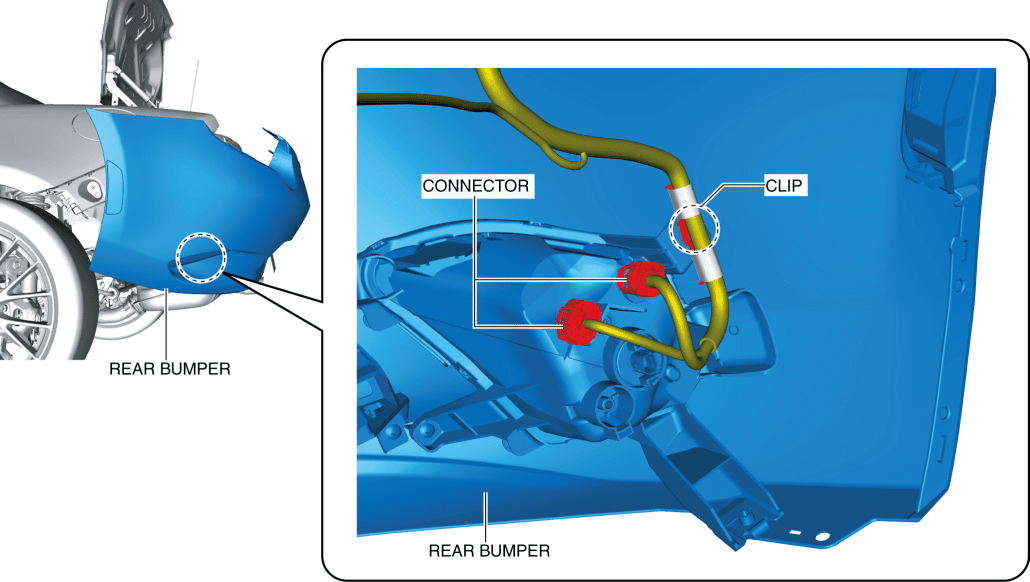
11. Remove the wiring harness clip.
12. Remove the rear bumper.