AUDIO AMPLIFIER REMOVAL/INSTALLATION
2016 – MX-5 – Body and Accessories
AUDIO AMPLIFIER REMOVAL/INSTALLATION
1. Disconnect the negative battery cable. (See NEGATIVE BATTERY CABLE DISCONNECTION/CONNECTION.)
2. Remove the following parts:
a. Seat (RH) (See SEAT REMOVAL/INSTALLATION.)
b. Scuff plate (RH) (See SCUFF PLATE REMOVAL/INSTALLATION.)
c. Tire house trim (RH) (See TIRE HOUSE TRIM REMOVAL/INSTALLATION.)
d. Wind blocker (See WIND BLOCKER REMOVAL/INSTALLATION.)
e. Side shelf (RH) (See SIDE SHELF REMOVAL/INSTALLATION.)
3. Disconnect the connectors.
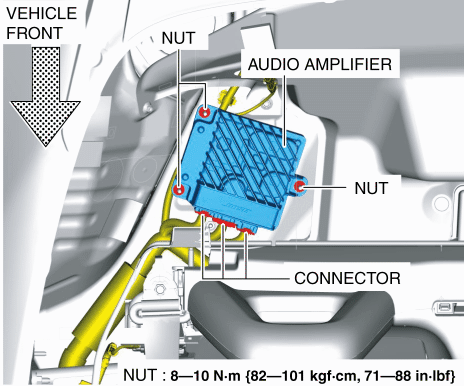
4. Remove the nuts.
5. Remove the audio amplifier.
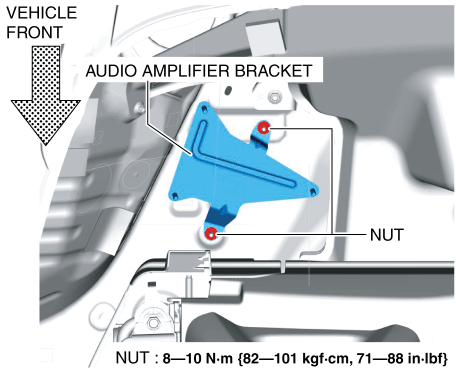
6. To remove the audio amplifier bracket, remove the nuts and then remove the audio amplifier bracket.
7. Install in the reverse order of removal.