DIAGNOSTIC ASSIST FUNCTION [AUDIO UNIT]
2016 – MX-5 – Body and Accessories
DIAGNOSTIC ASSIST FUNCTION [AUDIO UNIT]
LCD Inspection
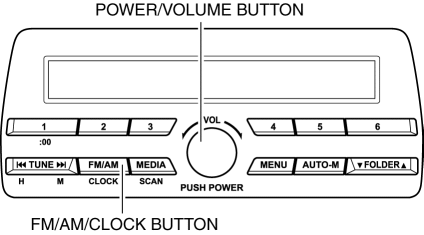
1. Switch the ignition to ACC or ON (engine off or on).
2. Turn the audio unit power on.
3. While pressing the POWER/VOLUME button, press the TUNE button (up) for 0.5 s or more.
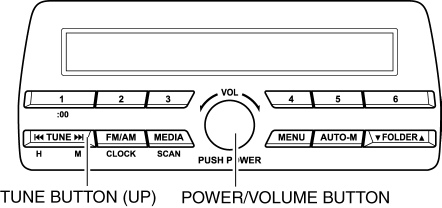
4. Inspect according to the following table:
|
Inspection |
Display |
Action |
|
|
Appended figure |
Yes |
Replace the audio unit. |
|
No |
Display is normal. |
||
Appended figure

5. Switch the audio unit power supply off or switch the ignition off to end the diagnostic assist function.
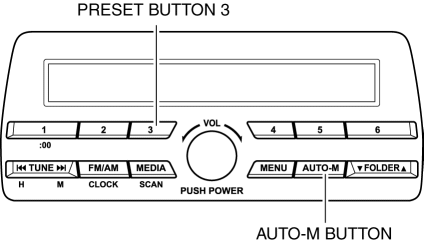
Button Inspection
1. Switch the ignition to ACC or ON (engine off or on).
2. Turn the audio unit power on.
3. While pressing the POWER/VOLUME button, press the Preset button 3 for 0.5 s or more.
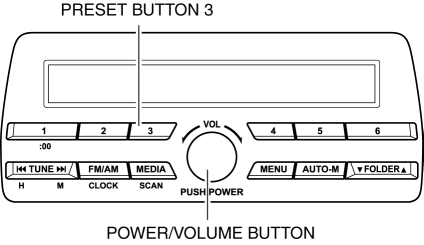
4. Inspect according to the following table:
|
Inspection |
Display |
Action |
|
|
― |
Yes |
All of the buttons are normal. |
|
No |
Replace the audio unit. |
||
5. Switch the audio unit power supply off or switch the ignition off to end the diagnostic assist function.
Speaker Inspection
1. Switch the ignition to ACC or ON (engine off or on).
2. Turn the audio unit power on.
3. While pressing the POWER/VOLUME button, press the AUTO-M button for 0.5 s or more.
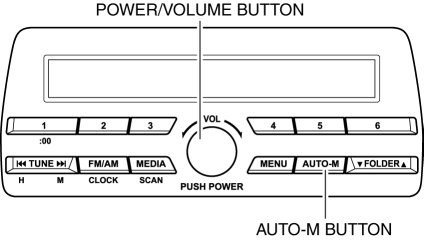
4. Inspect according to the following table:
|
Inspection |
Display |
Action |
|
|
― |
Yes |
The speakers and the wiring harness between the audio unit and speakers are normal. |
|
No |
Refer to the symptom troubleshooting. (See NO SOUND OUTPUT IN ALL MODES [ENTERTAINMENT SYSTEM [WITHOUT CENTER DISPLAY]].) |
||
5. Switch the audio unit power supply off or switch the ignition off to end the diagnostic assist function.
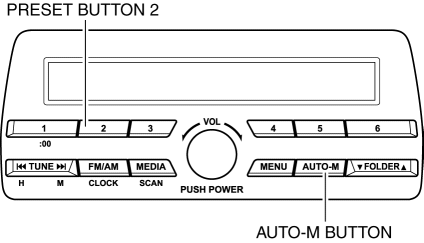
Radio Reception Condition Inspection
1. Switch the ignition to ACC or ON (engine off or on).
2. Turn the audio unit power on.
3. Tune in the radio.
4. While pressing the POWER/VOLUME button, press the Preset button 2 for 0.5 s or more.
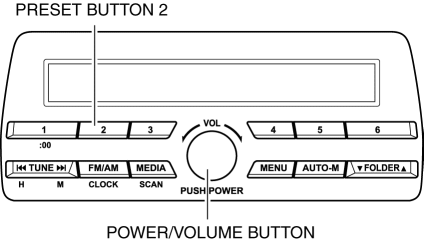
5. Inspect according to the following table:
CAUTION:
-
Even if the system is normal, radio reception may be difficult depending on where the system is inspected (indoors/outdoors, or conditions at the location). Before inspecting the system, verify that radio reception is adequate.
-
When performing the inspection, select the best area for receiving radio frequencies.
|
Inspection |
Display |
Action |
|
Verify the displayed screen. |
LEV 10 ― LEV 5 |
Radio reception condition is normal
Rod antenna, antenna feeder, and audio unit are normal. |
|
LEV 4 ― LEV 3 |
Radio reception condition is unstable
Change frequencies and re-perform the inspection. |
|
|
LEV 2 ― LEV 0 |
Radio reception is poor or not receivable
Inspect the rod antenna and antenna feeder. (See ROD ANTENNA INSPECTION.) (See ANTENNA FEEDER NO.1 INSPECTION.) (See ANTENNA FEEDER NO.2 INSPECTION.)
|
6. Switch the audio unit power supply off or switch the ignition off to end the diagnostic assist function.
Antenna Control Inspection
1. Switch the ignition to ACC or ON (engine off or on).
2. Turn the audio unit power on.
3. While pressing the POWER/VOLUME button, press the FM/AM/CLOCK button for 0.5 s or more.
4. Inspect according to the following table:
|
Inspection |
Display |
Action |
|
|
ANT―ON |
Good sound quality |
System is normal. |
|
Bad sound quality |
Inspect the rod antenna and antenna feeder. (See ROD ANTENNA INSPECTION.) (See ANTENNA FEEDER NO.1 INSPECTION.) (See ANTENNA FEEDER NO.2 INSPECTION.)
|
||
|
ANT―OFF |
Replace the audio unit. |
||
5. Switch the audio unit power supply off or switch the ignition off to end the diagnostic assist function.
Dial Inspection
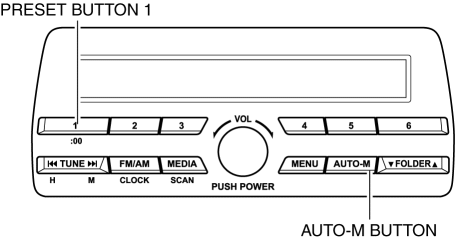
1. Switch the ignition to ACC or ON (engine off or on).
2. Turn the audio unit power on.
3. While pressing the AUTO-M button, press the Preset button 1 for 3 s or more.
4. Inspect according to the following table:
|
Inspection |
Display |
Action |
|
|
→ ← |
Yes |
System is normal. |
|
No |
Replace the audio unit. |
||
5. Switch the audio unit power supply off or switch the ignition off to end the diagnostic assist function.
Audio Amplifier Specification Verification
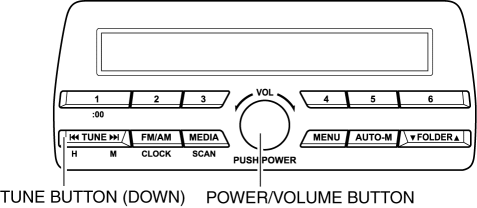
1. Switch the ignition to ACC or ON (engine off or on).
2. Turn the audio unit power on.
3. While pressing the POWER/VOLUME button, press the TUNE button (down) for 3 s or more.
4. Inspect according to the following table:
|
Inspection |
Display |
Action |
|
|
|
Yes |
System is normal. |
|
No |
Replace the audio unit. |
||
5. Switch the audio unit power supply off or switch the ignition off to end the diagnostic assist function.
CD Inspection
NOTE:
-
To perform this diagnostic assist function, it is necessary for vehicles with the CD player and the audio unit to recognize that the CD player is connected.
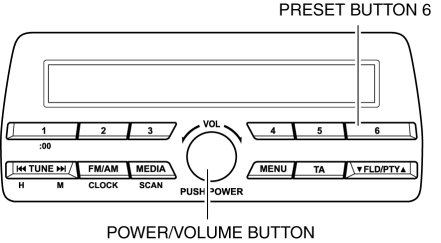
1. Switch the ignition to ACC or ON (engine off or on).
2. Turn the audio unit power on.
3. While pressing the POWER/VOLUME button, press the Preset button 6 for 3 s or more.
4. Verify that LOAD NEWDISC is displayed and insert a CD.
NOTE:
-
If TEST REJECTED is displayed, return to the normal mode because an on-market installed CD player cannot transition to the CD troubleshooting mode.
5. CHECKING is displayed and enters troubleshooting status.
6. Inspect according to the following table:
|
Inspection |
Display |
Action |
|
Verify the displayed screen. |
CD DEFECTIVE |
System is normal.
|
|
DRIVE FAILURE |
Replace the CD player. |
7. Switch the audio unit power supply off or switch the ignition off to end the diagnostic assist function.
Hands-free Password Clearing
NOTE:
-
To perform this diagnostic assist function, it is necessary for vehicles with the Bluetooth® unit and the audio unit to recognize that the Bluetooth® unit is connected.
1. Switch the ignition to ACC or ON (engine off or on).
2. While pressing AUTO-M button, press the Preset button 2 for 3 s or more.
3. “Cleared” is indicated in the display, and verify that the password is cleared.
4. Switch the ignition off to end the diagnostic assist function.
CD Part Number Verification
NOTE:
-
To perform this diagnostic assist function, it is necessary for vehicles with the CD player and the audio unit to recognize that the CD player is connected.
1. Switch the ignition to ACC or ON (engine off or on).
2. While pressing the AUTO-M button, press the Preset button 3 for 3 s or more.
NOTE:
-
The CD part number is displayed in the audio unit display.
3. Switch the audio unit power supply on/off or switch the ignition off to end the diagnostic assist function.