CONDENSER REMOVAL/INSTALLATION
2016 – MX-5 – HVAC
CONDENSER REMOVAL/INSTALLATION
1. Disconnect the negative battery cable. (See NEGATIVE BATTERY CABLE DISCONNECTION/CONNECTION.)
2. Discharge the refrigerant from the system. (See REFRIGERANT RECOVERY.) (See REFRIGERANT CHARGING.)
3. Remove the following parts:
a. Coolant reserve tank (See COOLANT RESERVE TANK REMOVAL/INSTALLATION [SKYACTIV-G 2.0].)
b. Air cleaner, air hose and resonance chamber No.1 as a single unit (See INTAKE-AIR SYSTEM REMOVAL/INSTALLATION [SKYACTIV-G 2.0].)
c. Battery and battery tray (See BATTERY REMOVAL/INSTALLATION [SKYACTIV-G 2.0].)
d. Front under cover (See FRONT UNDER COVER REMOVAL/INSTALLATION.)
e. Front tire (See GENERAL PROCEDURES (SUSPENSION).)
f. Front mudguard No.1 (See FRONT MUDGUARD REMOVAL/INSTALLATION.)
g. Front splash shield No.2 (See FRONT SPLASH SHIELD No.2 REMOVAL/INSTALLATION.)
4. Drain the engine coolant. (See ENGINE COOLANT REPLACEMENT [SKYACTIV-G 2.0].)
5. Remove the bolt.
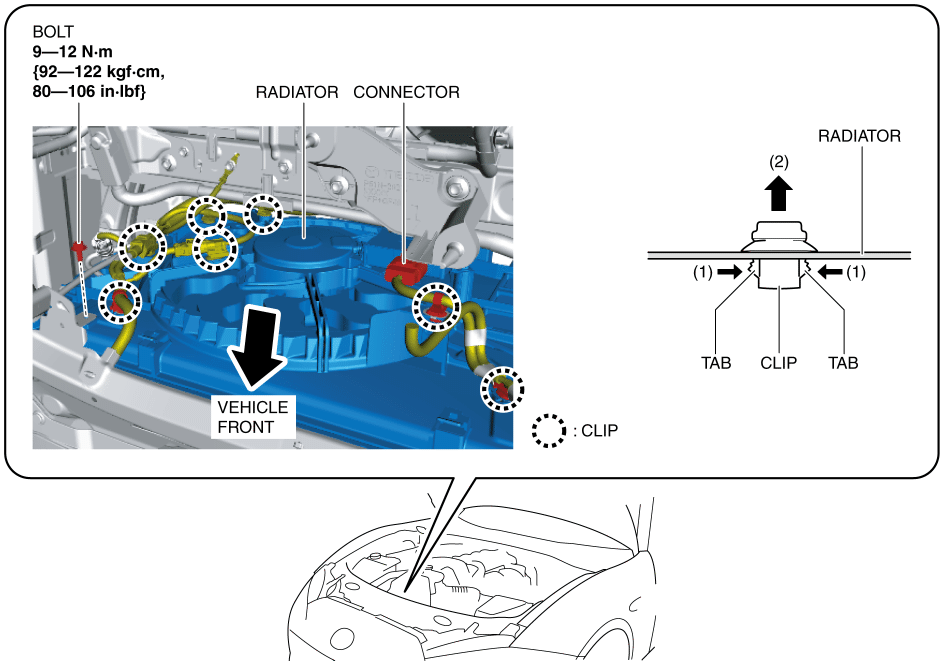
6. While pressing the clip tabs in the direction of arrows (1) shown in the figure, pull the clip in the direction of arrow (2) to detach the clip tabs from the radiator.
7. Remove the clips.
8. Disconnect the connector.
9. Remove the bolts.

10. Remove the upper mount rubber brackets.
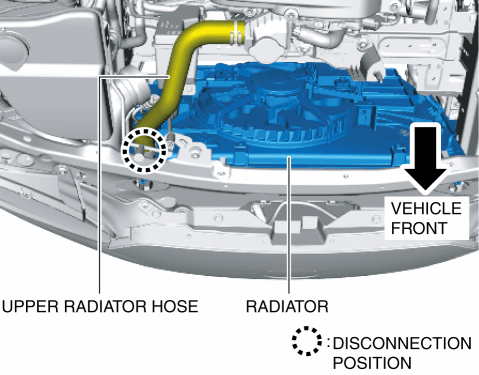
11. Disconnect the upper radiator hose.
12. While pressing the clip tabs in the direction of arrows (1) shown in the figure, pull the clip in the direction of arrow (2) to detach the clip tabs from the radiator.
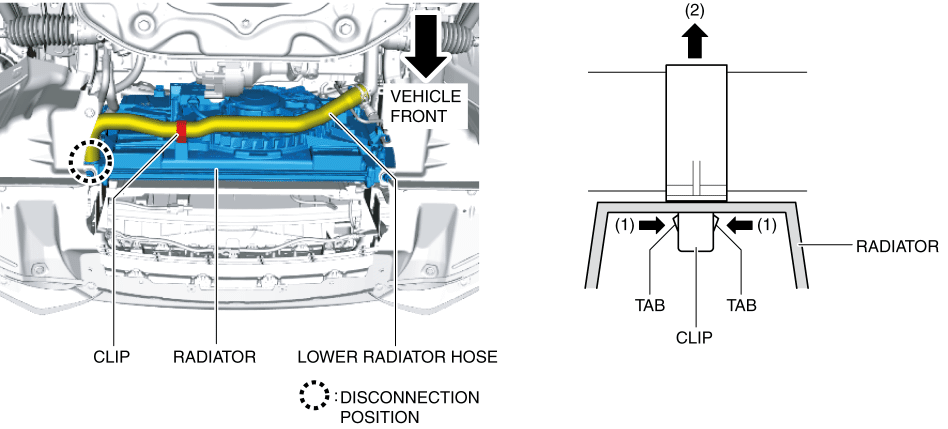
13. Remove the clip.
14. Disconnect the lower radiator hose.
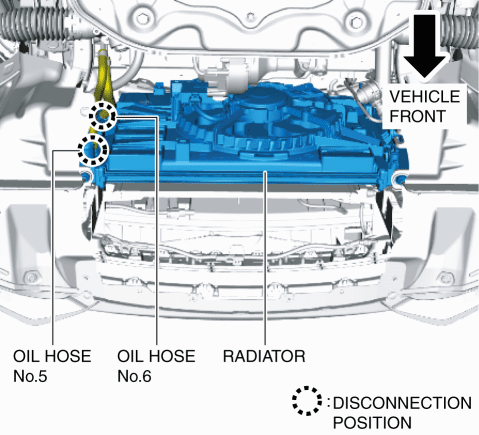
15. Disconnect the oil hoses No.5 and No.6. (AT)
16. Remove the bolt.
CAUTION:
-
If moisture or foreign matter enters the refrigeration cycle, cooling ability will be lowered and abnormal noise will occur. Always immediately plug all open fittings after removing any refrigeration cycle parts to keep moisture or foreign matter out of the cycle.
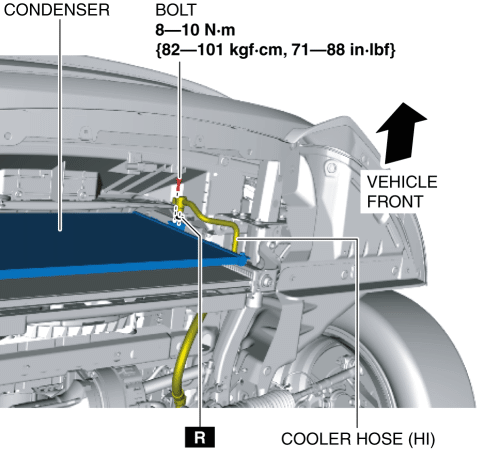
17. Disconnect the cooler hose (HI).
18. Remove the bolt.
CAUTION:
-
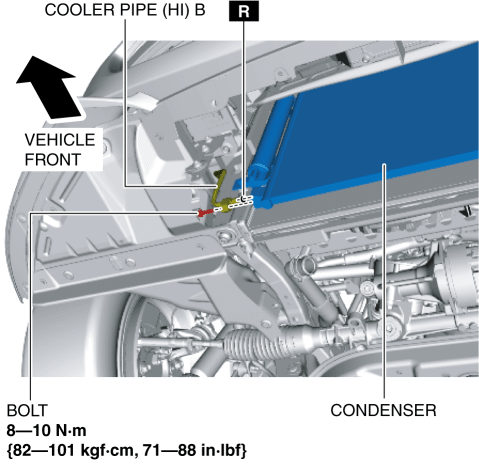
If moisture or foreign matter enters the refrigeration cycle, cooling ability will be lowered and abnormal noise will occur. Always immediately plug all open fittings after removing any refrigeration cycle parts to keep moisture or foreign matter out of the cycle.
19. Disconnect the cooler pipe (HI) B.
20. Remove the bolts.
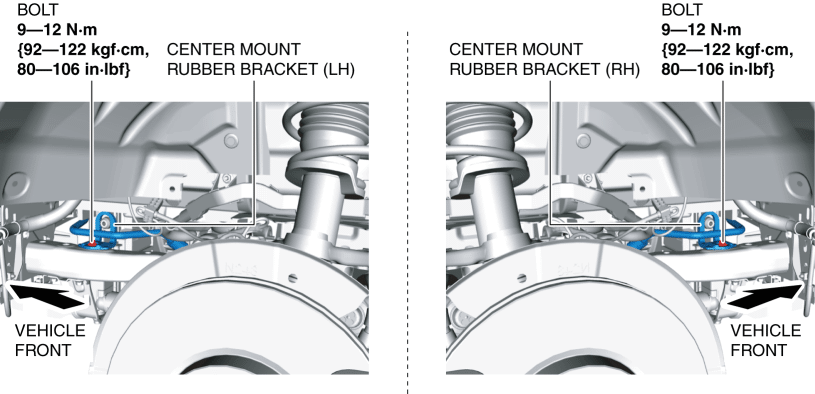
21. Remove the center mount rubber brackets.
22. Remove the bolts.
23. Remove the lower mount rubber brackets.
CAUTION:
-
The radiator, cooling fan component, and condenser are very heavy. When loading/unloading these parts to/from the vehicle, always perform with at least one other person.
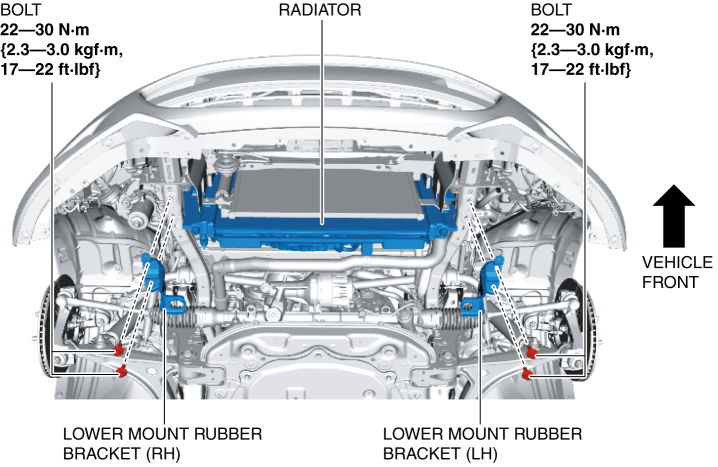
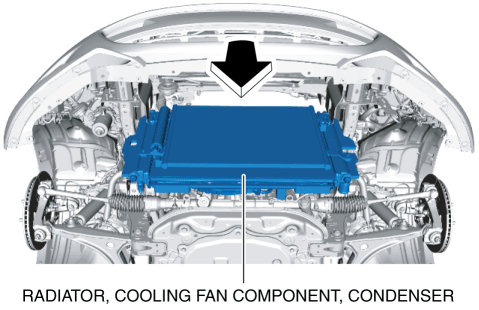
24. Remove the radiator, cooling fan component, and condenser as a single unit.
25. Remove the bolts.
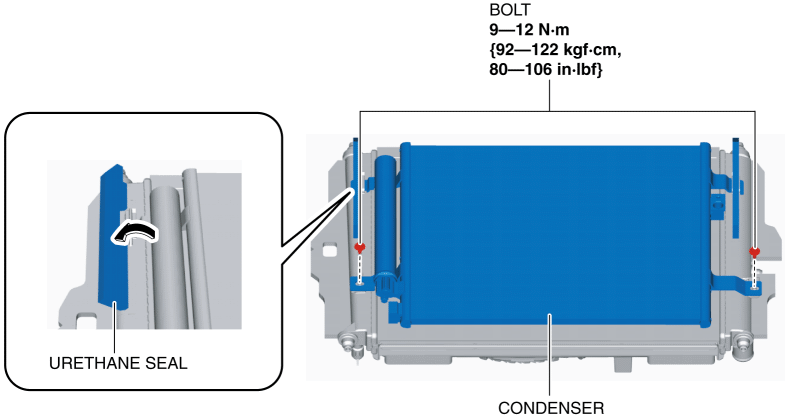
CAUTION:
-
The tab connection parts of the condenser and radiator are covered with urethane seals. Therefore, the urethane seals may be damaged if the condenser is removed/installed without folding the urethane seals. Fold the urethane seals when removing/installing the condenser.
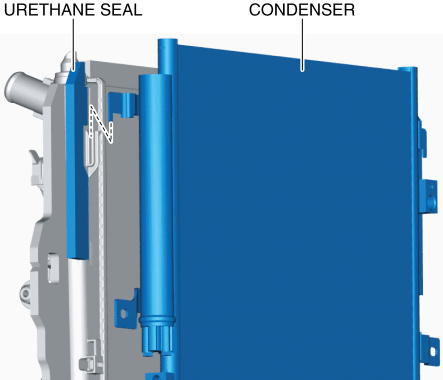
26. Fold the urethane seal in the direction of the arrow shown in the figure.
27. Remove the condenser.
28. Install in the reverse order of removal.
29. When replacing the condenser, add compressor oil to the refrigerant cycle.
-
Supplemental compressor oil amount (approx. quantity)
-
24 ml {24 cc, 0.81 US fl oz}
30. Inspect for engine coolant leakage. (See ENGINE COOLANT LEAKAGE INSPECTION [SKYACTIV-G 2.0].)
31. Perform the refrigerant system performance test. (See REFRIGERANT SYSTEM PERFORMANCE TEST.)