SHIFT PANEL REMOVAL/INSTALLATION
2016 – MX-5 – Body and Accessories
SHIFT PANEL REMOVAL/INSTALLATION
1. Disconnect the negative battery cable. (See NEGATIVE BATTERY CABLE DISCONNECTION/CONNECTION.)
2. Remove the selector lever knob. (AT) (See AUTOMATIC TRANSMISSION SHIFT MECHANISM REMOVAL/INSTALLATION.)
3. Remove the shift lever knob. (MT)
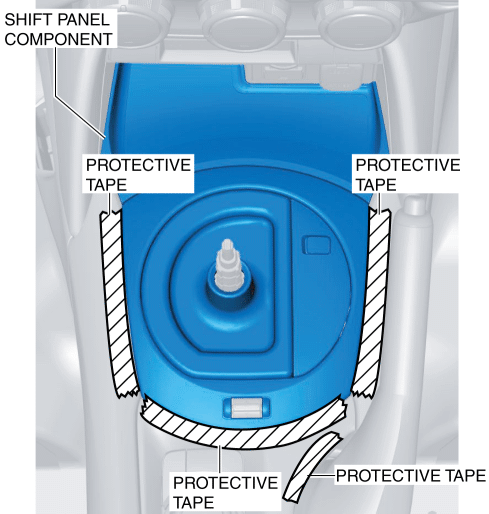
4. To prevent scratches or damage, apply protective tape to the positions shown in the figure.
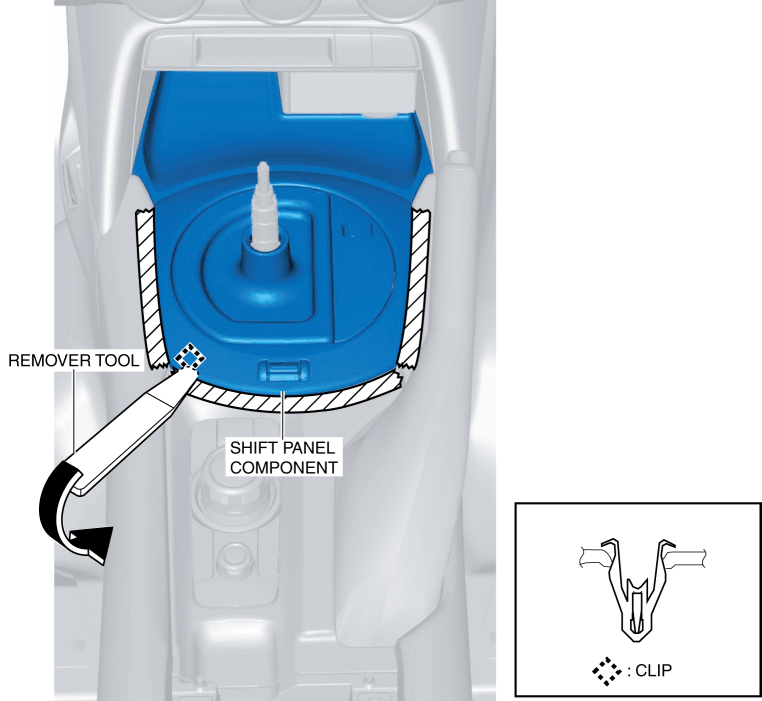
5. Insert a remover tool into the position shown in the figure.
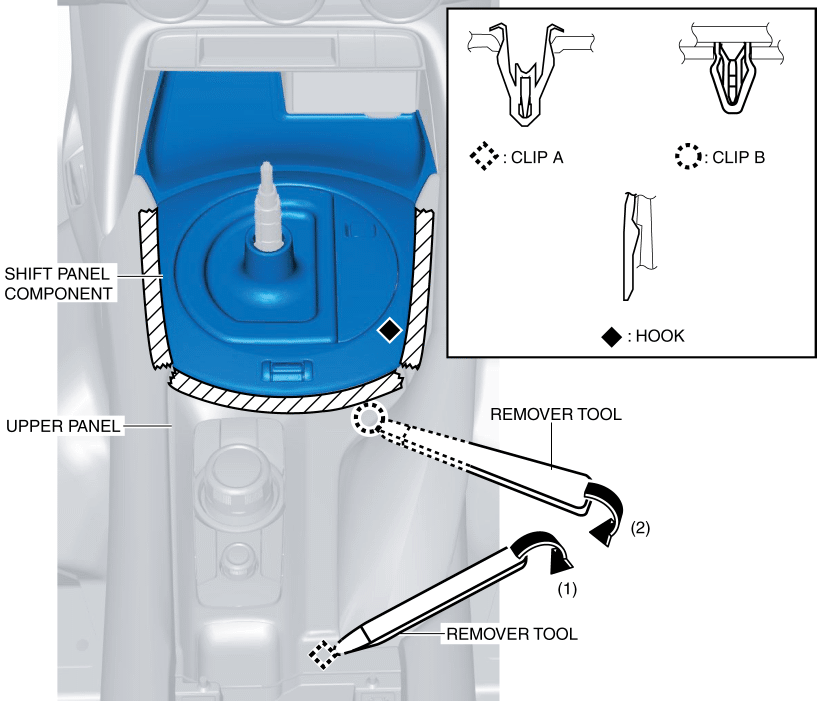
6. Move the remover tool in the order of arrows (1) and (2) shown in the figure and detach clips A and B, and the hook from the rear console to secure a space for inserting the remover tool into the lower area of the shift panel component.
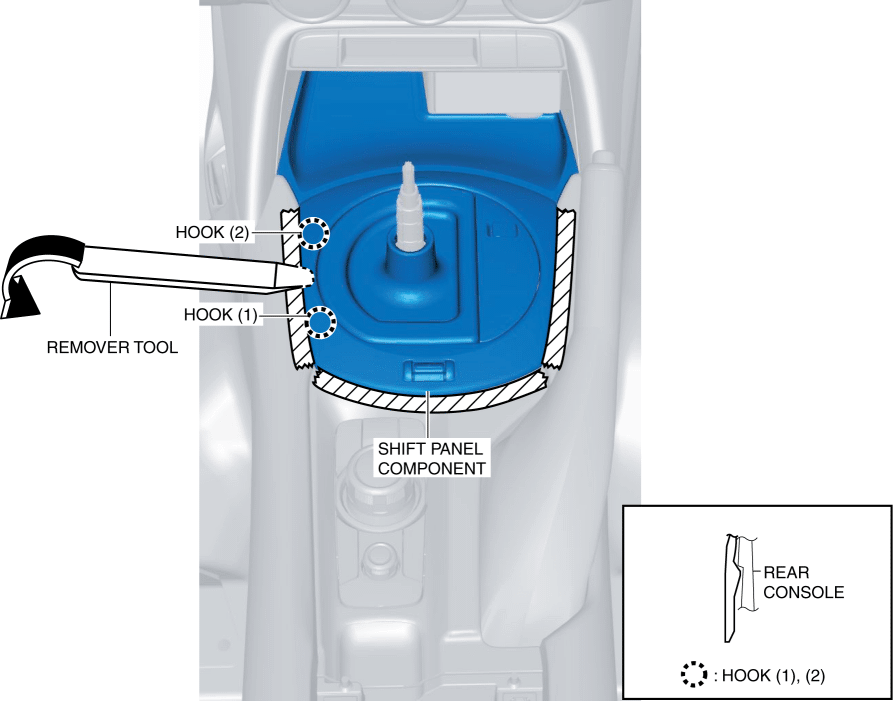
7. Insert a remover tool into the position shown in the figure.
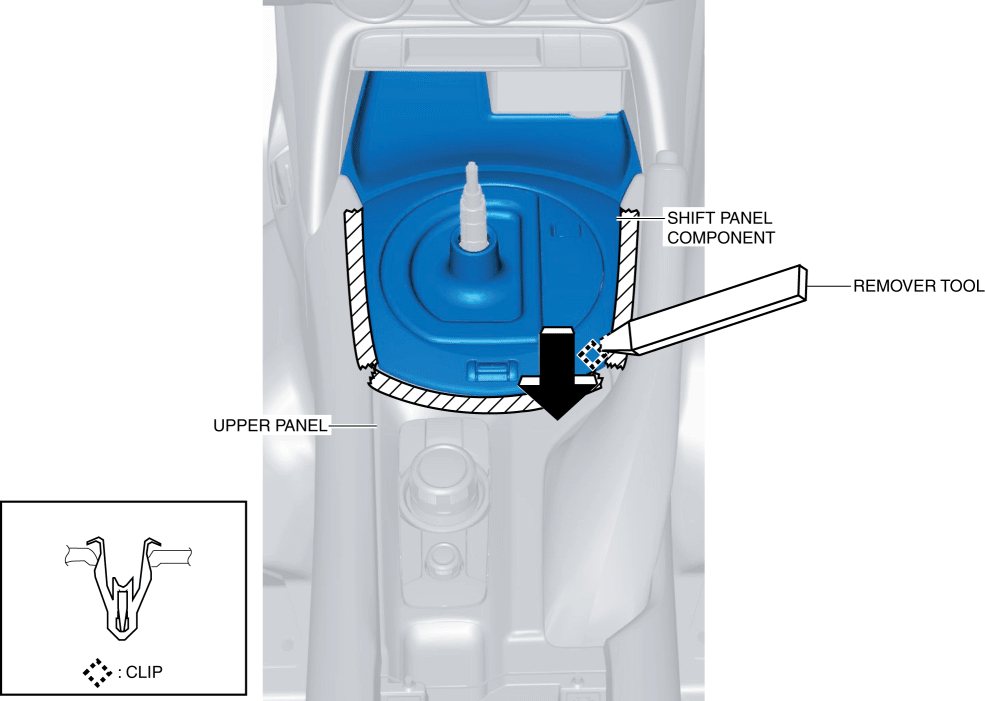
8. With the remover tool inserted, press the upper panel in the direction of the arrow shown in the figure and detach the shift panel component clip from the upper panel.
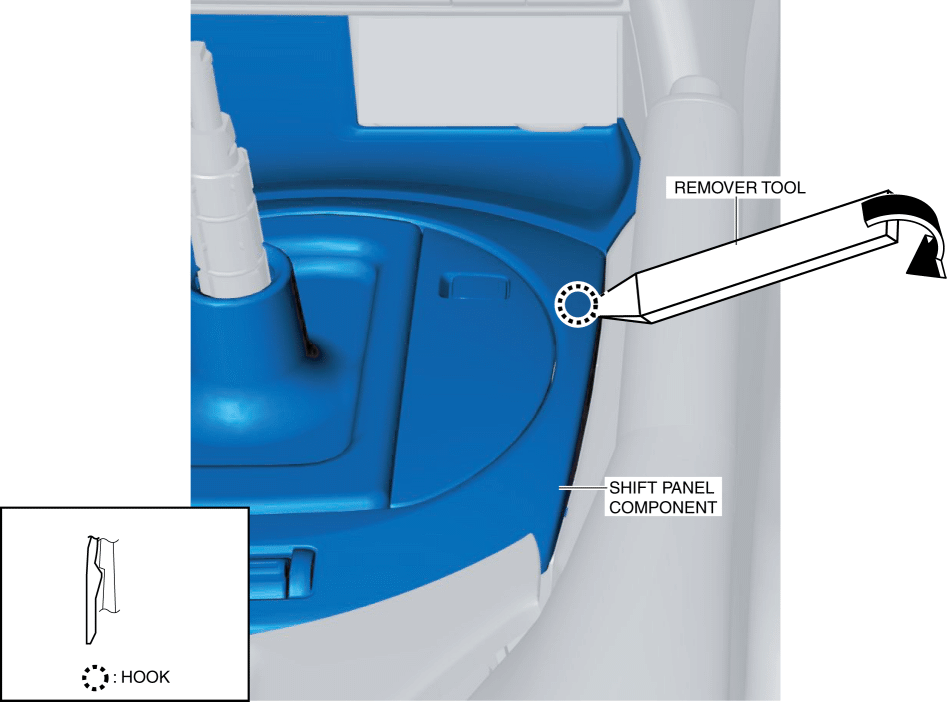
9. Move the remover tool in the direction of the arrow shown in the figure and detach the hook from the rear console.
10. Move the remover tool in the direction of the arrow shown in the figure and detach the clip from the rear console.
11. Move the remover tool in the direction of the arrow shown in the figure and detach the hooks in the order of (1) and (2).
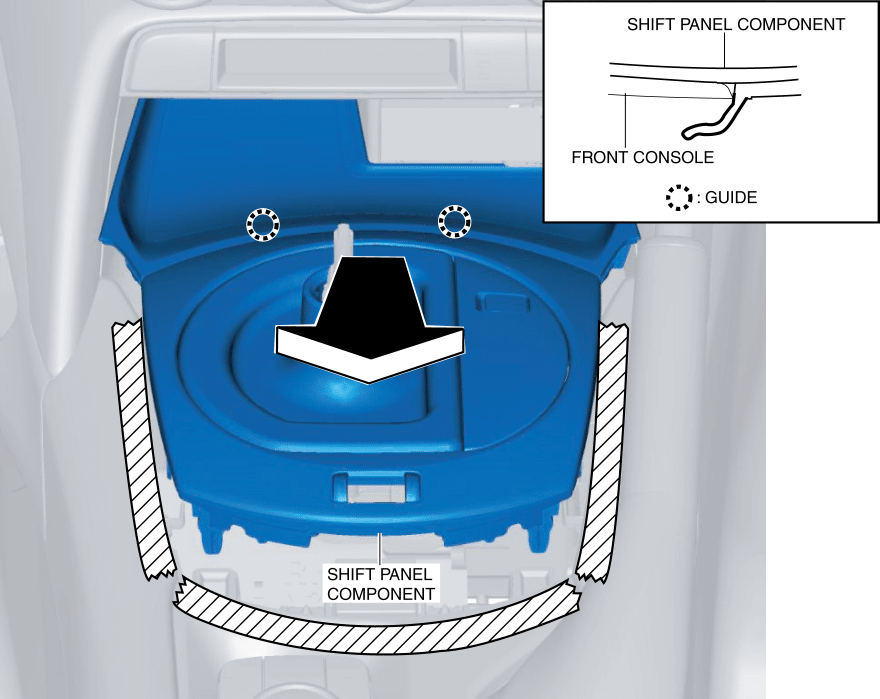
12. Move the shift panel component in the direction of the arrow shown in the figure and remove the guides.
13. Disconnect the indicator connector.
14. Remove the shift panel component.
15. Remove the console panel when replacing the shift panel. (See CONSOLE PANEL REMOVAL/INSTALLATION.)
16. Install in the reverse order of removal.