CLUTCH RELEASE CYLINDER REMOVAL/INSTALLATION
2016 – MX-5 – Transmission/Transaxle
CLUTCH RELEASE CYLINDER REMOVAL/INSTALLATION
CAUTION:
-
Do not allow clutch fluid to get on a painted surface. Clutch fluid contains properties which can dissolve the paint. If clutch fluid gets on a painted surface, rinse with water immediately, then wipe the area dry.
1. Remove the front crossmember under cover. (See FRONT CROSSMEMBER UNDER COVER REMOVAL/INSTALLATION.)
2. Disconnect the clutch pipe No.2 from clutch release cylinder, and plug it to avoid clutch fluid leakage. (See CLUTCH PIPE AND HOSE REMOVAL/INSTALLATION.)
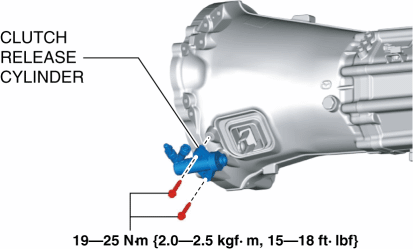
3. Remove the clutch release cylinder.
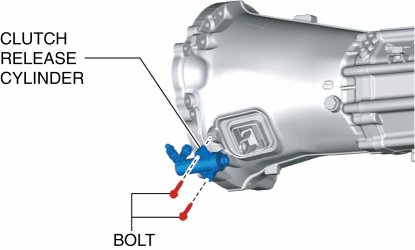
4. Install the clutch release cylinder.
5. Connect the clutch pipe No.2 to clutch release cylinder. (See CLUTCH PIPE AND HOSE REMOVAL/INSTALLATION.)
6. Bleed the air from the clutch system. (See CLUTCH FLUID REPLACEMENT/AIR BLEEDING.)
7. Install the front crossmember under cover. (See FRONT CROSSMEMBER UNDER COVER REMOVAL/INSTALLATION.)