CONTROL VALVE BODY REMOVAL [SJ6A-EL]
2016 – MX-5 – Transmission/Transaxle
CONTROL VALVE BODY REMOVAL [SJ6A-EL]
On-Vehicle Removal
WARNING:
-
A hot transmission and ATF can cause severe burns. Turn off the engine and wait until they are cool before replacing ATF.
-
Using compressed air can cause dirt and other particles to fly out, causing injury to the eyes. Wear protective eyeglasses whenever using compressed air.
CAUTION:
-
Clean the transmission exterior thoroughly with a steam cleaner or cleaning solvents before removal.
-
If any old sealant gets into the transmission during installation of the oil pan, a malfunction may occur in the transmission case and oil pan. Clean with cleaning fluids.
1. Disconnect the negative battery cable. (See NEGATIVE BATTERY CABLE DISCONNECTION/CONNECTION.)
2. Drain the ATF. (See AUTOMATIC TRANSMISSION FLUID (ATF) REPLACEMENT [SJ6A-EL].)
3. Remove the oil pan and the oil pan gasket.
CAUTION:
-
Do not damage the fitting surface of the transmission case and the oil pan.
-
Do not to deform the oil pan.
4. Remove the magnets from the oil pan.
NOTE:
-
Examine the chips and particles in the oil pan to determine what type of wear has occurred in the transmission. Steel particles (magnetic) indicate bearing, gear and plate wear. Brass particles (non-magnetic) indicate bushing wear.
5. Remove the oil strainer from the control valve body component.
6. Remove the O-ring from the oil strainer.
7. Disconnect the connectors from the solenoids.
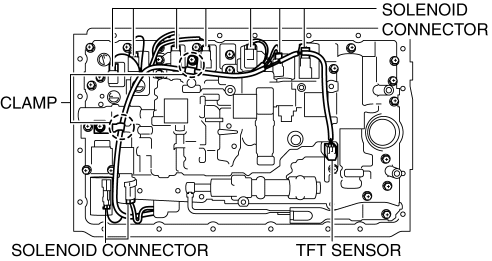
8. Disconnect the coupler component from the clamps.
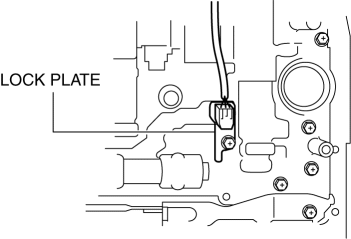
9. Remove the lock plate from the control valve body component.
10. Pull the TFT sensor from the control valve body component.
CAUTION:
-
Verify that the coupler component does not interfere with the control valve body component when installing.
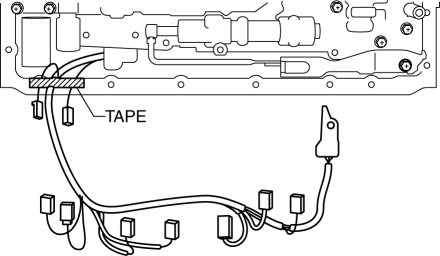
11. Fix the coupler component with tape to the transmission case as shown in the figure.
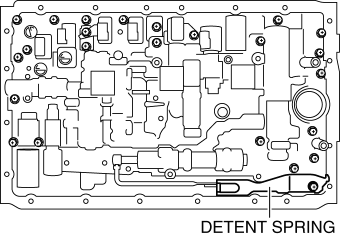
12. Remove the detent spring cover and detent spring from the control valve body component.
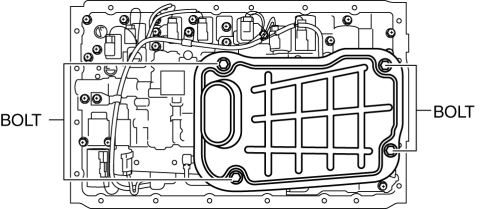
13. Remove the bolts from the transmission case as shown in the figure.

CAUTION:
-
Do not to drop the control valve body component.
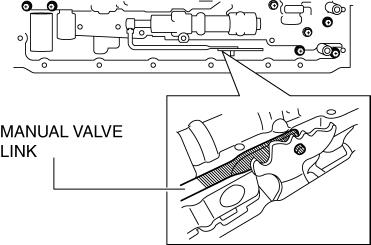
14. Disconnect the manual valve link and remove the control valve body component.
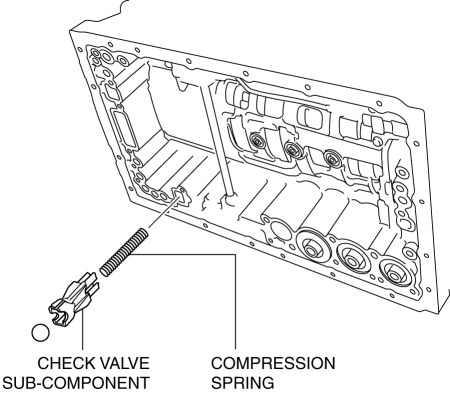
15. Remove the check valve sub-component and the compression spring from the transmission case.
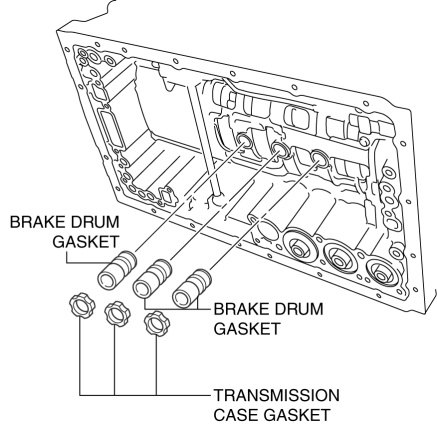
16. Remove the transmission case gaskets and the brake drum gaskets from the transmission case.
CAUTION:
-
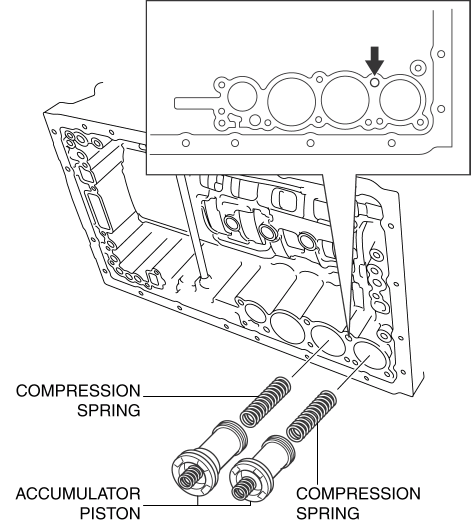
Be careful of the C-2 and B-3 accumulator pistons may eject.
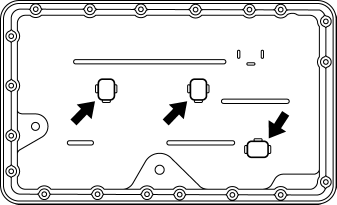
17. Apply compressed air into the oil passage as shown in the figure and remove the accumulator pistons (C-2, B-3) and the compression springs from the transmission case.
18. Remove the snap rings from the accumulator pistons (C-2, B-3) using a flathead screwdriver.
19. Remove the compression springs from the accumulator pistons (C-2, B-3).
20. Remove the O-rings from the accumulator pistons (C-2, B-3) using a flathead screwdriver.
CAUTION:
-
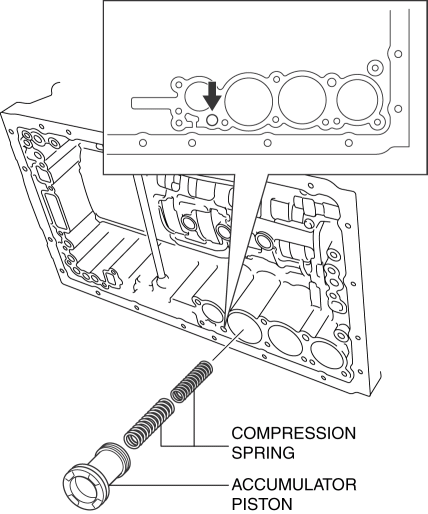
Be careful of the C-3 accumulator pistons may eject.
21. Apply compressed air into the oil passage as shown in the figure and remove the accumulator piston (C-3) and compression springs from the transmission case.
22. Remove the O-rings from the accumulator piston (C-3) using a flathead screwdriver.
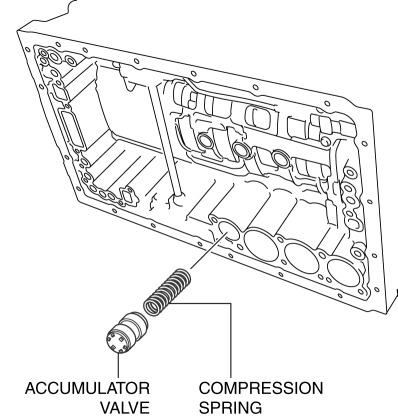
23. Remove the accumulator valve and compression springs from the transmission case.