ELECTRIC VACUUM PUMP REMOVAL/INSTALLATION
2016 – MX-5 – Brakes
ELECTRIC VACUUM PUMP REMOVAL/INSTALLATION
1. Switch the ignition ON (engine off or on).
2. Turn the steering wheel to the right until it locks.
3. Switch the ignition off.
4. DIsconnect the negative battery cable. (See NEGATIVE BATTERY CABLE DISCONNECTION/CONNECTION.)
5. Remove the front mudguard No.1 and front deflector as a single unit. (See FRONT MUDGUARD REMOVAL/INSTALLATION.)
6. Remove horn HI. (See HORN REMOVAL/INSTALLATION.)
7. Remove in the order indicated in the table.
8. Install in the reverse order of removal.
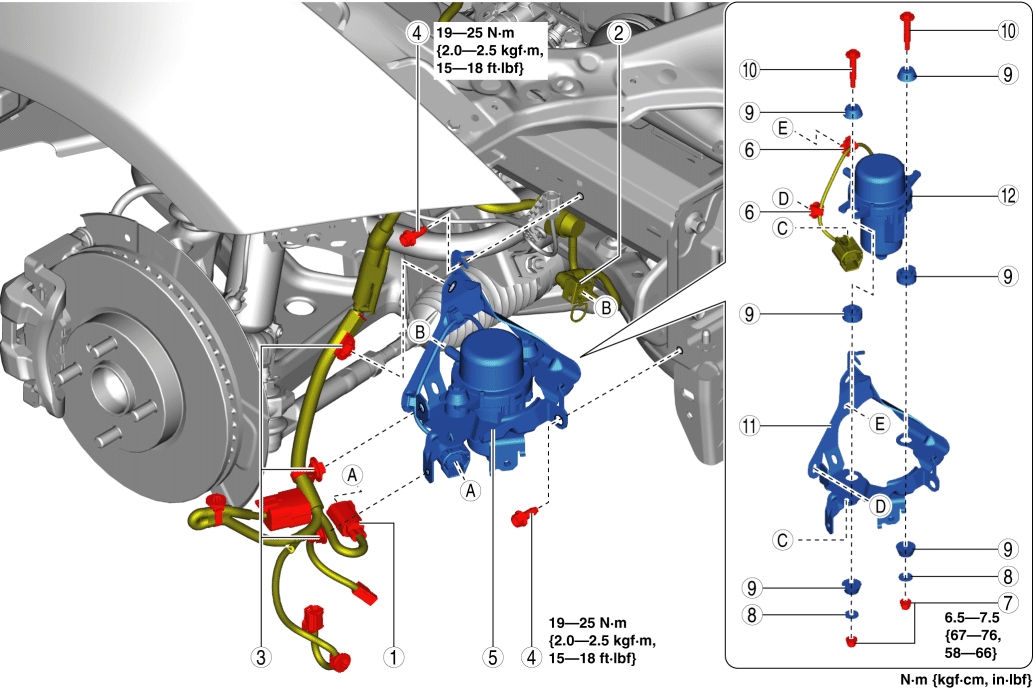
|
1 |
Electric vacuum pump connector |
|
2 |
Quick release connector |
|
3 |
Harness clip |
|
4 |
Bolt |
|
5 |
Electric vacuum pump component |
|
6 |
Harness clip |
|
7 |
Nut |
|
8 |
Washer |
|
9 |
Rubber mount |
|
10 |
Bolt |
|
11 |
Bracket |
|
12 |
Electric vacuum pump |
Quick Release Connector Removal Note
1. Move the retainer tabs in the direction of arrows (1) shown in the figure, move the retainer in the direction of arrow (2).
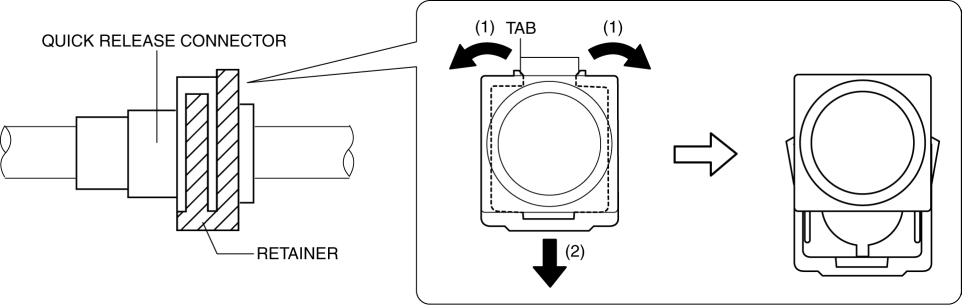
2. Pull out the quick release connector straight from the electric vacuum pump and disconnect it.
Quick Release Connector Installation Note
1. Install the quick release connector as shown in the figure.
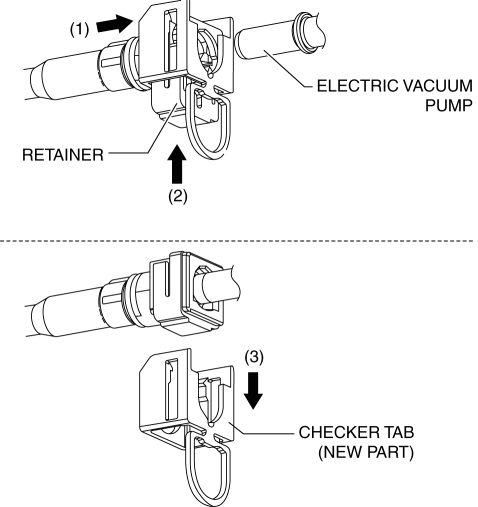
-
If the retainer cannot be pushed down, push the electric vacuum pump further to the quick release connector.
2. Lightly pull and push the quick release connector a few times by hand, and then verify that it is connected securely.