PROPELLER SHAFT REMOVAL/INSTALLATION
2016 – MX-5 – DriveLine/Axle
PROPELLER SHAFT REMOVAL/INSTALLATION
1. Remove the bolts.
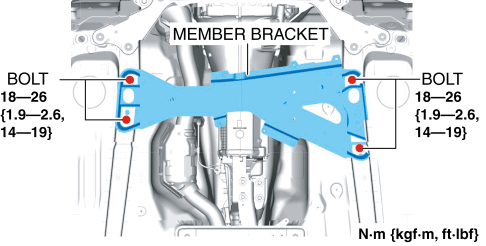
2. Remove the member bracket. (With member bracket)
3. Remove the bolts.
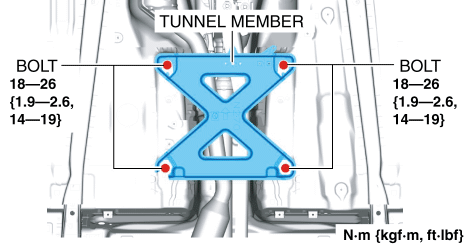
4. Remove the tunnel member.
5. Disconnect the O 2 sensor wiring harness clip from the three way catalytic converter (TWC). (See HEATED OXYGEN SENSOR (HO2S) REMOVAL/INSTALLATION [SKYACTIV-G 2.0].)
6. Disconnect the TWC from the exhaust manifold. (See EXHAUST SYSTEM REMOVAL/INSTALLATION [SKYACTIV-G 2.0].)
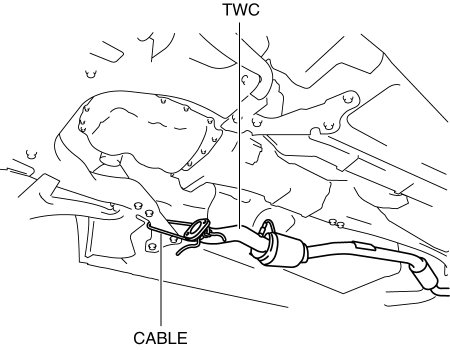
7. Suspend the TWC using a cable as shown in the figure.
8. Remove in the order shown in the figure.
9. Install in the reverse order of removal.
10. Perform a road test and inspect for abnormal vibration or noise.
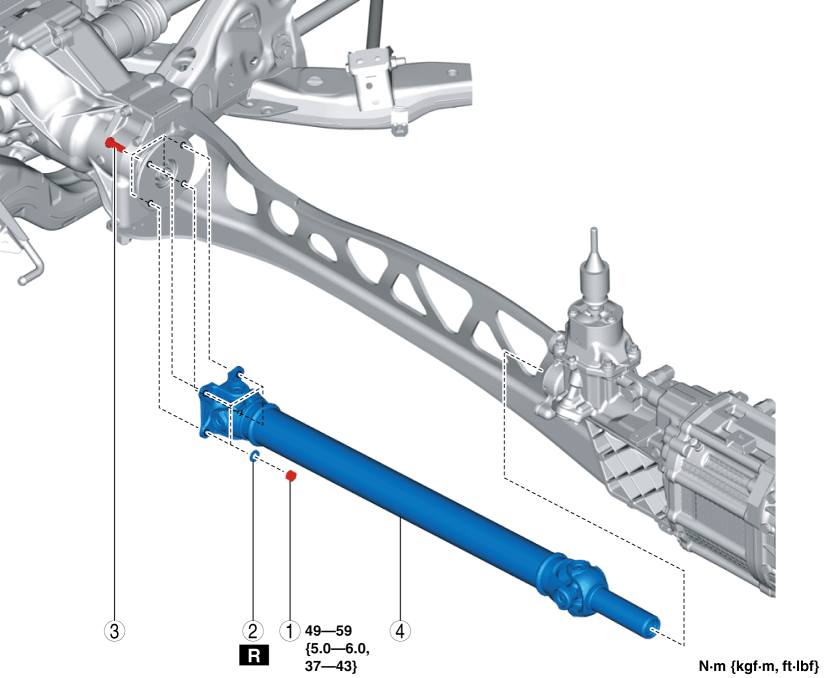
|
1 |
Nut |
|
2 |
Washer |
|
3 |
Bolt |
|
4 |
Propeller shaft (See Propeller Shaft Removal Note.) |
Propeller Shaft Removal Note
1. Move the propeller shaft in the direction of the arrow shown in the figure and pull out the main shaft from the sliding yoke.
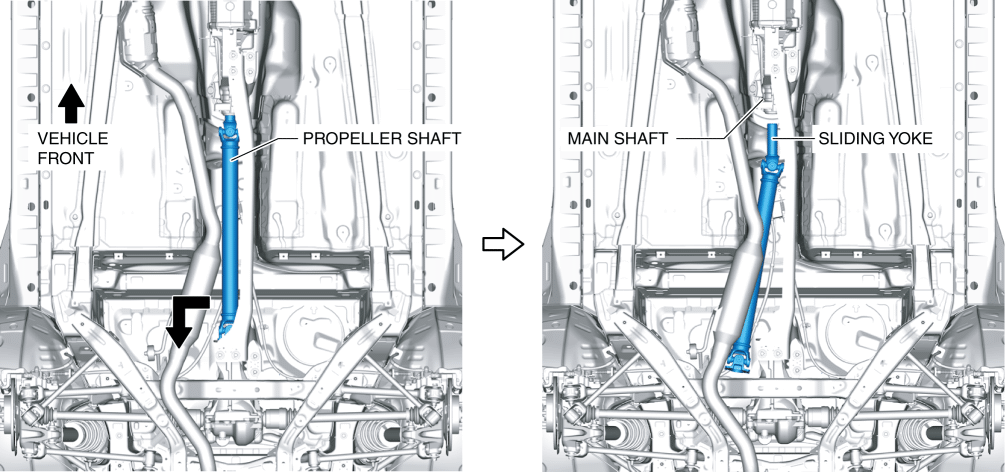
2. Remove the propeller shaft from the sliding yoke.
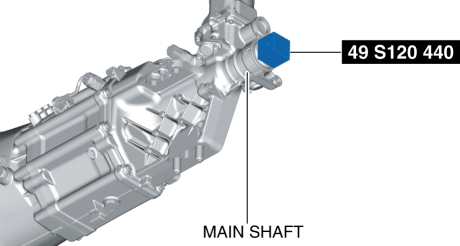
3. Install the SST to the main shaft. (With MT vehicles)
Propeller Shaft Installation Note
1. Remove the main shaft from the SST.
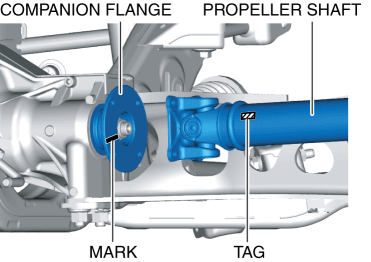
2. Align the tag on the propeller shaft with the companion flange alignment mark as shown in the figure and install the propeller shaft.