REAR BRAKE (DISC) REMOVAL/INSTALLATION
2016 – MX-5 – Brakes
REAR BRAKE (DISC) REMOVAL/INSTALLATION
1. Loosen the adjusting nut. (See PARKING BRAKE LEVER REMOVAL/INSTALLATION.)
2. Disconnect the brake hose from the caliper. (See BRAKE HOSE (REAR) REMOVAL/INSTALLATION.)
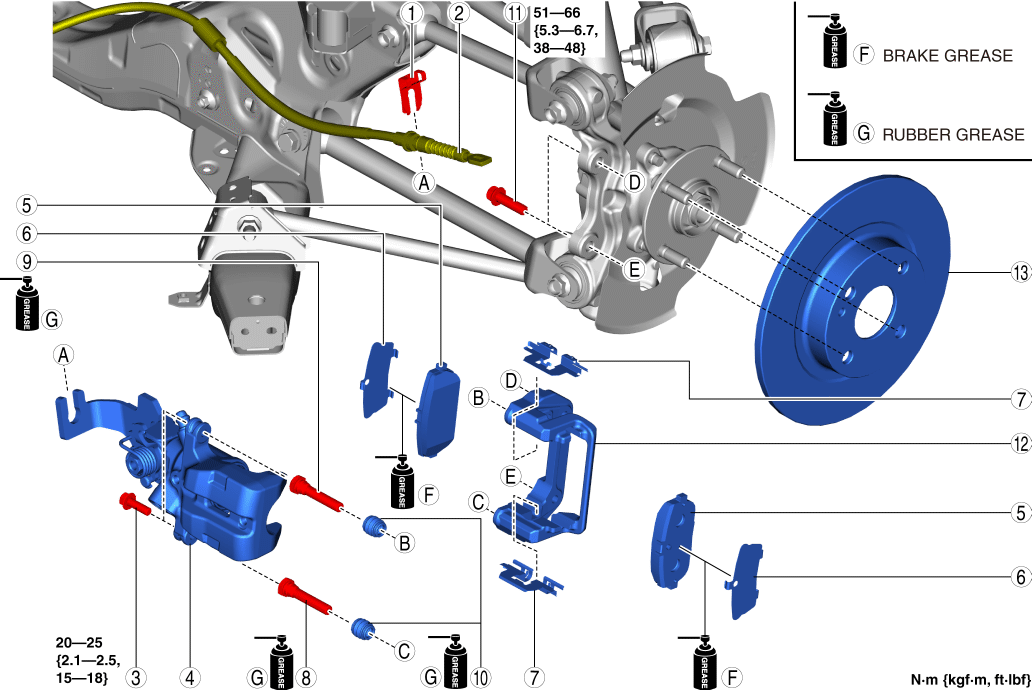
3. Remove in the order indicated in the table.
4. Install in the reverse order of removal.
5. After installation, add brake fluid, bleed the air, and inspect for fluid leakage. (See BRAKE FLUID AIR BLEEDING.)
6. Pump the brake pedal a few times and inspect the following:
-
The disc pad projection is securely installed to the piston groove
-
Parking brake lever stroke
-
Brake drag
|
1 |
Clip (See Clip Installation Note.) |
|
2 |
Rear parking brake cable |
|
3 |
Bolt |
|
4 |
Caliper (See Caliper Installation Note.) |
|
5 |
Disc pad |
|
6 |
Shim |
|
7 |
Guide plate |
|
8 |
Slide pin (main) |
|
9 |
Slide pin (sub) |
|
10 |
Dust boot |
|
11 |
Bolt |
|
12 |
Mounting support |
|
13 |
Disc plate |
Caliper Installation Note
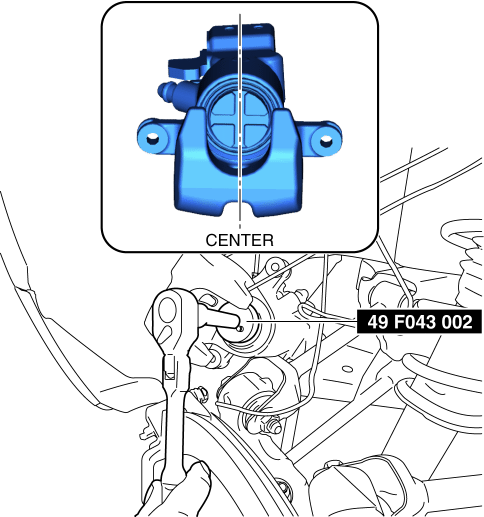
1. Clean the exposed area of the piston.
2. Rotate the piston clockwise slowly using the SST and push the piston completely until the piston grooves are in the position shown in the figure.
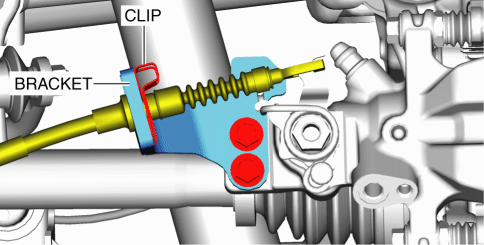
Clip Installation Note
1. Install the clip to the position shown in the figure.