DRIVE BELT AUTO TENSIONER INSPECTION [SKYACTIV-G 2.0]
2016 – MX-5 – Engine
DRIVE BELT AUTO TENSIONER INSPECTION [SKYACTIV-G 2.0]
WARNING:
-
A hot engine can cause severe burns. Turn off the engine and wait until it is cool before servicing.
CAUTION:
-
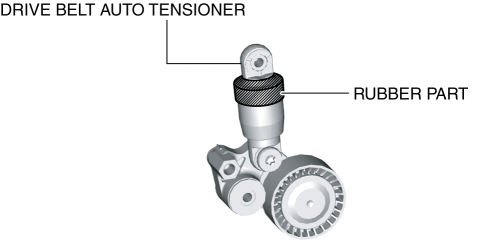
If the rubber part of the drive belt auto tensioner is damaged by a screwdriver or other tool, oil in the hydraulic pressure unit could leak and the tensioner may not operate normally. Be careful not to damage the rubber part of the drive belt auto tensioner.
1. Remove the generator drive belt. (See DRIVE BELT REMOVAL/INSTALLATION [SKYACTIV-G 2.0].)
CAUTION:
-
To prevent damage to the drive belt auto tensioner, do not apply excessive torque after the tensioner moves full-stroke.
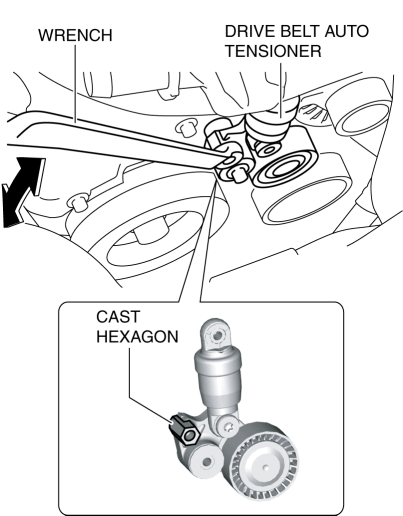
2. Insert the wrench onto the cast hexagon on the drive belt auto tensioner, slowly turn it in the direction of the arrow shown in the figure, and fully depress.
NOTE:
-
The drive belt auto tensioner is operated in the direction of the arrow by turning the wrench.
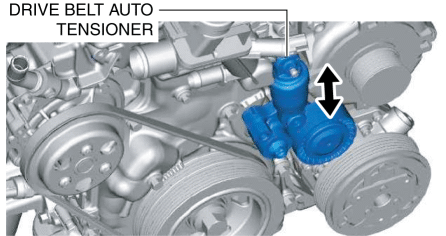
3. Verify that the drive belt auto tensioner moves smoothly in the operational direction.
-
If it does not move smoothly, air infiltration into the inner hydraulic pressure unit can be considered. Move the drive belt auto tensioner up and down at full stroke three times to bleed the air.
-
After bleeding the air, if the drive belt auto tensioner still does not move smoothly when re-inspecting, replace the drive belt auto tensioner. (See DRIVE BELT AUTO TENSIONER REMOVAL/INSTALLATION [SKYACTIV-G 2.0]).
NOTE:
-
By moving the drive belt auto tensioner up and down full-stroke three times, the piston inside the tensioner moves to bleed the air.
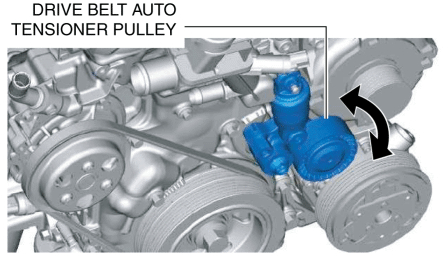
4. Turn the drive belt auto tensioner pulley by hand and verify that it rotates smoothly.
-
If it does not move smoothly, replace the drive belt auto tensioner. (See DRIVE BELT AUTO TENSIONER REMOVAL/INSTALLATION [SKYACTIV-G 2.0].)
5. Install the generator drive belt. (See DRIVE BELT REMOVAL/INSTALLATION [SKYACTIV-G 2.0].)