NO.7 ENGINE OIL WARNING LIGHT ILLUMINATED/MESSAGE RELATED TO ENGINE HYDRAULIC PRESSURE MALFUNCTION INDICATED IN DISPLAY [SKYACTIV-G 2.0]
2016 – MX-5 – Engine
NO.7 ENGINE OIL WARNING LIGHT ILLUMINATED/MESSAGE RELATED TO ENGINE HYDRAULIC PRESSURE MALFUNCTION INDICATED IN DISPLAY [SKYACTIV-G 2.0]
|
7 |
ENGINE OIL WARNING LIGHT ILLUMINATED/MESSAGE RELATED TO ENGINE HYDRAULIC PRESSURE MALFUNCTION INDICATED IN DISPLAY |
|
DESCRIPTION |
|
|
POSSIBLE CAUSE |
|
|
|
|
Diagnostic Procedure
|
STEP |
INSPECTION |
RESULTS |
ACTION |
|
1 |
INSPECT ENGINE OIL LEVEL
|
Yes |
Engine oil level is below L:
Engine oil level is above F:
|
|
No |
Go to Step 3. |
||
|
2 |
VERIFY IF ENGINE OIL WARNING LIGHT ILLUMINATES
|
Yes |
Go to the next step. |
|
No |
Symptom troubleshooting is completed. |
||
|
3 |
VERIFY DTC
|
Yes |
Go to the applicable DTC inspection. |
|
No |
Go to the next step. |
||
|
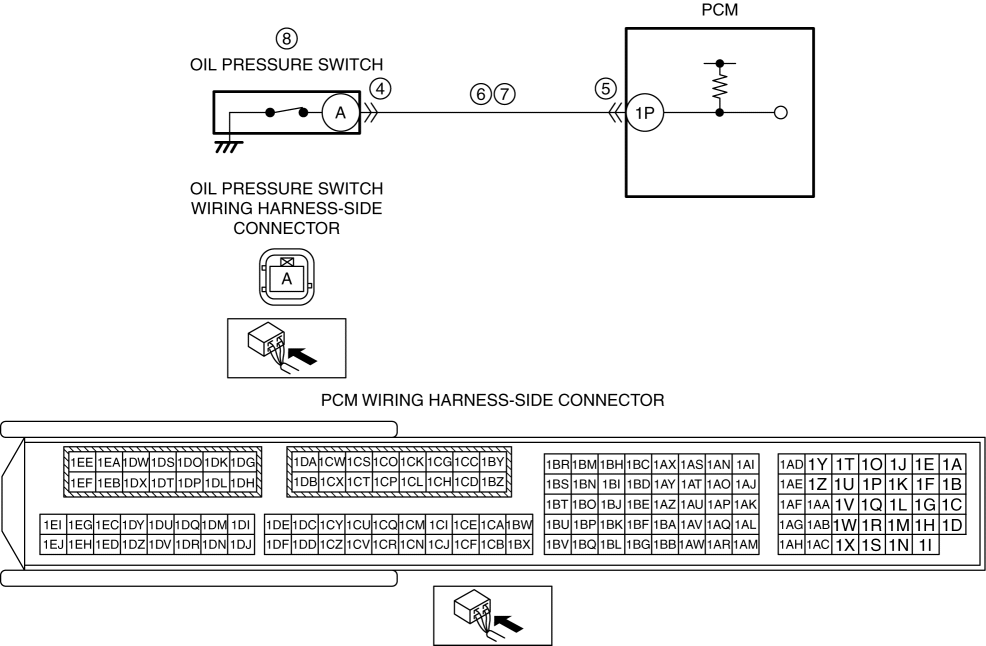
4 |
INSPECT OIL PRESSURE SWITCH CONNECTOR CONDITION
|
Yes |
Repair or replace the connector and/or terminals. |
|
No |
Go to the next step. |
||
|
5 |
INSPECT PCM CONNECTOR CONDITION
|
Yes |
Repair or replace the connector and/or terminals. |
|
No |
Go to the next step. |
||
|
6 |
INSPECT OIL PRESSURE SWITCH SIGNAL CIRCUIT FOR SHORT TO GROUND
|
Yes |
Refer to the wiring diagram and verify whether or not there is a common connector between oil pressure switch terminal A and PCM terminal 1P.
|
|
No |
Go to the next step. |
||
|
7 |
INSPECT OIL PRESSURE SWITCH SIGNAL CIRCUIT FOR OPEN CIRCUIT
|
Yes |
Go to the next step. |
|
No |
Refer to the wiring diagram and verify whether or not there is a common connector between oil pressure switch terminal A and PCM terminal 1P.
|
||
|
8 |
INSPECT ENGINE OIL PRESSURE
|
Yes |
Replace the oil pump, then go to the next step. |
|
No |
Replace the oil pressure switch, then go to the next step. (See ENGINE OIL SOLENOID VALVE REMOVAL/INSTALLATION [SKYACTIV-G 2.0].) |
||
|
9 |
Verify the test results.
|
||