NET REMOVAL/INSTALLATION
2016 – MX-5 – Body and Accessories
NET REMOVAL/INSTALLATION
WARNING:
-
Handling a seat equipped with a side air bag improperly can accidentally operate (deploy) the air bag, which may seriously injure you. Read the service warnings/cautions in the Workshop Manual before handling the seat (side air bag integrated). (See AIR BAG SYSTEM SERVICE WARNINGS [TWO-STEP DEPLOYMENT CONTROL SYSTEM].) (See AIR BAG SYSTEM SERVICE CAUTIONS [TWO-STEP DEPLOYMENT CONTROL SYSTEM].) (See AIR BAG SYSTEM SERVICE WARNINGS [STANDARD DEPLOYMENT CONTROL SYSTEM].) (See AIR BAG SYSTEM SERVICE CAUTIONS [STANDARD DEPLOYMENT CONTROL SYSTEM].)
CAUTION:
-
The elasticity of the nets (seat back side and seat cushion side) may decrease if exposed to direct sunlight (UV rays). Do not remove/install the seat back trim and disassemble/assemble the seats in an outdoor environment under direct sunlight (UV rays).
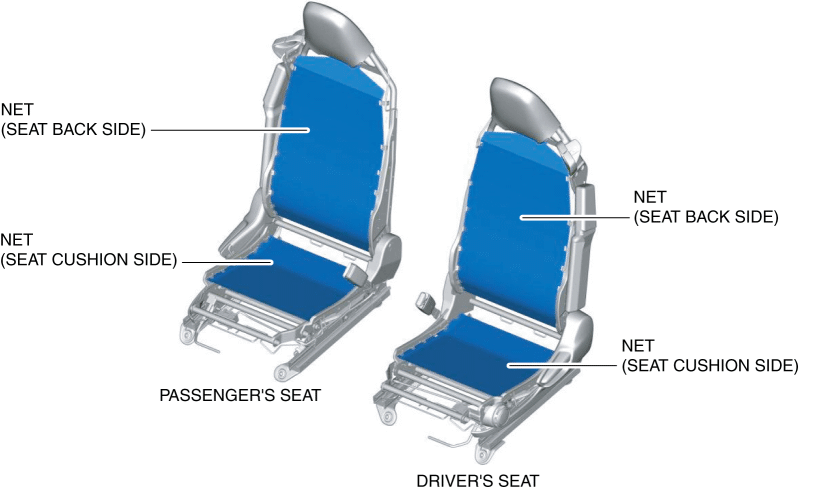
Net (Seat Back Side)
1. Switch the ignition OFF (LOCK).
2. Disconnect the negative battery cable and wait for 1 min or more.(See NEGATIVE BATTERY CABLE DISCONNECTION/CONNECTION.)
3. Remove the following parts:
a. Seat (See SEAT REMOVAL/INSTALLATION.)
b. Seat side cover(See SEAT SIDE COVER REMOVAL/INSTALLATION.)
c. Buckle(See BUCKLE REMOVAL/INSTALLATION)
d. Seat back component (See SEAT BACK COMPONENT REMOVAL/INSTALLATION.)
e. Seat back trim (See SEAT BACK TRIM REMOVAL/INSTALLATION.)
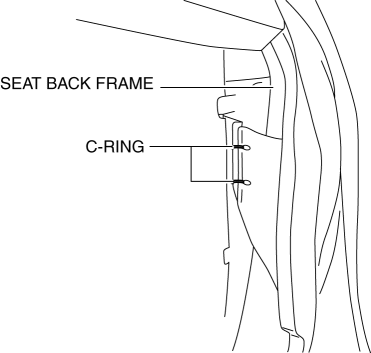
4. Remove the C-rings.
5. Insert a precision flathead screwdriver in the position shown in the figure.

6. Move the precision flathead screwdriver in the direction of the arrow shown in the figure to detach the wire from the hook.
7. Detach all of the wires from the hooks and remove the net.
8. Install in the reverse order of removal. (See Net Installation Note.)
Net (Seat Cushion Side)
1. Switch the ignition OFF (LOCK).
2. Disconnect the negative battery cable and wait for 1 min or more.(See NEGATIVE BATTERY CABLE DISCONNECTION/CONNECTION.)
3. Remove the following parts:
a. Seat (See SEAT REMOVAL/INSTALLATION.)
b. Seat side cover(See SEAT SIDE COVER REMOVAL/INSTALLATION.)
c. Buckle(See BUCKLE REMOVAL/INSTALLATION)
d. Seat back component (See SEAT BACK COMPONENT REMOVAL/INSTALLATION.)
e. Seat cusion trim (See SEAT CUSHION TRIM REMOVAL/INSTALLATION.)
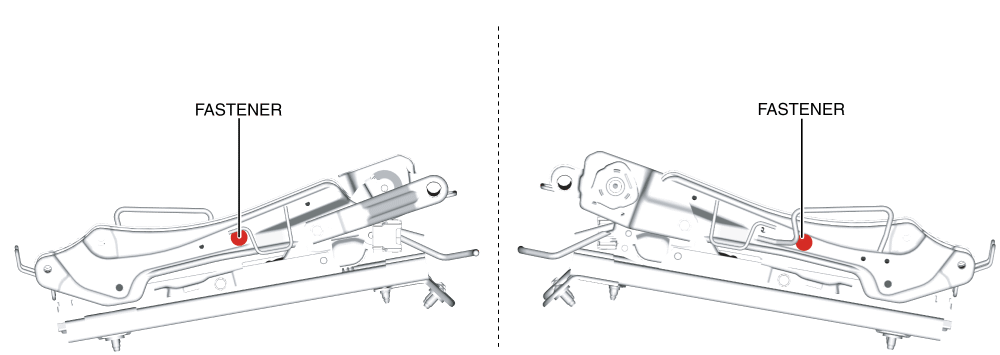
4. Remove the fasteners.
5. Insert a precision flathead screwdriver in the position shown in the figure.
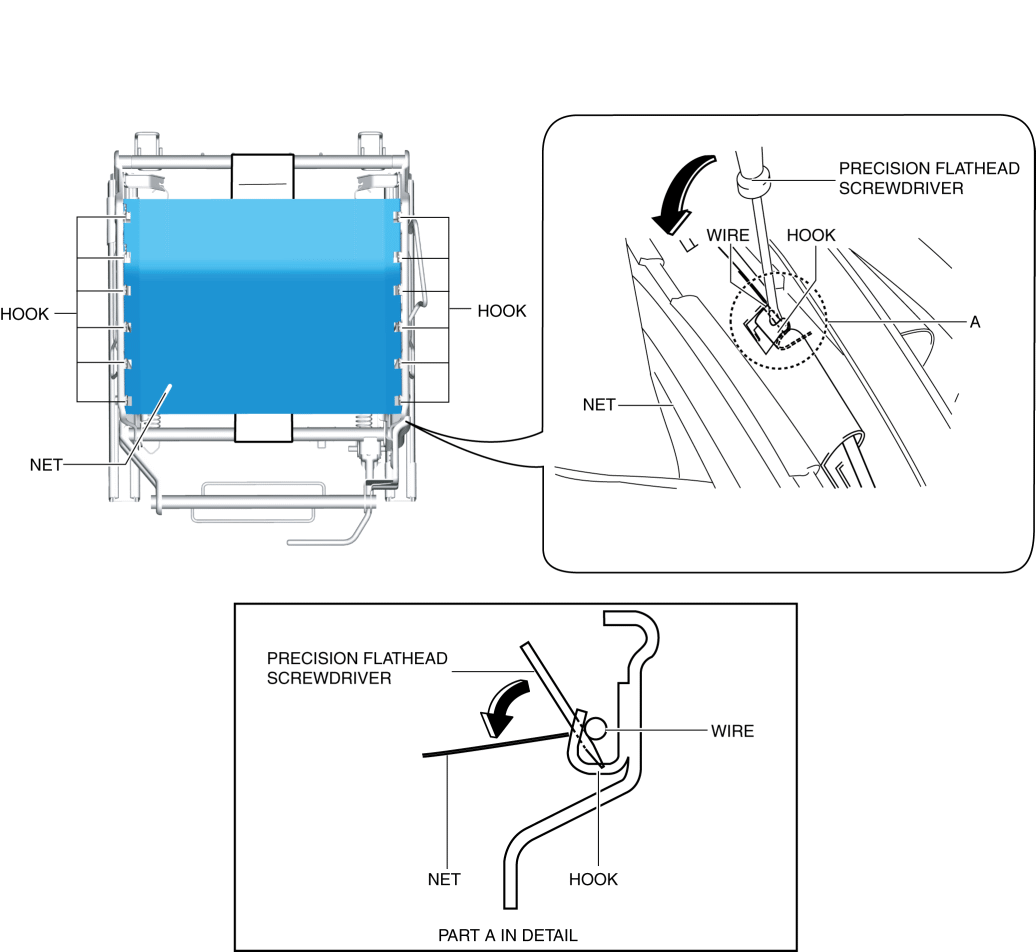
6. Move the precision flathead screwdriver in the direction of the arrow shown in the figure to detach the wire from the hook.
7. Detach all of the wires from the hooks and remove the net.
-
If the cushion supporter is to be removed, remove it using the following procedure.
8. Move hooks A in the order of arrows (1) and (2) shown in the figure and detach them from hooks B.
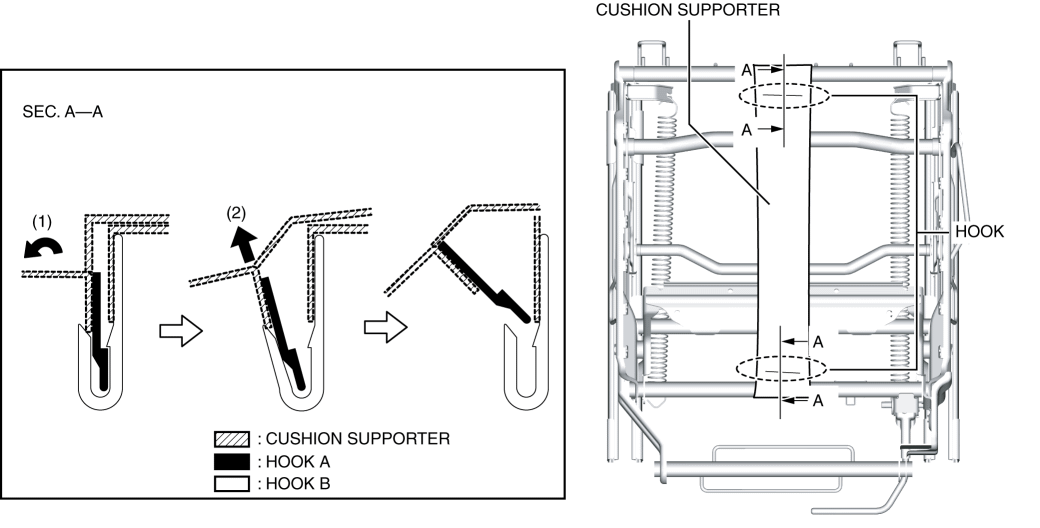
9. Remove the cushion supporter.
10. Install in the reverse order of removal. (See Net Installation Note.)
Net Installation Note
-
Install the net using the following procedure.
1. Insert a precision flathead screwdriver in the position shown in the figure.
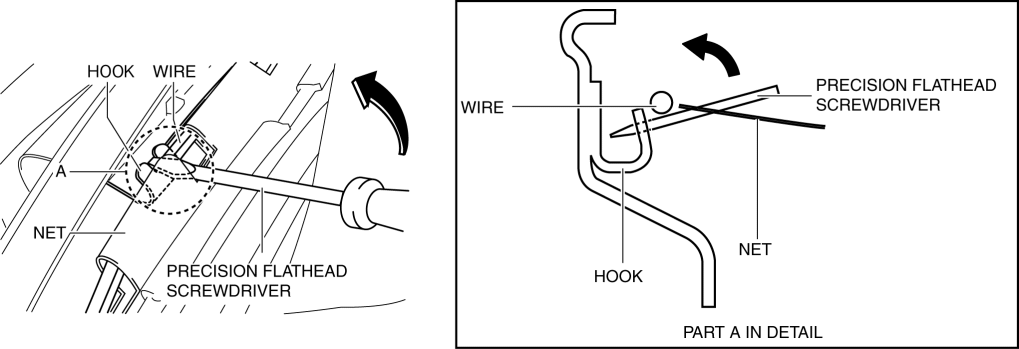
2. Move the precision flathead screwdriver in the direction of the arrow shown in the figure and install the wire onto the hook.