WIPER MOTOR AND LINK REMOVAL/INSTALLATION
2016 – MX-5 – Body and Accessories
WIPER MOTOR AND LINK REMOVAL/INSTALLATION
1. Disconnect the negative battery cable. (See NEGATIVE BATTERY CABLE DISCONNECTION/CONNECTION.)
2. Remove the wiper arm and blade. (See WIPER ARM AND BLADE REMOVAL/INSTALLATION.)
3. Remove the cowl grille. (See COWL GRILLE REMOVAL/INSTALLATION.)
CAUTION:
-
Always apply protective tape to the windshield end. If the wiper motor and link contacts the windshield, it could damage the windshield.
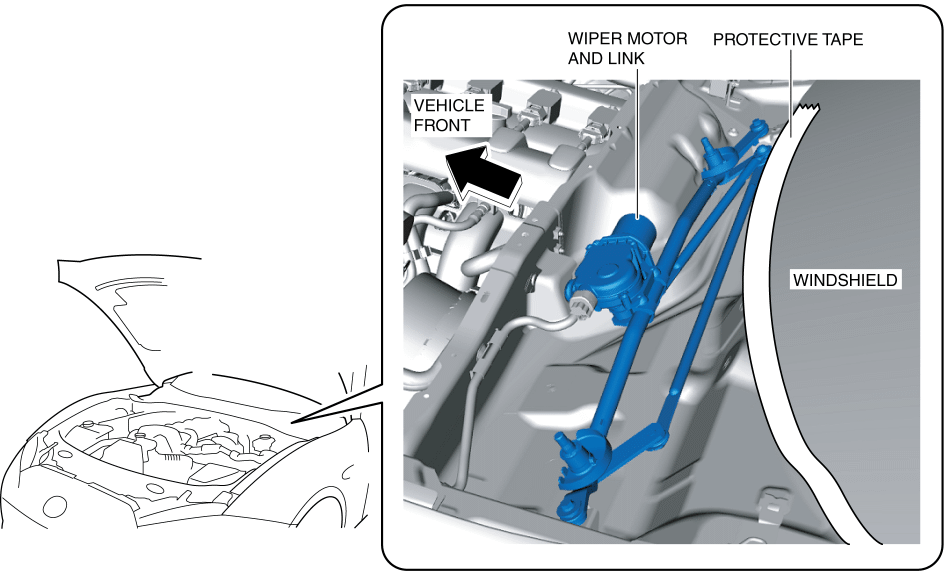
4. Apply protective tape to the area where the windshield end interferes with the wiper motor and link as shown in the figure.
5. Disconnect the connector.
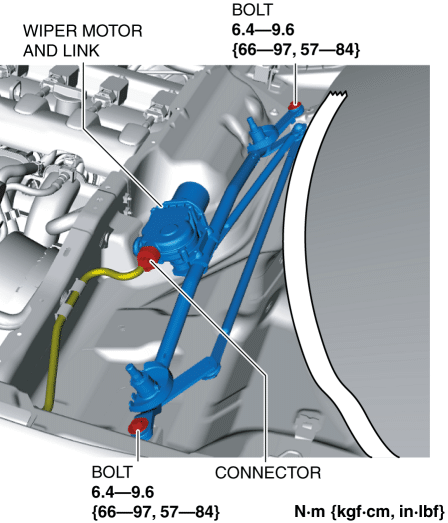
6. Remove the bolts.
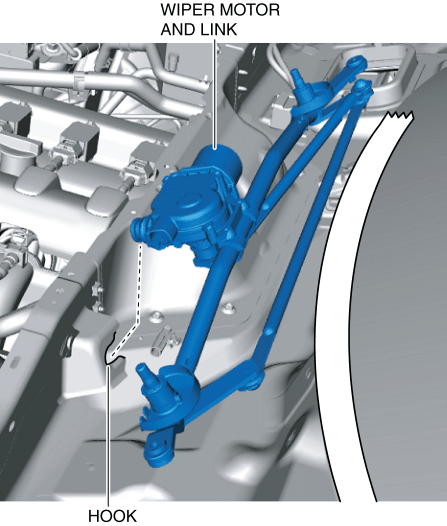
7. Pull out the wiper motor and link from the hook.
8. Remove the wiper motor and link.
9. Insert a tape-wrapped flathead screwdriver into the gap between the wiper motor and the wiper link.
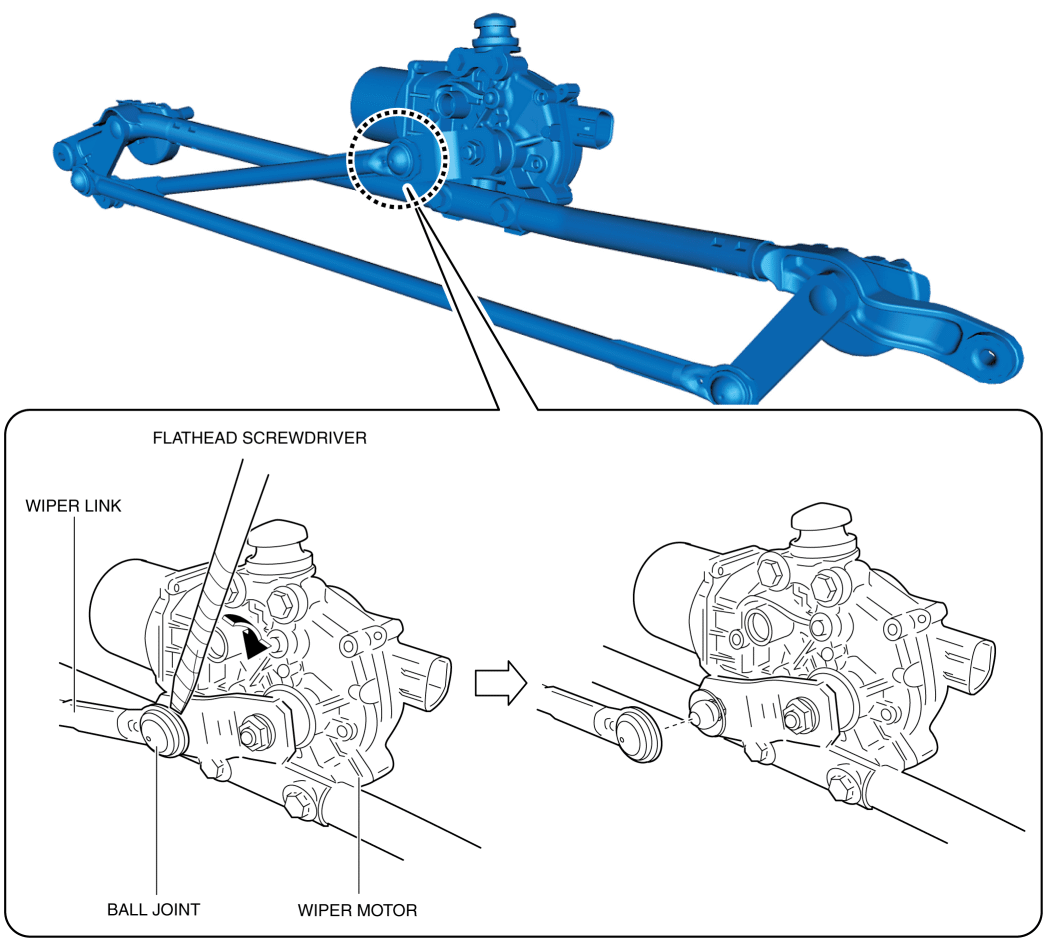
10. Move the flathead screwdriver in the direction of the arrow shown in the figure and detach the wiper motor from the wiper link ball joint. (See Ball Joint Assembly Note.)
11. Remove the bolts.

12. Remove the wiper motor from the wiper link.
13. Install in the reverse order of removal.
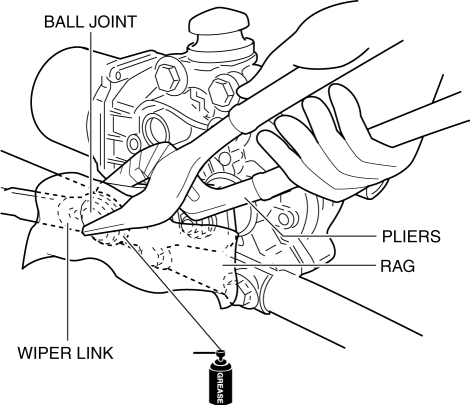
Ball Joint Assembly Note
1. When assembling the ball joint, use a clean rag to protect the link, and squeeze using a pair of protective tape-wrapped pliers.