BACK TRIM REMOVAL/INSTALLATION
2016 – MX-5 – Body and Accessories
BACK TRIM REMOVAL/INSTALLATION
1. Disconnect the negative battery cable. (See NEGATIVE BATTERY CABLE DISCONNECTION/CONNECTION.)
2. Remove the following parts:
a. Selector lever knob (AT) (See AUTOMATIC TRANSMISSION SHIFT MECHANISM REMOVAL/INSTALLATION.)
b. Shift lever knob (MT)
c. Shift panel component (See SHIFT PANEL REMOVAL/INSTALLATION.)
d. Upper panel (See UPPER PANEL REMOVAL/INSTALLATION.)
e. Parking brake lever boot panel (See PARKING BRAKE LEVER BOOT PANEL REMOVAL/INSTALLATION.)
f. Rear console (See REAR CONSOLE REMOVAL/INSTALLATION.)
g. Scuff plate (See SCUFF PLATE REMOVAL/INSTALLATION.)
h. Tire house trim (See TIRE HOUSE TRIM REMOVAL/INSTALLATION.)
i. Front seat back bar garnish (See SEAT BACK BAR GARNISH REMOVAL/INSTALLATION.)
j. Quarter trim (See QUARTER TRIM REMOVAL/INSTALLATION.)
k. Wind blocker (See WIND BLOCKER REMOVAL/INSTALLATION.)
l. Roof hook lever (See ROOF HOOK REMOVAL/INSTALLATION.)
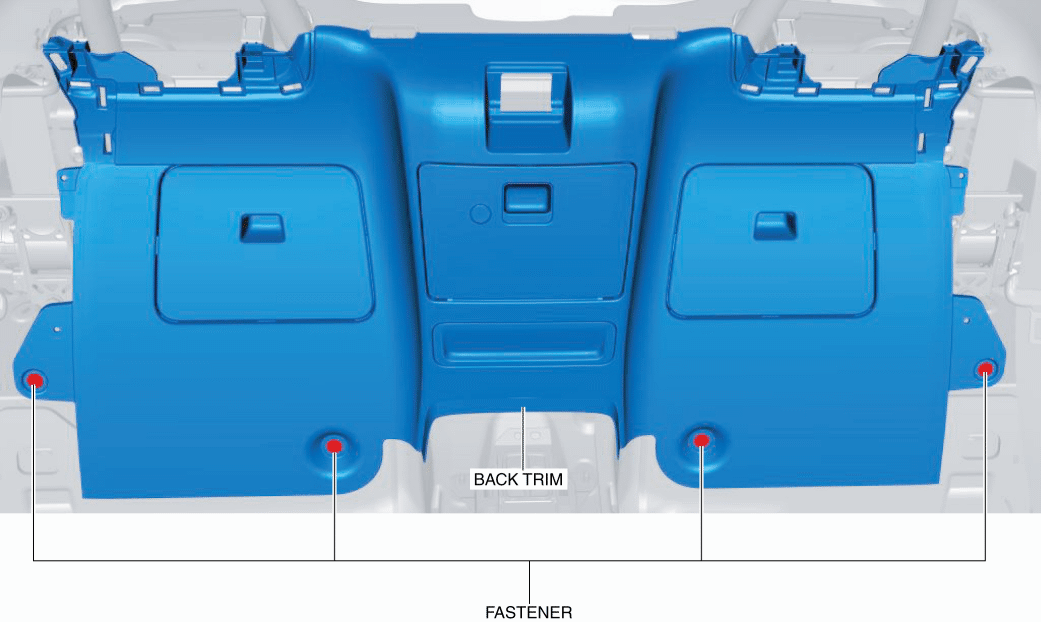
3. Remove the fasteners.
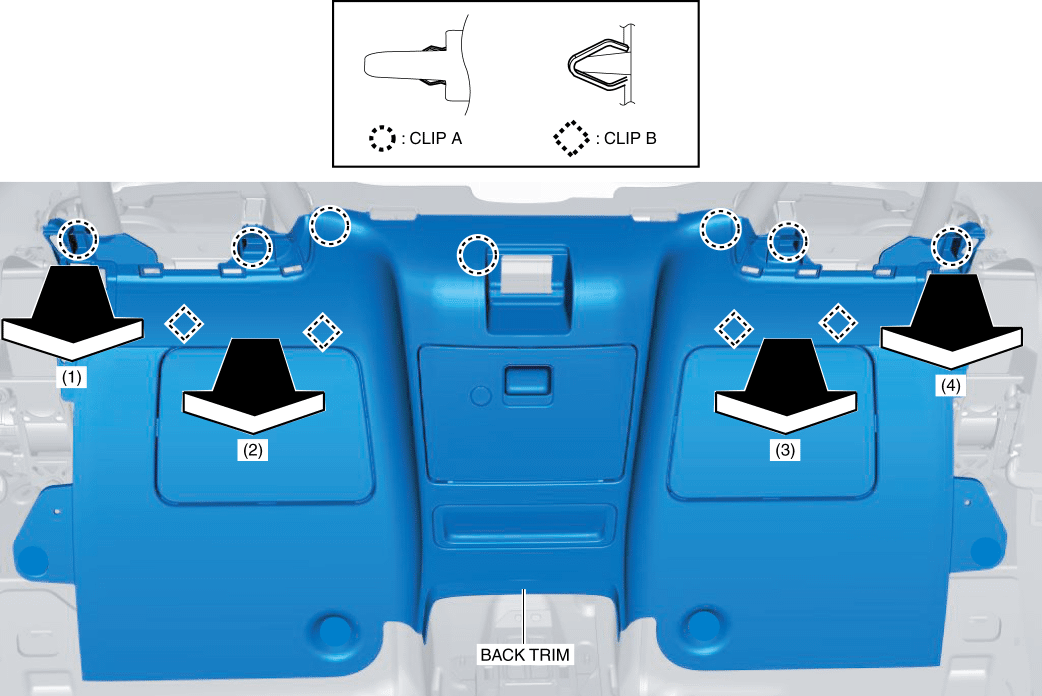
4. Move the back trim in the order of arrows (1), (2), (3) and (4) while detaching clips A and B using the fastener remover and remove the back trim.
5. Install in the reverse order of removal.