WINDSHIELD GARNISH REMOVAL/INSTALLATION
2016 – MX-5 – Body and Accessories
WINDSHIELD GARNISH REMOVAL/INSTALLATION
1. Open the convertible top.
2. Disconnect the negative battery cable. (See NEGATIVE BATTERY CABLE DISCONNECTION/CONNECTION.)
3. Remove the following parts:
a. A-pillar trim (See A-PILLAR TRIM REMOVAL/INSTALLATION.)
b. Female wedge (See FEMALE WEDGE REMOVAL/INSTALLATION.)
c. Front header trim (See FRONT HEADER TRIM REMOVAL/INSTALLATION.)
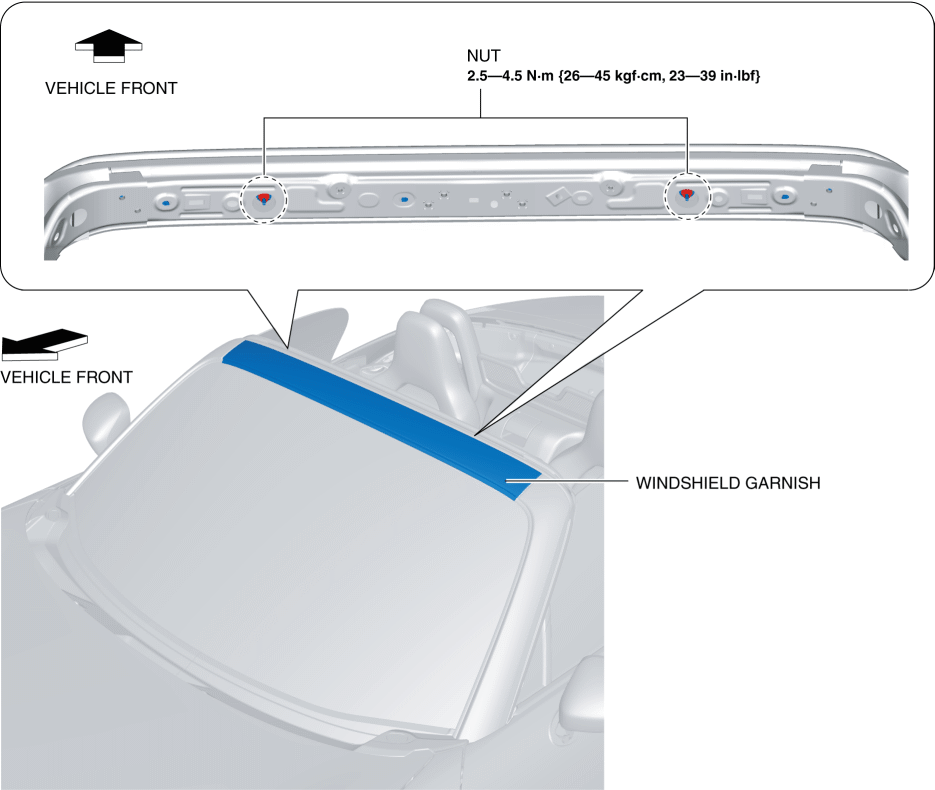
4. Remove the nuts.
CAUTION:
-
If the tape-wrapped flathead screwdriver is inserted too deeply when detaching windshield garnish clips A and clips B, it could damage the windshield. When detaching them, be careful not to scratch the windshield.
5. Insert a tape-wrapped flathead screwdriver into the position shown in the figure, rotate it in the direction of the arrows and detach windshield garnish clips A and clips B.
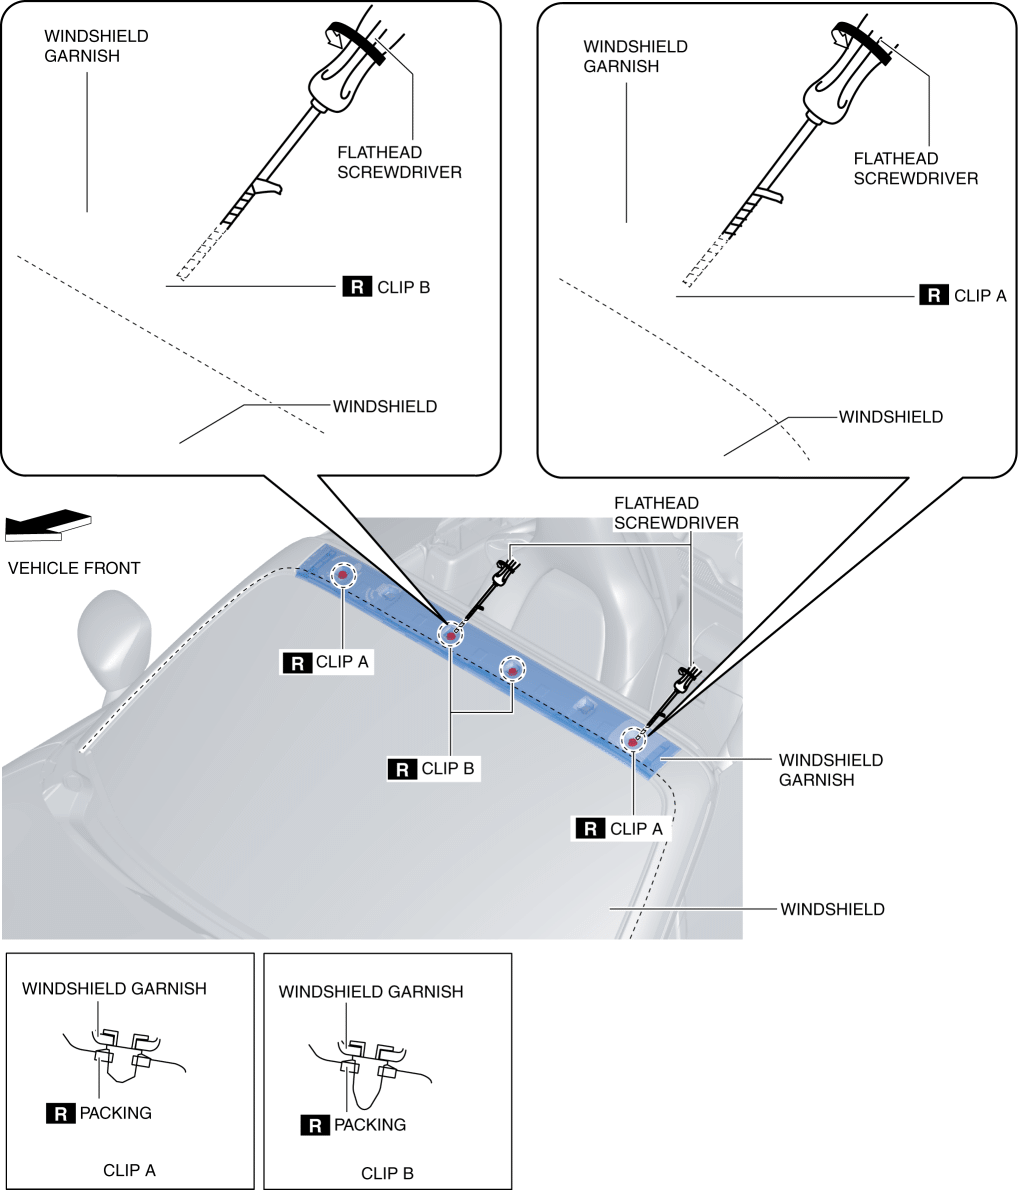
6. Remove the windshield garnish.
7. Install in the reverse order of removal.