TOP LOCK STRIKER REMOVAL/INSTALLATION
< Previous Next >
2016 – MX-5 – Body and Accessories
TOP LOCK STRIKER REMOVAL/INSTALLATION
1. Disconnect the negative battery cable. (See NEGATIVE BATTERY CABLE DISCONNECTION/CONNECTION.)
2. Remove the following parts:
a. A-pillar trim (See A-PILLAR TRIM REMOVAL/INSTALLATION.)
b. Female wedge (See FEMALE WEDGE REMOVAL/INSTALLATION.)
c. Front header trim (See FRONT HEADER TRIM REMOVAL/INSTALLATION.)
3. Disconnect the connector.
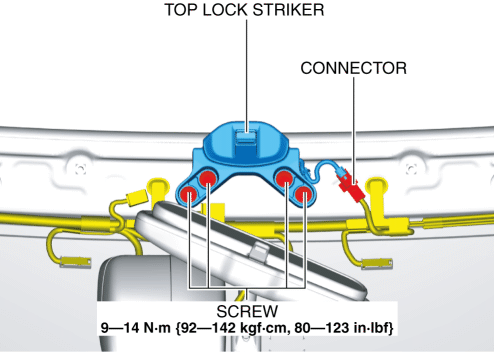
4. Remove the screws.
5. Remove the top lock striker.
6. Install in the reverse order of removal.
-
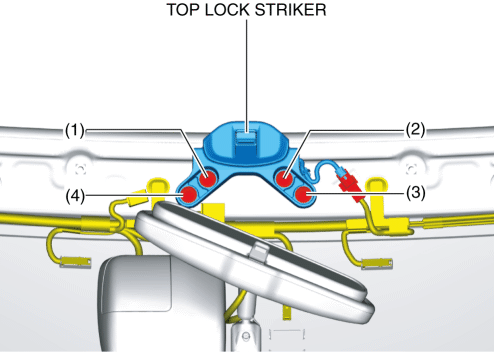
When installing the top lock striker installation screws, tighten the screws in the order shown in the figure.
© 2014 Mazda North American Operations, U.S.A.