TOP FABRIC REPAIR
2016 – MX-5 – Body and Accessories
TOP FABRIC REPAIR
NOTE:
-
Prepare the following before starting the procedure.
-
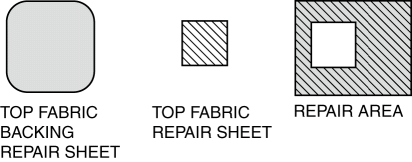
Top fabric repair sheet
-
Top fabric backing repair sheet (top fabric repair sheet)
-
Adhesive agent (Loctite410 or equivalent)
-
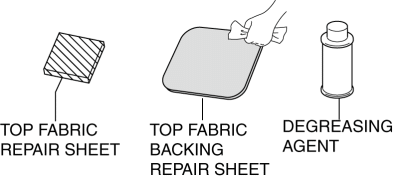
Degreasing agent
-
Utility knife
-
Scissors
-
Flat board
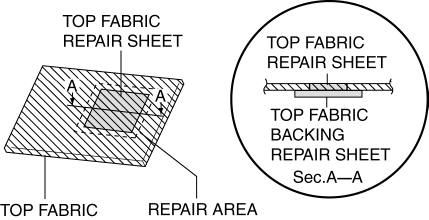
Hole repair
1. Align the grain of the top fabric repair sheet with the area being repaired from the outside of the vehicle and overlay it.
2. Place a flat board underneath the repair area from the inside of the vehicle.
3. Set the ruler on the repair area and cut out the top fabric repair sheet and the top fabric simultaneously using a utility knife.
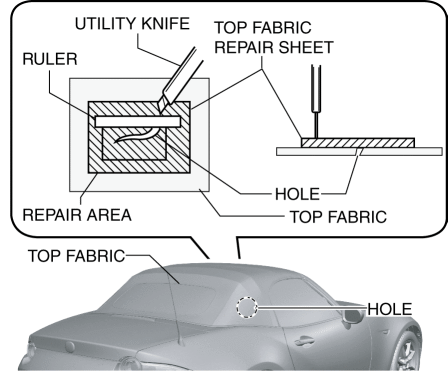
4. Using scissors, remove fraying on the top fabric repair sheet and the repair area where the damaged area was cut out.
5. Cut the top fabric backing repair sheet so that it is larger than the cut area, and then round out the edges.
6. Completely remove any moisture, grease, and dirt from the top and back of the top fabric repair sheet and the top of the top fabric backing repair sheet.
7. Apply adhesive agent to the back of the top fabric repair sheet and the repair area, and the top of the top fabric backing repair sheet.
NOTE:
-
Apply adhesive agent twice to the back of the repair area and top fabric repair sheet because adhesive agent is easily absorbed by the fabric.
-
Follow the instructions for the product being used to determine the adhesive drying time.
CAUTION:
-
When applying the top fabric backing repair sheet, be careful not to apply it to the tension fabric and inner fabric (vehicle with inner fabric).
8. Affix the top fabric backing repair sheet to the repair area.
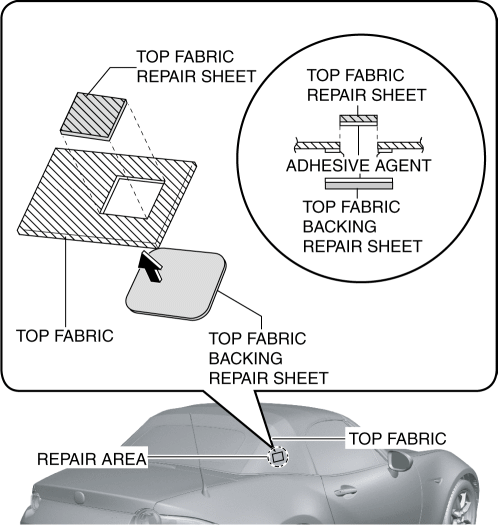
9. Affix the top fabric repair sheet to the repair area.
NOTE:
-
Firmly press the top fabric repair sheet and the top fabric backing repair sheet together.
-
Leave the repair until the adhesive agent dries.
-
Follow the instructions for the product being used to determine the adhesive drying time.
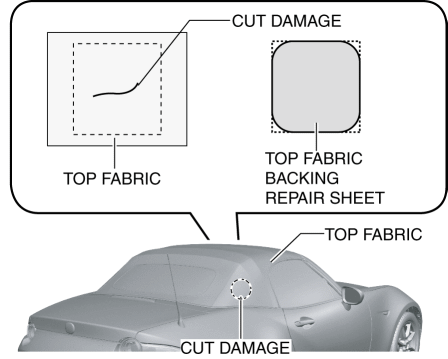
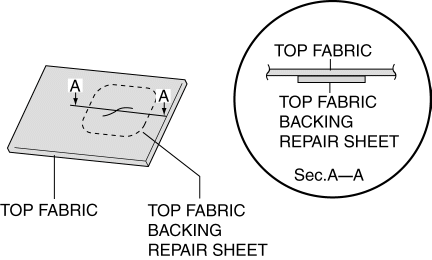
Repair for cut damage
1. Cut the top fabric backing repair sheet so that it is larger than the cut damage, and then round out the edges.
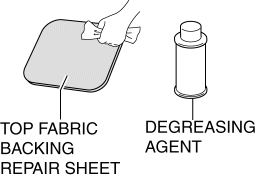
2. Using degreasing agent, degrease the back of the cut damage repair area and the top of the top fabric backing repair sheet.
3. Apply the adhesive agent evenly to the back of the cut damage repair area and the top of the top fabric backing repair sheet.
NOTE:
-
Apply adhesive agent twice to the back of the repair area and top fabric cut damage area because adhesive agent is easily absorbed by the fabric.
-
Follow the instructions for the product being used to determine the adhesive drying time.
CAUTION:
-
When applying the top fabric backing repair sheet, be careful not to apply it to the tension fabric and inner fabric (vehicle with inner fabric).
4. Affix the top fabric backing repair sheet to the repair area.
NOTE:
-
Press the top fabric and the top fabric backing repair sheet together by holding them between your hands.
-
Leave the repair until the adhesive agent dries.
-
Follow the instructions for the product being used to determine the adhesive drying time.