REMOTE TRANSMITTER DISASSEMBLY/ASSEMBLY
2016 – MX-5 – Body and Accessories
REMOTE TRANSMITTER DISASSEMBLY/ASSEMBLY
Disassembly
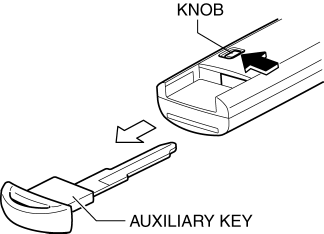
1. Press the knob on the remote transmitter and pull the auxiliary key out.
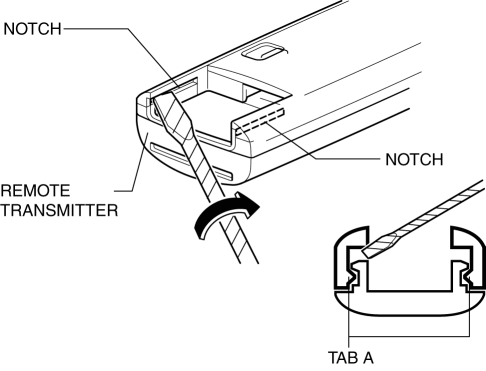
2. Insert a tape-wrapped flathead screwdriver into the notch on the remote transmitter and turn it in the direction of the arrow shown in the figure to detach tabs A from the remote transmitter.
3. Insert a tape-wrapped flathead screwdriver between the remote transmitter and the cover and slide it in the direction of arrow (1) shown in the figure.
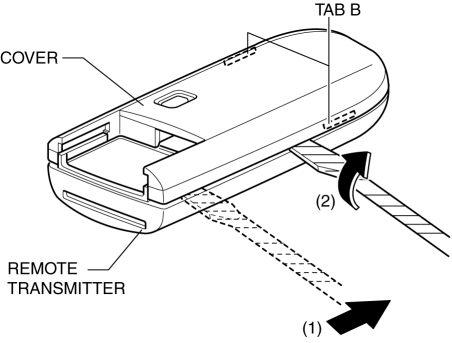
4. Turn the screwdriver in the direction of arrow (2) shown in the figure to detach tabs B of the cover from the remote transmitter.
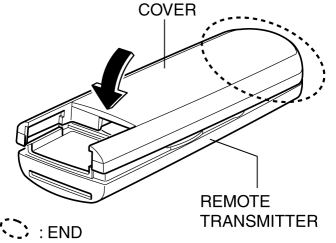
5. Remove the cover.
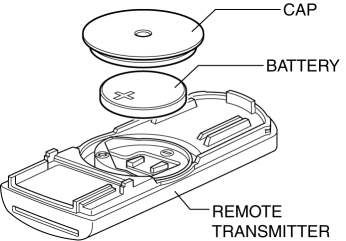
6. Remove the cap and the battery from the remote transmitter.
Assembly
1. Verify that the O-ring is installed to the remote transmitter.
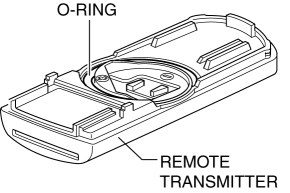
NOTE:
-
If the O-ring is removed, install it before installing the battery.
2. Install a new battery (CR2025) in the direction of the arrow shown in the figure with the negative pole facing down.
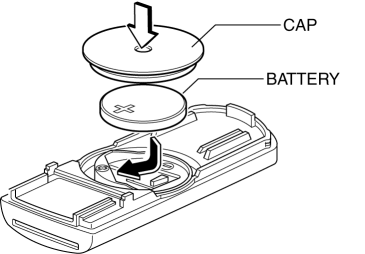
3. Install the cap.
4. Align the cover to the transmitter from its end and press it in the direction of the arrow shown in the figure to engage the tabs of the cover with the remote transmitter.
5. Insert the auxiliary key.
