HOOD REMOVAL/INSTALLATION
2016 – MX-5 – Body and Accessories
HOOD REMOVAL/INSTALLATION
WARNING:
-
If the hood installation bolts are removed without supporting the hood, the hood may fall off or close suddenly and cause injury. Always remove the hood with at least another person.
1. Disconnect the negative battery cable. (See NEGATIVE BATTERY CABLE DISCONNECTION/CONNECTION.)
CAUTION:
-
If a different type of metal such as iron contacts the aluminum panel (aluminum), it could corrode the aluminum. Use exclusive surface finished bolts for the aluminum panel installation.
2. Remove the bolts.
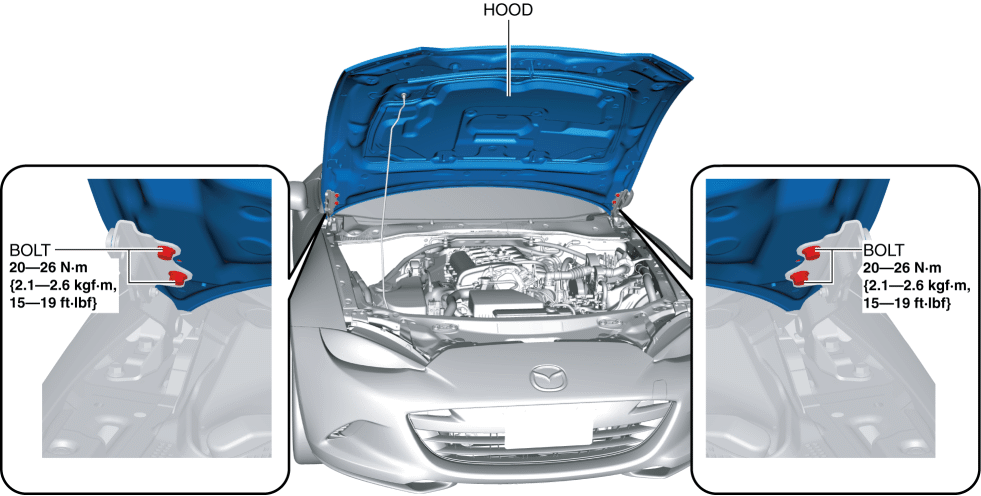
3. Remove the hood.
4. Remove the wiper arm and blade. (See WIPER ARM AND BLADE REMOVAL/INSTALLATION.)
5. Disconnect washer hose B from joint pipe A. (See WASHER HOSE REMOVAL/INSTALLATION.)
6. Remove the following parts:
a. Front bumper (See FRONT BUMPER REMOVAL.) (See FRONT BUMPER INSTALLATION.)
b. Front bumper slider (See FRONT BUMPER SLIDER REMOVAL/INSTALLATION.)
c. Front combination light (See FRONT COMBINATION LIGHT REMOVAL/INSTALLATION.)
d. Cowl grille (See COWL GRILLE REMOVAL/INSTALLATION.)
e. Side step molding (See SIDE STEP MOLDING REMOVAL.) (See SIDE STEP MOLDING INSTALLATION.)
f. Door (See DOOR REMOVAL/INSTALLATION.)
g. Front fender insulator (See FRONT FENDER INSULATOR REMOVAL/INSTALLATION.)
h. Front fender panel (See FRONT FENDER PANEL REMOVAL/INSTALLATION.)
7. Remove the bolts.
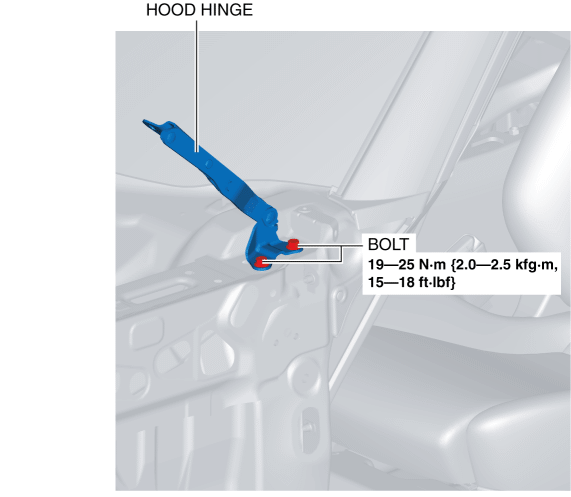
8. Remove the hood hinge.
9. Install in the reverse order of removal.
10. Adjust the hood. (See HOOD ADJUSTMENT.)