MAGNETIC CLUTCH ADJUSTMENT
2016 – MX-5 – HVAC
MAGNETIC CLUTCH ADJUSTMENT
WARNING:
-
If magnetic clutch adjustment is performed, do not start the engine. Otherwise, the drive belt could get caught and cause an accident.
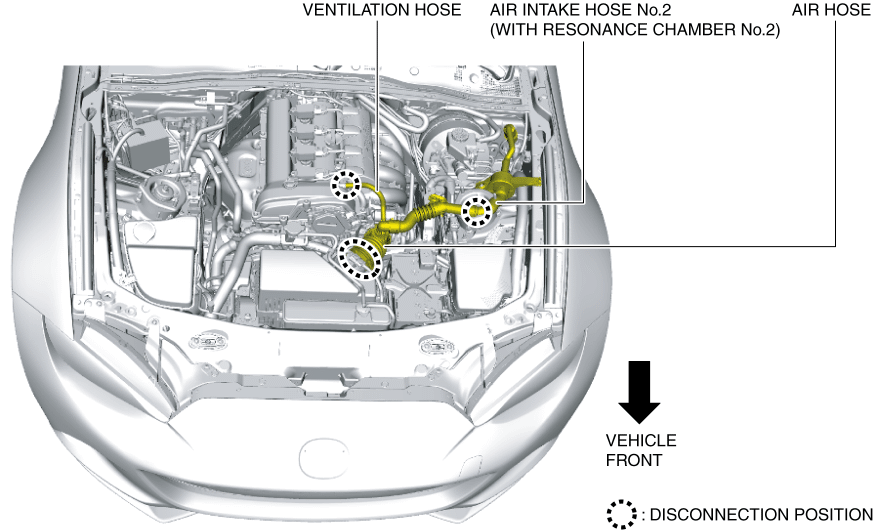
1. Disconnect the air hose, ventilation hose, and air intake hose No.2 (with resonance chamber No.2) at the positions shown in the figure, and remove them as a single unit. (See INTAKE-AIR SYSTEM REMOVAL/INSTALLATION [SKYACTIV-G 2.0].)
2. Measure the clearance around the entire circumference between the pressure plate and A/C compressor pulley using a thickness gauge.
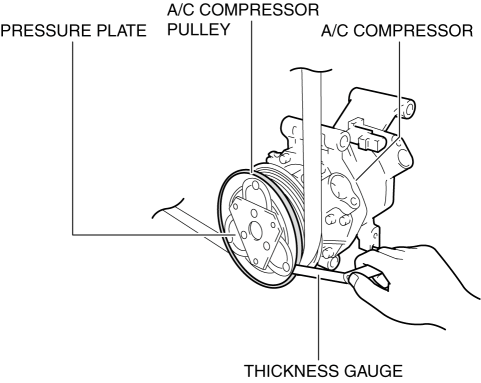
3. Verify that the clearance is within the specification.
-
If the clearance is not within the specification, perform the following procedure and adjust the clearance.
-
Display the PCM simulation items using the M-MDS. (See ON-BOARD DIAGNOSTIC TEST [PCM (SKYACTIV-G 2.0)].)
-
Turn the A/C relay on using the PCM simulation item ACCS.
-
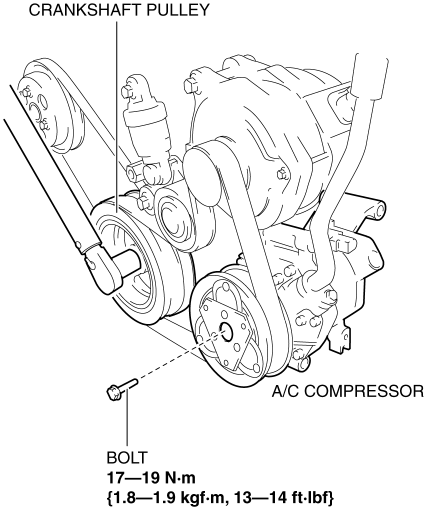
Lock the crankshaft pulley.
NOTE:
-
If the crankshaft pulley rotates with the magnetic clutch engaged, the magnetic clutch will be released. If the bolt is rotated, secure the crankshaft pulley so that it does not rotate.
-
-
Remove the bolt.
NOTE:
-
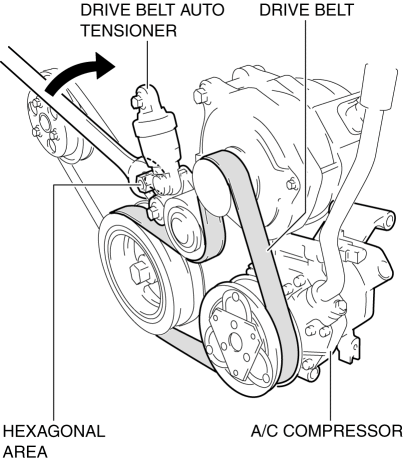
If the friction between the drive belt and A/C compressor pulley is small and the pulley slides when removing the bolt, insert a wrench into the hexagonal area of the drive belt auto tensioner and slowly rotate it in the direction of the arrow shown in the figure to increase the tension of the drive belt.
-
-
Turn the A/C relay off using the PCM simulation item ACCS.
-
Adjust the clearance by changing the type or number of the shim kit.

-
Magnetic clutch clearance
-
0.3—0.6 mm {0.012—0.023 in}