OIL SEAL (EXTENSION HOUSING) REPLACEMENT [SJ6A-EL]
2016 – MX-5 – Transmission/Transaxle
OIL SEAL (EXTENSION HOUSING) REPLACEMENT [SJ6A-EL]
1. Clean the transmission exterior thoroughly with a steam cleaner or cleaning solvent.
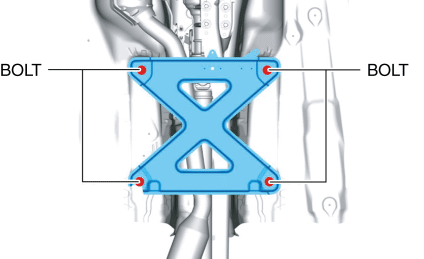
2. Remove the tunnel member.
3. Disconnect the HO2S harness bracket from the TWC. (See HEATED OXYGEN SENSOR (HO2S) REMOVAL/INSTALLATION [SKYACTIV-G 2.0].)
4. Disconnect the TWC from the exhaust manifold (WU-TWC). (See EXHAUST SYSTEM REMOVAL/INSTALLATION [SKYACTIV-G 2.0].)
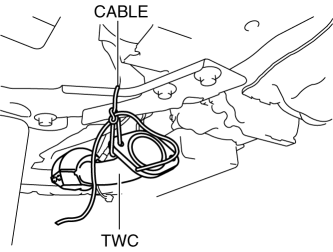
5. Suspend the TWC using a cable as shown in the figure.
6. Remove the propeller shaft. (See PROPELLER SHAFT REMOVAL/INSTALLATION.)
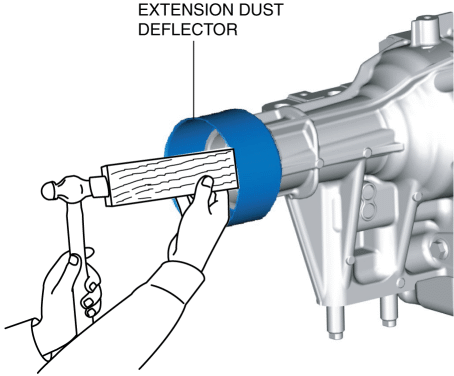
7. Using a plastic hammer and slab of wood, tap the extension dust deflector to remove it.
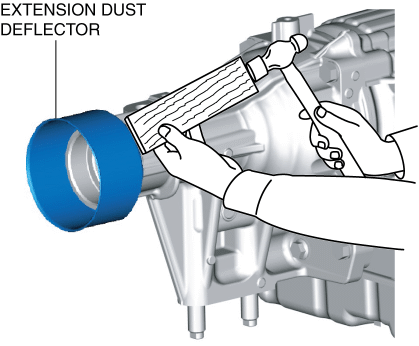
CAUTION:
-
Do not to damage the extension dust deflector.
-
Do not to damage the extension housing.
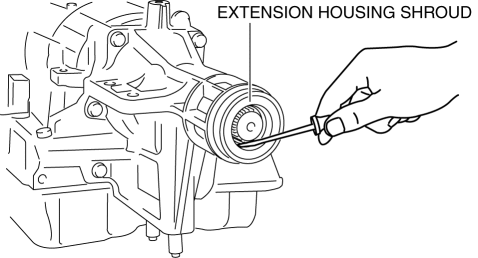
8. Using a tape-wrapped flathead screwdriver, remove the extension housing shroud.
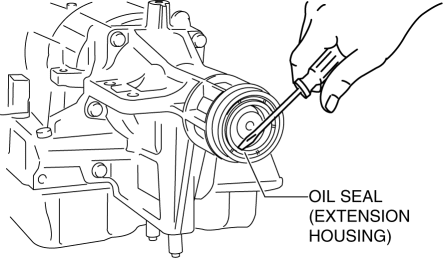
9. Using a tape-wrapped flathead screwdriver, remove the oil seal (extension housing).
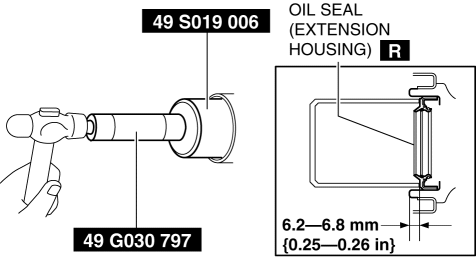
10. Using the SST and a hammer, install the new oil seal to the extension housing.
11. Coat the oil seal lip with grease.
12. Using the SST and a hammer, install the new extension housing shroud to the extension housing.

13. Using a plastic hammer and slab of wood, install the extension dust deflector to the extension housing.
14. Install the propeller shaft. (See PROPELLER SHAFT REMOVAL/INSTALLATION.)
15. Install the TWC to the exhaust manifold (WU-TWC). (See EXHAUST SYSTEM REMOVAL/INSTALLATION [SKYACTIV-G 2.0].)
16. Install the tunnel member.
17. Adjust the ATF level. (See AUTOMATIC TRANSMISSION FLUID (ATF) LEVEL ADJUSTMENT [SJ6A-EL].)