FRONT CROSSMEMBER REMOVAL/INSTALLATION
2016 – MX-5 – Suspension
FRONT CROSSMEMBER REMOVAL/INSTALLATION
CAUTION:
-
Performing the following procedures could cause an open circuit in the front ABS wheel-speed sensor wiring harness if it is pulled by mistake. Before servicing, disconnect the front ABS wheel-speed sensor and set it aside so that the wiring harness will not be pulled by mistake.
-
If the steering wheel rotates after the steering shaft and the steering gear are disconnected, the internal parts of the clock spring could be damaged. Secure the steering wheel using tape or a cable to prevent the steering shaft from rotating after disconnecting the steering shaft.
-
If the steering gear is dropped it could result in internal damage to the EPS CM, therefore be careful not to drop it. If the steering gear receives an impact, replace the EPS CM.
1. Disconnect the negative battery cable. (See NEGATIVE BATTERY CABLE DISCONNECTION/CONNECTION.)
2. Remove front mudguard No.1 and the front deflector as a single unit. (See FRONT MUDGUARD REMOVAL/INSTALLATION.)
3. Remove the following parts:
a. Front under cover (See FRONT UNDER COVER REMOVAL/INSTALLATION.)
b. Front crossmember under cover (See FRONT CROSSMEMBER UNDER COVER REMOVAL/INSTALLATION.)
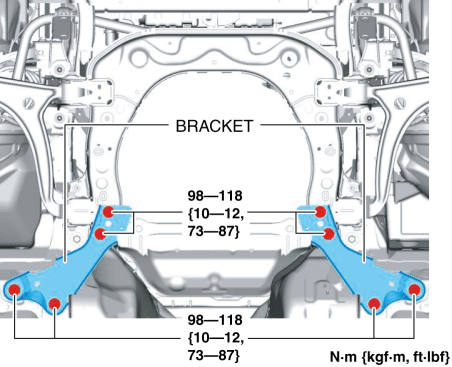
4. Remove the brackets.
5. Remove the front ABS wheel-speed sensor from the wheel hub component.
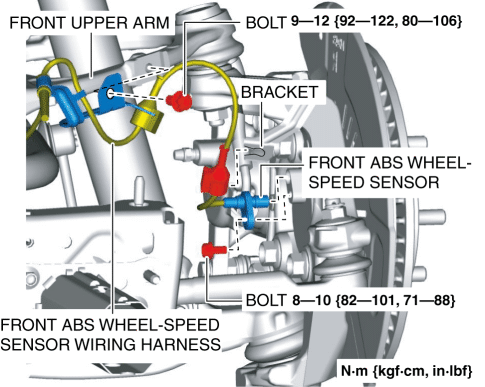
6. Remove the front ABS wheel-speed sensor wiring harness from the bracket and front upper arm and set it aside so that it does not interfere with the servicing.
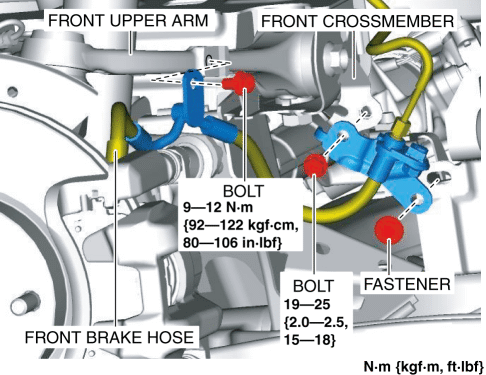
7. Remove the front brake hose from the front upper arm and front crossmember and set it aside so that it does not interfere with the servicing.
8. Remove the front brake caliper component and suspend it in a place out of the way using a cable. (See FRONT BRAKE (DISC) REMOVAL/INSTALLATION [WITH SINGLE PISTON CALIPER].) (See FRONT BRAKE (DISC) REMOVAL/INSTALLATION [WITH 4-POT OPPOSED PISTON CALIPER].)

9. Remove the front disc plate. (See FRONT BRAKE (DISC) REMOVAL/INSTALLATION [WITH SINGLE PISTON CALIPER].) (See FRONT BRAKE (DISC) REMOVAL/INSTALLATION [WITH 4-POT OPPOSED PISTON CALIPER].)
10. Disconnect the following parts and remove the steering knuckle, wheel hub component and dust cover as a single unit. (See WHEEL HUB, STEERING KNUCKLE REMOVAL/INSTALLATION.)
a. Tie-rod end (See TIE-ROD END REPLACEMENT.)
b. Front lower arm ball joint (See FRONT LOWER ARM REMOVAL/INSTALLATION.)
c. Front upper arm ball joint (See FRONT UPPER ARM REMOVAL/INSTALLATION.)
11. Disconnect the front stabilizer control link from the front lower arm. (See FRONT STABILIZER REMOVAL/INSTALLATION.)
12. Disconnect the front shock absorber from the front lower arm. (See FRONT SHOCK ABSORBER AND COIL SPRING REMOVAL/INSTALLATION.)
13. Remove the front splash shield No.2. (See FRONT SPLASH SHIELD No.2 REMOVAL/INSTALLATION.)
14. Remove the front stabilizer bracket installation nuts. (See FRONT STABILIZER REMOVAL/INSTALLATION.)
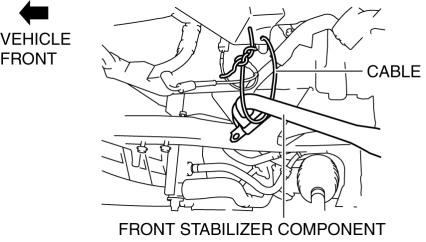
15. Suspend the front stabilizer component on the body side using a cable as shown in the figure.
CAUTION:
-
With the front stabilizer component suspended and secured, the front crossmember may come in contact with it during front crossmember removal/installation which may lead to part damage. When suspending the front stabilizer component, suspend it to allow some play so that it can be moved.
16. Disconnect the intermediate shaft from the steering gear and linkage. (See INTERMEDIATE SHAFT REMOVAL/INSTALLATION.)
17. Remove the steering gear and linkage. (See STEERING GEAR AND LINKAGE REMOVAL/INSTALLATION.)
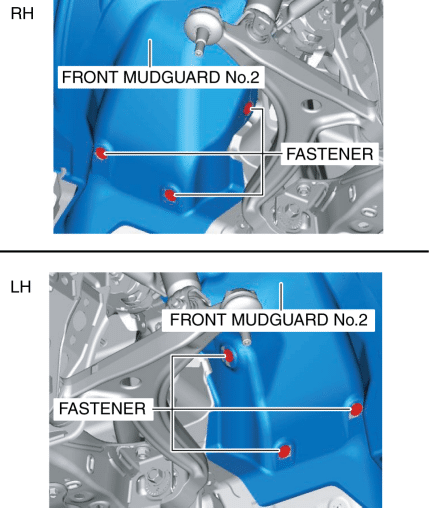
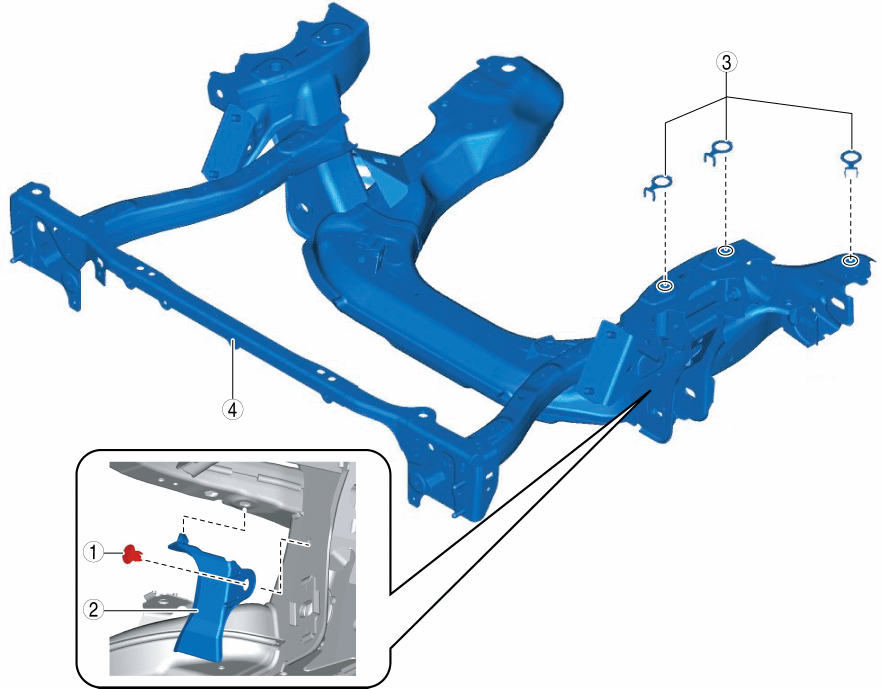
18. Remove the fasteners shown in the figure and partially peel back front mudguard No.2.
19. Remove the front splash shield No.1. (See FRONT SPLASH SHIELD No.1 REMOVAL/INSTALLATION.)
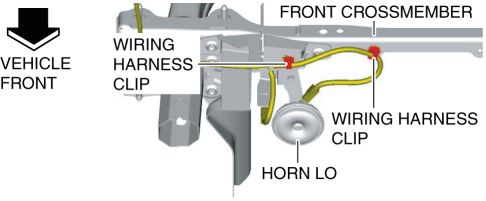
20. Detach the wiring harness clips shown in the figure.
21. Remove the seal plate. (See SEAL PLATE REMOVAL/INSTALLATION.)
22. Remove the horn LO. (See HORN REMOVAL/INSTALLATION.)
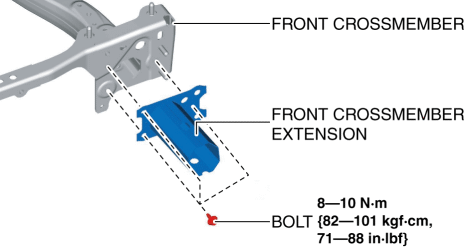
23. Remove the front crossmember extension.
24. Remove the oil pipe No.3 bracket from the front crossmember. (AT vehicles) (See OIL COOLER REMOVAL/INSTALLATION [SJ6A-EL].)
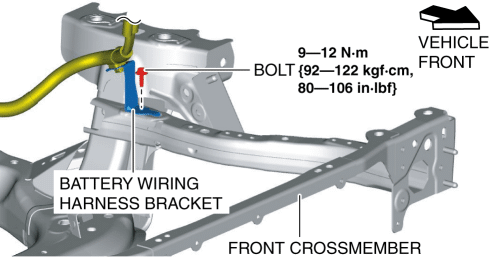
25. Remove the battery wiring harness bracket. (MT vehicles)
26. Remove the coolant reserve tank. (See COOLANT RESERVE TANK REMOVAL/INSTALLATION [SKYACTIV-G 2.0].)
27. Remove the upper mount rubber bracket (LH). (See RADIATOR REMOVAL/INSTALLATION [SKYACTIV-G 2.0].)
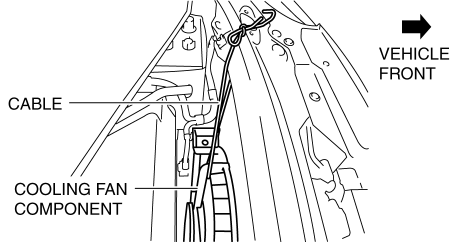
28. Suspend the cooling fan component through the upper mount rubber bracket (LH) hole using a cable as shown in the figure.
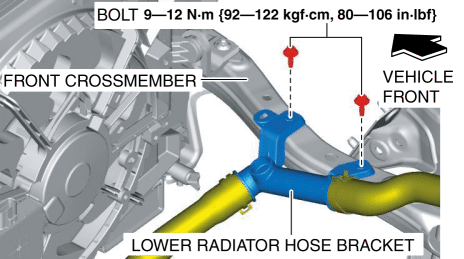
29. Remove the lower radiator hose brackets from the front crossmember.
30. Remove the lower mount rubber bracket. (See RADIATOR REMOVAL/INSTALLATION [SKYACTIV-G 2.0].)
31. Remove the center mount rubber bracket. (See RADIATOR REMOVAL/INSTALLATION [SKYACTIV-G 2.0].)
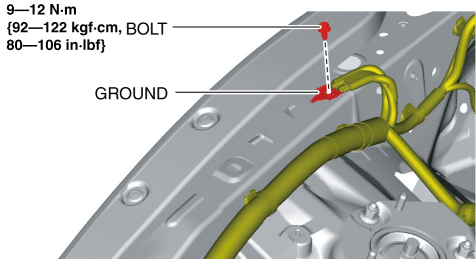
32. Remove the ground.
33. Suspend the engine using the SST. (See ENGINE REMOVAL/INSTALLATION [SKYACTIV-G 2.0].)
34. Disconnect the engine mount rubber from the front crossmember. (See ENGINE MOUNT DISASSEMBLY/ASSEMBLY [SKYACTIV-G 2.0].)
35. Remove the front upper arm from the front crossmember. (See FRONT UPPER ARM REMOVAL/INSTALLATION.)
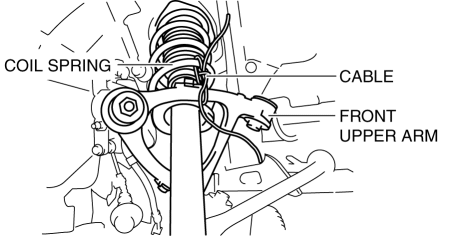
36. Suspend the front upper arm to the coil spring using a cable as shown in the figure.
37. Support the front crossmember using a jack.
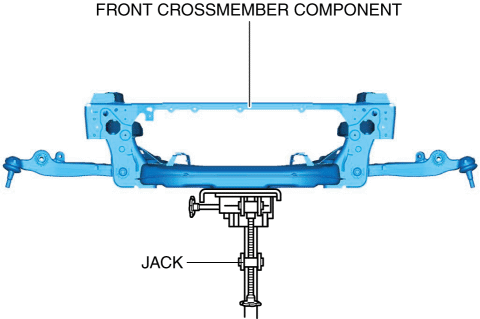
WARNING:
-
If the front crossmember falls off during front crossmember removal/installation, it may cause serious injury or death, or vehicle damage. When removing/installing the front crossmember, use a jack and verify that the crossmember is securely supported.
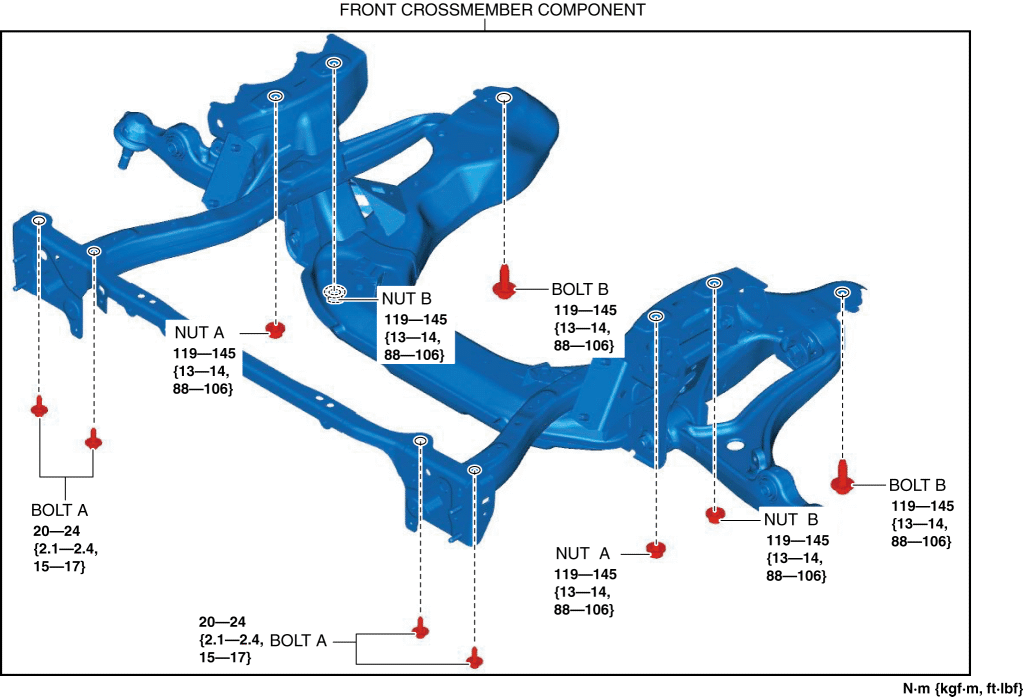
38. Remove in the order of bolts A, B, nuts A, and B.
39. Lower the jack slowly and remove the front crossmember component.
40. Remove the front lower arm from the front crossmember. (See FRONT LOWER ARM REMOVAL/INSTALLATION.)
41. Remove in the order indicated in the table.
42. Install in the reverse order of removal.
43. Inspect the front wheel alignment and adjust it if necessary. (See FRONT WHEEL ALIGNMENT.)
|
1 |
Fastener |
|
2 |
Plate |
|
3 |
Washer |
|
4 |
Front crossmember |